I haven’t been keeping up with posting, as these past few months have been atypical. April was devoted to attending conferences and giving presentations. Much of this was prompted by my recent work with the Data Rescue Project, and the HIFLD Open rescue initiative in particular. The month began with a panel at Brown’s Data Science Institute, where the topic was Trust in Data. A few days later, I joined local colleagues at the Northeast Higher Ed GIS Facilitators Meet Up in Worcester, MA. I was honored to serve as the keynote speaker for the annual Big 10 GIS Conference (held virtually), where I presented on preserving federal datasets and the HIFLD Open rescue initiative. Shortly thereafter, I traveled to the Census Bureau’s headquarters just outside of DC for FedGeoDay 2026 and served on a panel of non-federal data providers who are contributing to the national data ecosystems. I came back to Providence just in time to give a poster presentation on our GIS and Data Services at the CHAIRS-C conference (Center on Heat, Health, and Aging Innovation and Research Solutions for Communities at the Brown University School of Public Health).
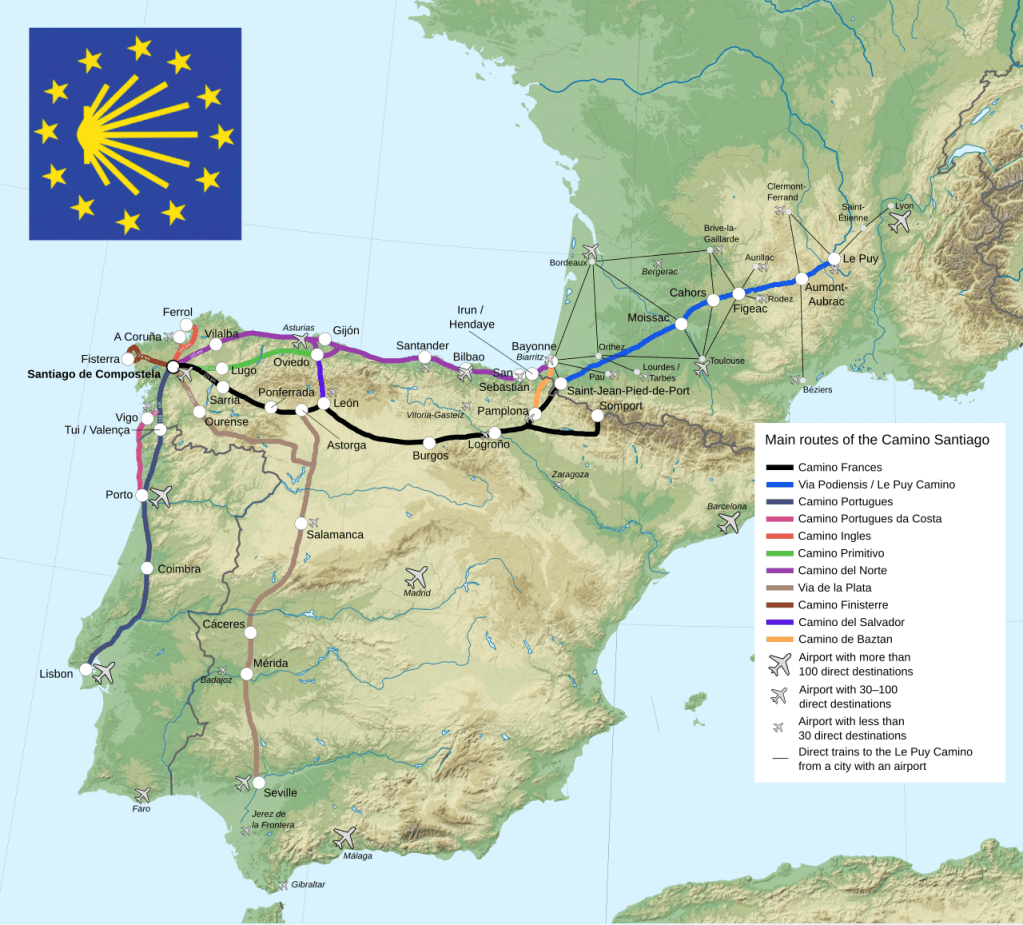
Then in May, I went off the grid. My wife and I traveled to Northwestern Spain to walk the Camino de Santiago, or Way of St. James. Established in the Middle Ages, the Camino is a series of routes that drew Christian pilgrims from throughout Europe to the Cathedral in Santiago de Compestella, which is believed to be the resting place of the apostle St James, brother of St John. We walked the Camino Primitivo, which is the “original” route established by King Alfonso II circa 814 AD. It’s also considered to be the most challenging of the routes, as it climbs through mountains and forests before descending into farmland. It’s not considered a “wilderness” hike however, as all of the routes follow a mix of unpaved and paved roads between towns and villages. A map of the primary routes (from Wikipedia) is below. The French Way is considered the primary route and is the most heavily traveled. The Portuguese and Northern Ways are also popular, followed by the Primitivo.
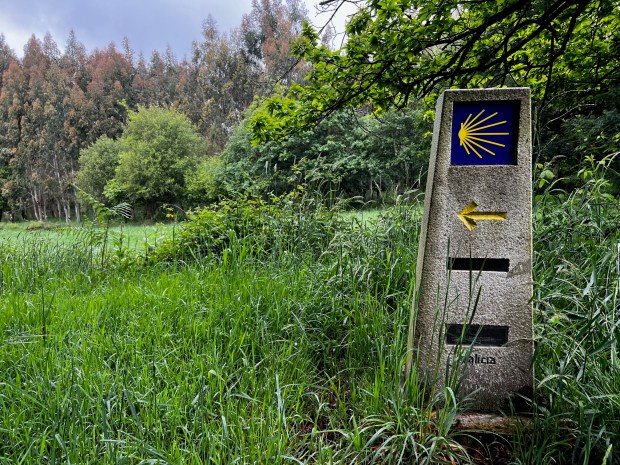
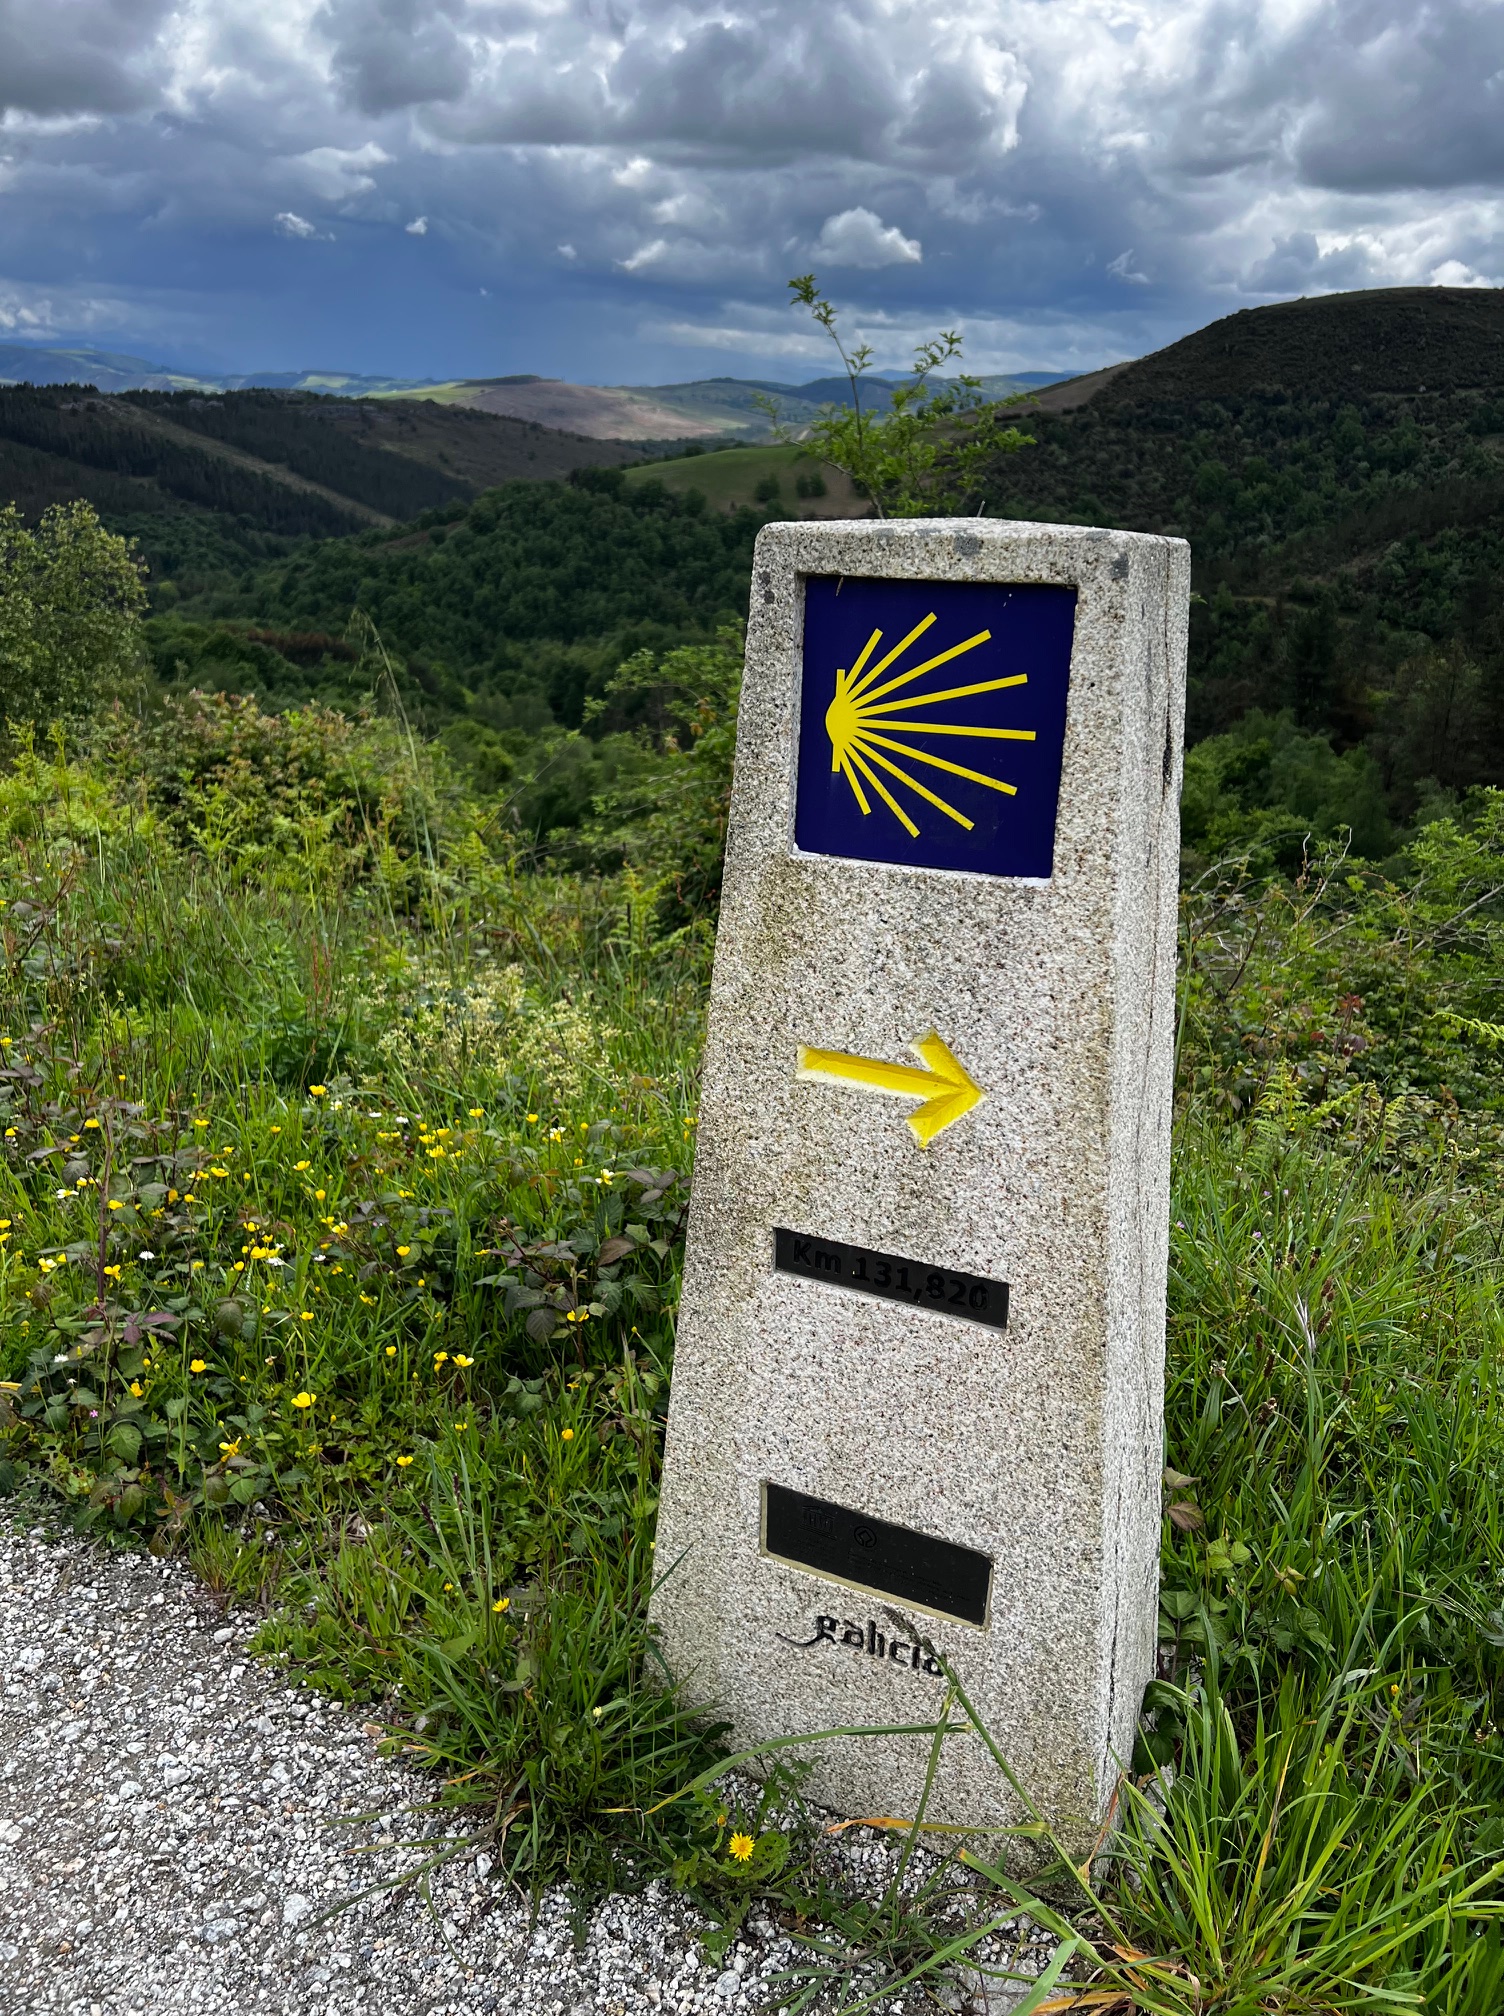
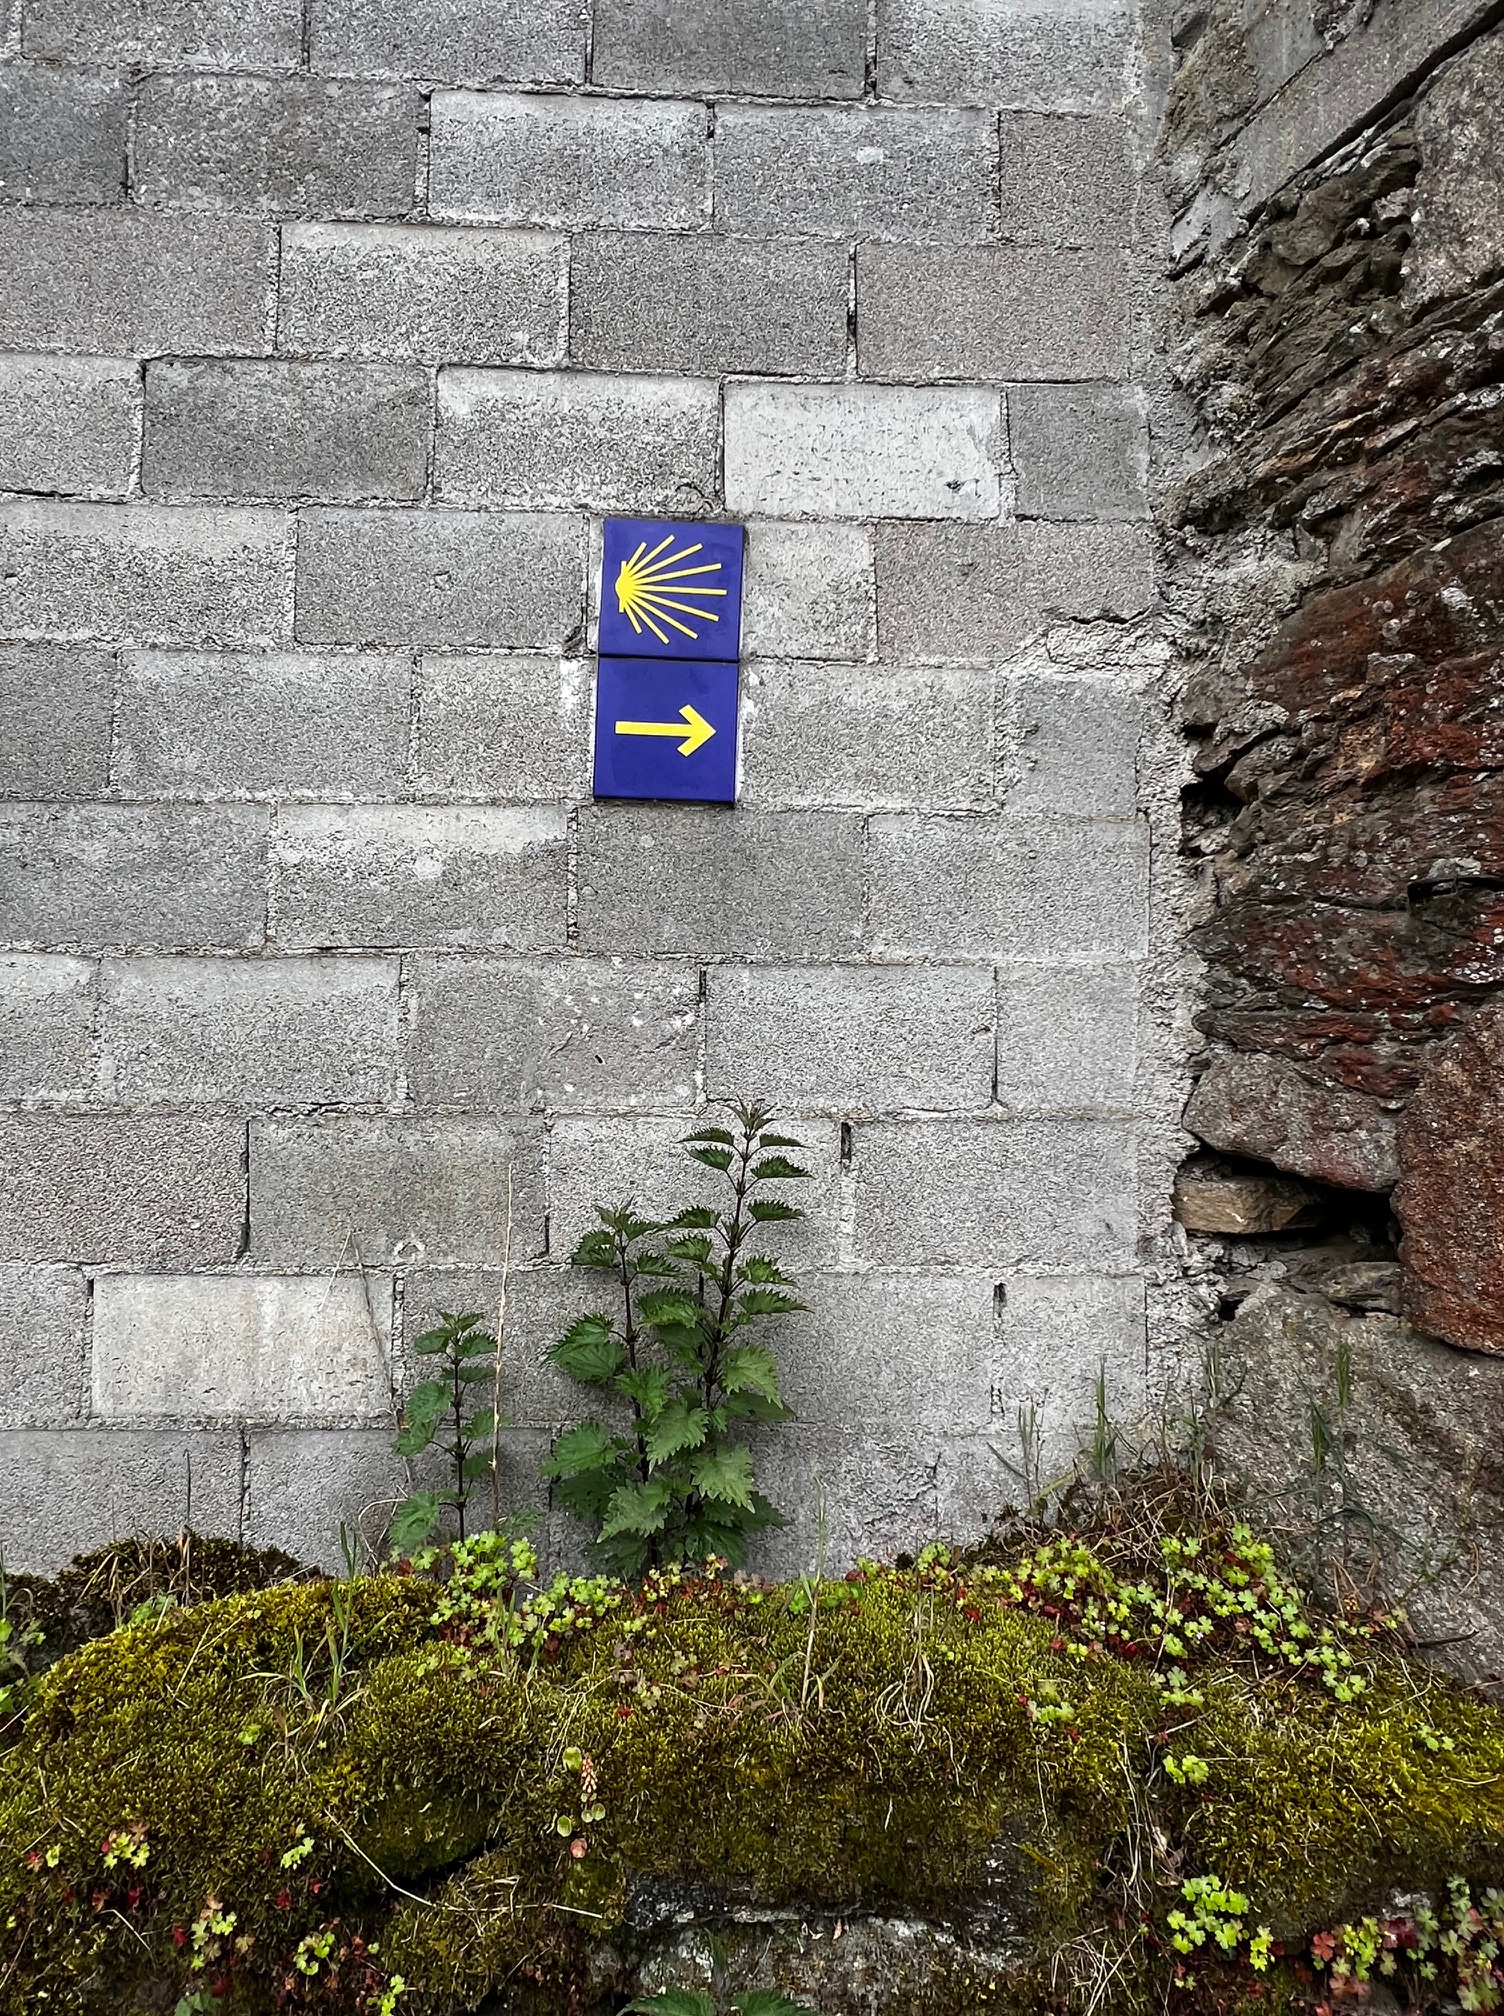
The paths are marked at regular intervals, and whenever you have to turn or change direction. You look for a white or grey stone marker with a scallop shell, a symbol of St. James and of the Camino, to guide you. In places where a marker stone isn’t feasible, a blue and yellow tile of the shell is embedded in a wall or building to point the way. The system was so good that we rarely needed our phones; we used nothing more than our eyes and an excellent guidebook with detailed topographic maps of each stage of the journey, elevation diagrams, and a directory of landmarks and places to stay (the Village to Village Camino Guides – highly recommended).
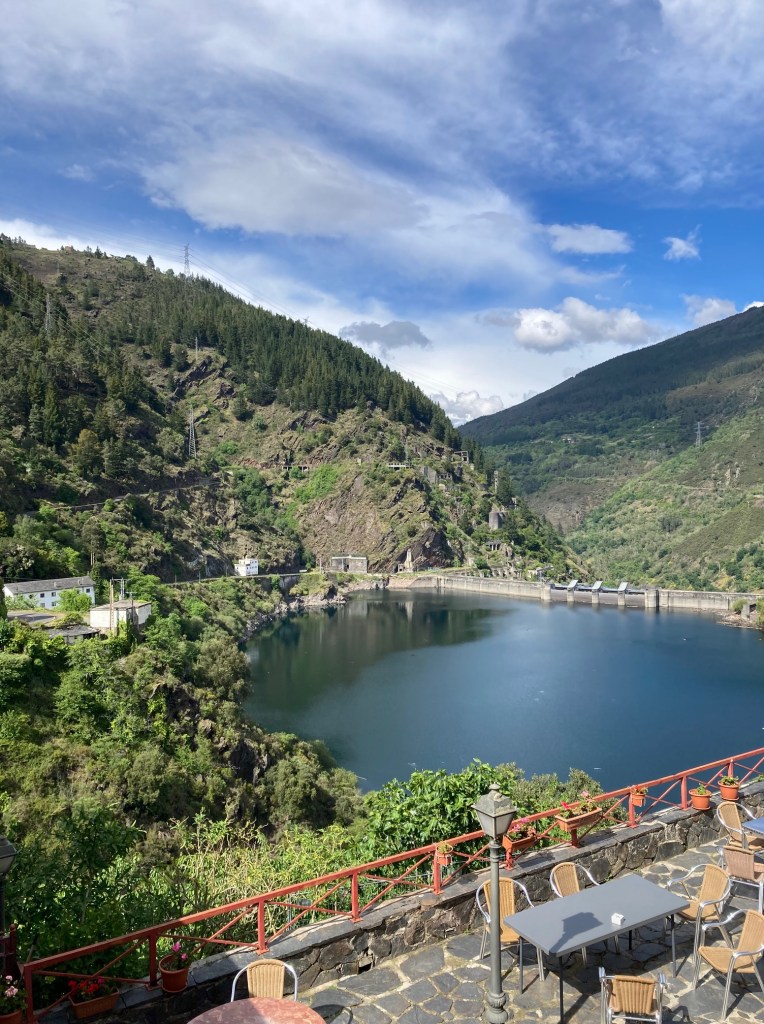
The routes run into the hundreds of kilometers; the Primitivo is a shorter trek that covers about 320 km between Oviedo and Santiago, but in exchange for the shorter distances you have greater changes in elevation. As this was our first attempt at something like this, we opted to do half the route, beginning in a town called Grandas de Salime, located at a large dam and reservoir as you leave the region of Asturias and enter Galicia.
Our starting point: view of the Embalse de Salime from the Hotel Las Grandas
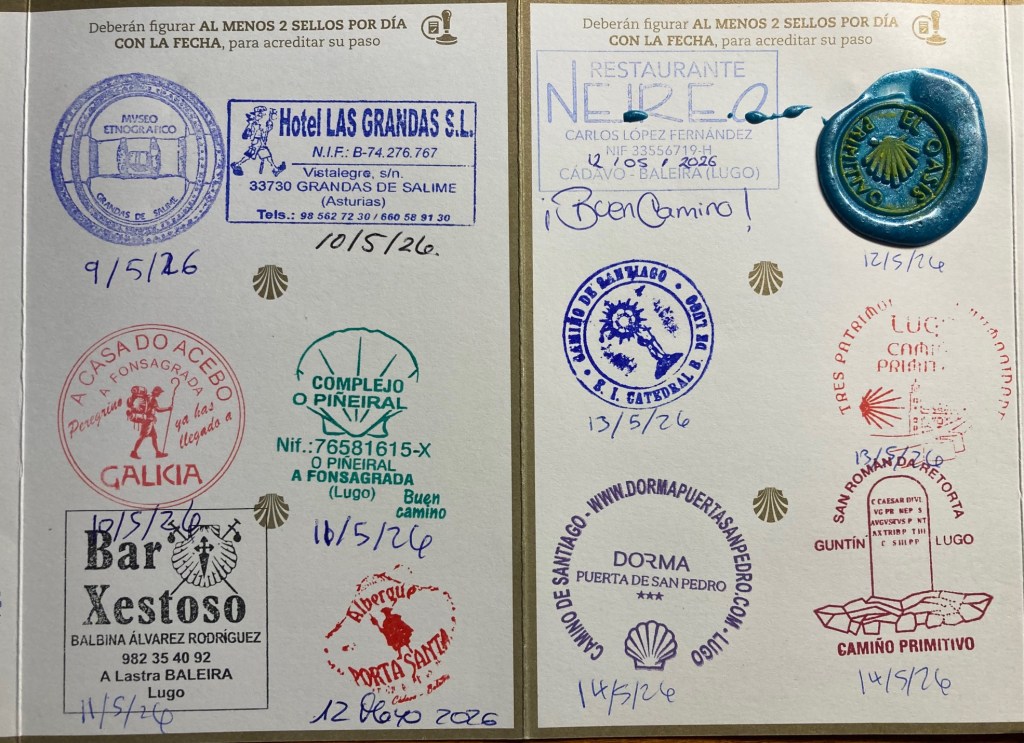
Accommodations and cafes serve pilgrims throughout the route; albergues offer a mix of hostel-like rooms (bunk beds in shared rooms) and single rooms, and there are also basic hotels. Our 183 km walk took us 9 days (3 days walking / 1 rest day in Lugo / 5 days walking). You are issued a pilgrim’s credential or passport when you begin, which grants you access to pilgrim-reserved accommodations and resources. On your journey, you need to get your passport stamped twice a day to verify that you are doing the walk. You always get a stamp at the places you stay, and in-between you can pick up others at cafes and restaurants, churches, museums, visitor centers, and even certain stores (we managed to get one at a cheese shop). Once you reach the cathedral in Santiago, you visit the pilgrim’s office (essentially the Camino DMV), where you present your passport to receive the Compostella, the official document that certifies that you finished the pilgrimage. You need to walk 100km minimum (200km if you’re biking) to qualify.
A Selection of Stamps from my Pilgrim’s Credential or Passport
It was a deeply moving experience, retracing the steps that countless pilgrims took over a thousand years, and ending in front of the statue and tomb of St James behind the high altar in the cathedral, receiving the Eucharist at the Pilgrim’s mass. It was a relief to disconnect from technology and work, boiling life down to the singular goal of getting from point A to B each day. It was physically satisfying, pushing my body to walk 10 to 20 miles a day in rough terrain in all kinds of weather. It was wonderful to meet new friends; there is a cohort of people who happen to begin their journey simultaneously with you, and you see them throughout the walk, sharing the road for a time or a meal at the end of the day at the albergue. And it was a lot of fun, for a geographer who enjoys navigating a landscape with no digital do-dads, and who loves collecting stamps!
An experience like this alters your perspective, and it’s been difficult to transition back to my normal routines. It has strengthened my belief that it’s time for me to consider new possibilities and next stages in my career. Please reach out (via LinkedIn or email in the sidebar) to share opportunities. My resume is available on the About page.
Stay tuned for some heat and climate-related dataset suggestions in my next post; resources I compiled for the heat conference, and new ones I’ve learned about at FedGeoDay.
Last year I wrote about my stamp collecting hobby in a piece that explored maps and geography on stamps. Since it was well received, I thought I’d do a follow-up about geography and postmarks on stamps. I also thought it would be a good time to feature some “lighter” content.
Many collectors search for lightly canceled stamps to add to their collections, where the postmark isn’t damaging, heavy, or intrusive to the point that it obscures what’s depicted on the stamp, while others will only collect mint stamps. But the postmark can be interesting, as it reveals the time and place where the stamp did its job, and may also convey additional, distinct messages that tie it to the location where it began its journey.
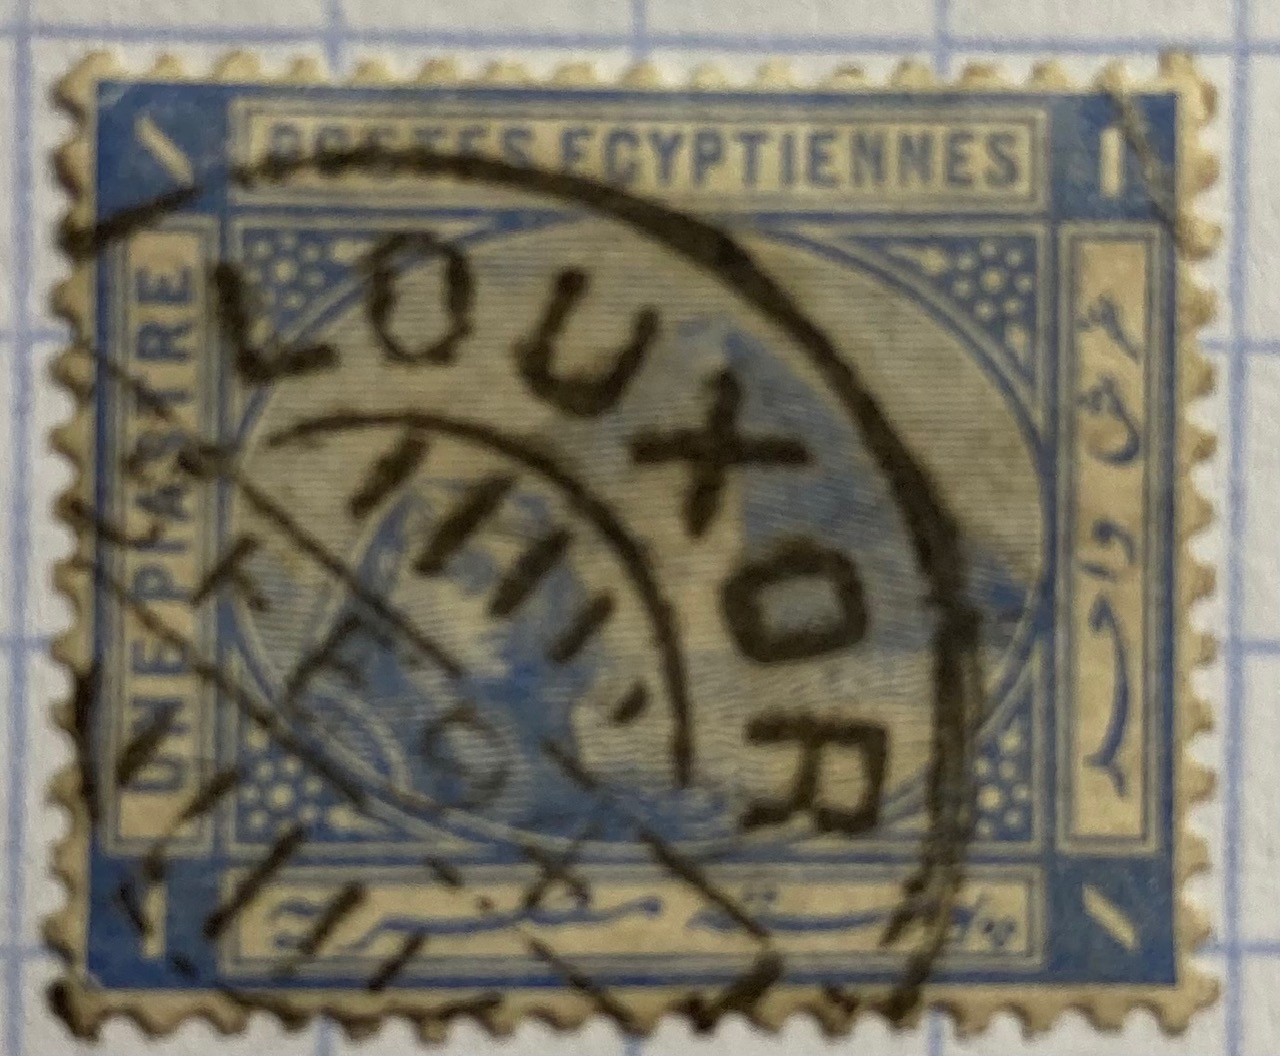
Consider the examples below. Someone was up late mailing letters, at 10:30pm in Edinburgh, Scotland on Jan 12, 1898, and just after midnight at the Franco-British Exhibition in London on Aug 31, 1908. A pyramid looms and the sphinx peers behind a stamp postmarked in Luxor at some point at the end of the 19th century (based on when that stamp was in circulation). While Queen Victoria has been blotted out and the sphinx is obscured, these marks turn the stamps into unique objects which situate them in history.
I add stamps like these to a special album I’ve created for postmarks. I’ll share samples from my collection here; they won’t be illustrative of all postmarks from around the world, but reflect whatever I happen to have. I’ll also link to pages that provide information about particular series that were widely published and popular for collecting. Check out this introduction on stamp collecting from the National Postal Museum at the Smithsonian if you’d like a primer. They are also an excellent reference for US stamps.
Time and Place in Cancellation Marks
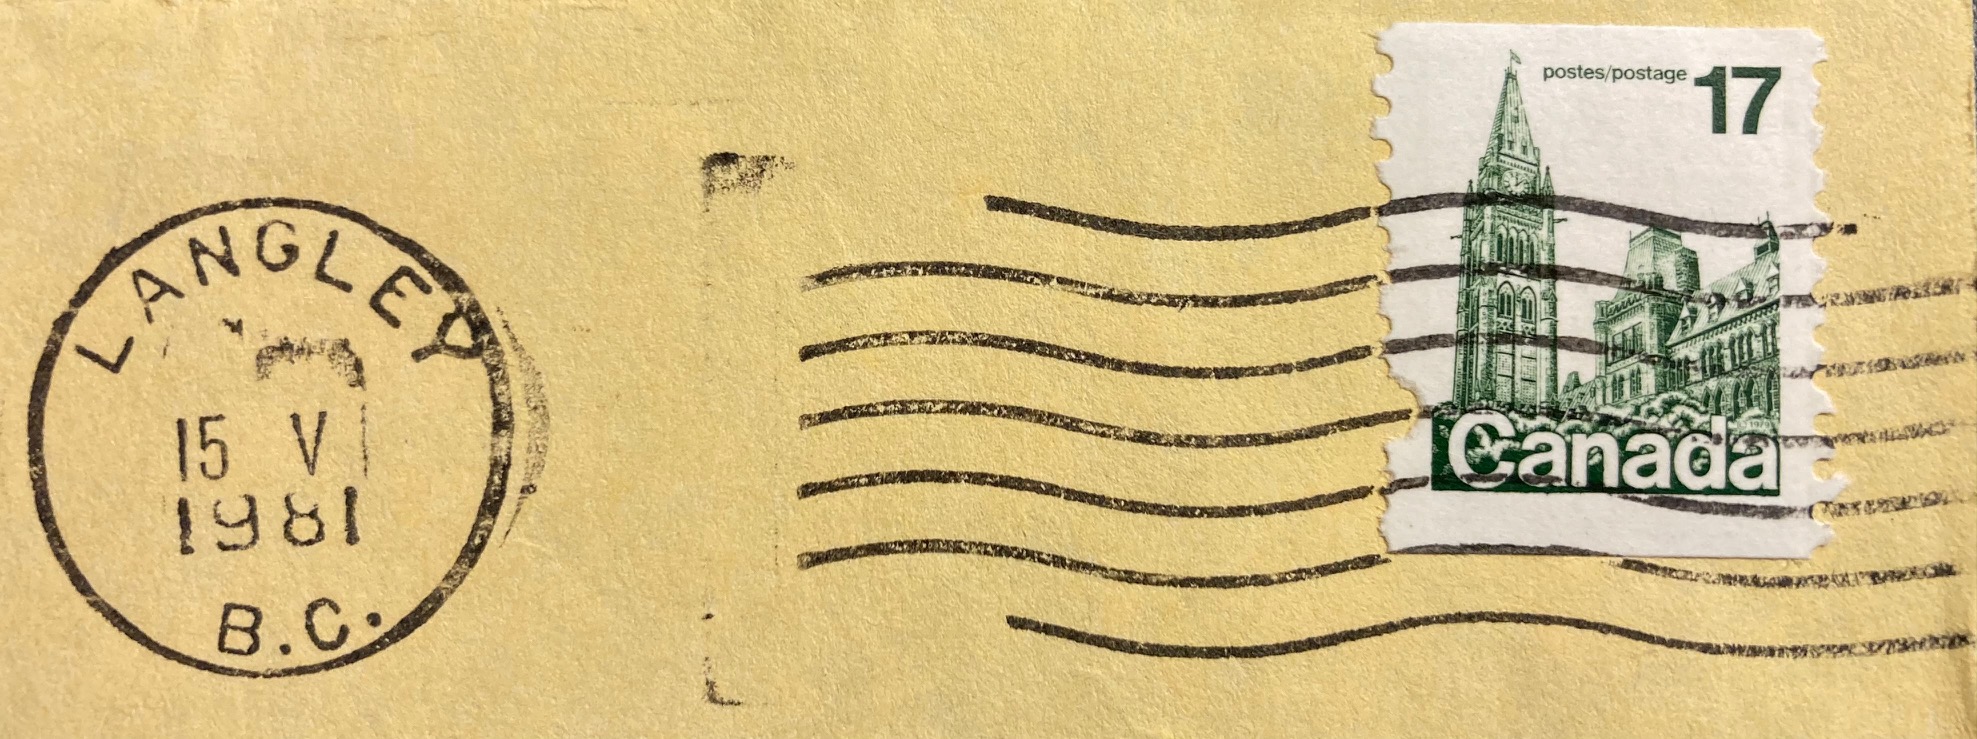
In the late 20th century, the time and place on standard North American postmarks appeared in a circular mark that contained the date and city where the letter was processed, followed by empty space and then wavy lines, bars, or a public service message that cancelled the stamp, as we can see in the early 1980s examples below (the “Please Mail Early for Christmas” cancellation appears atop a stamp from the popular US Transportation Coil series of the 1980s and 90s). This postmark convention continues today in the early 21st century, with time and place on the left and cancellation on the right; the mark in the last example celebrates the 250th anniversary of the beginning of the American Revolution.
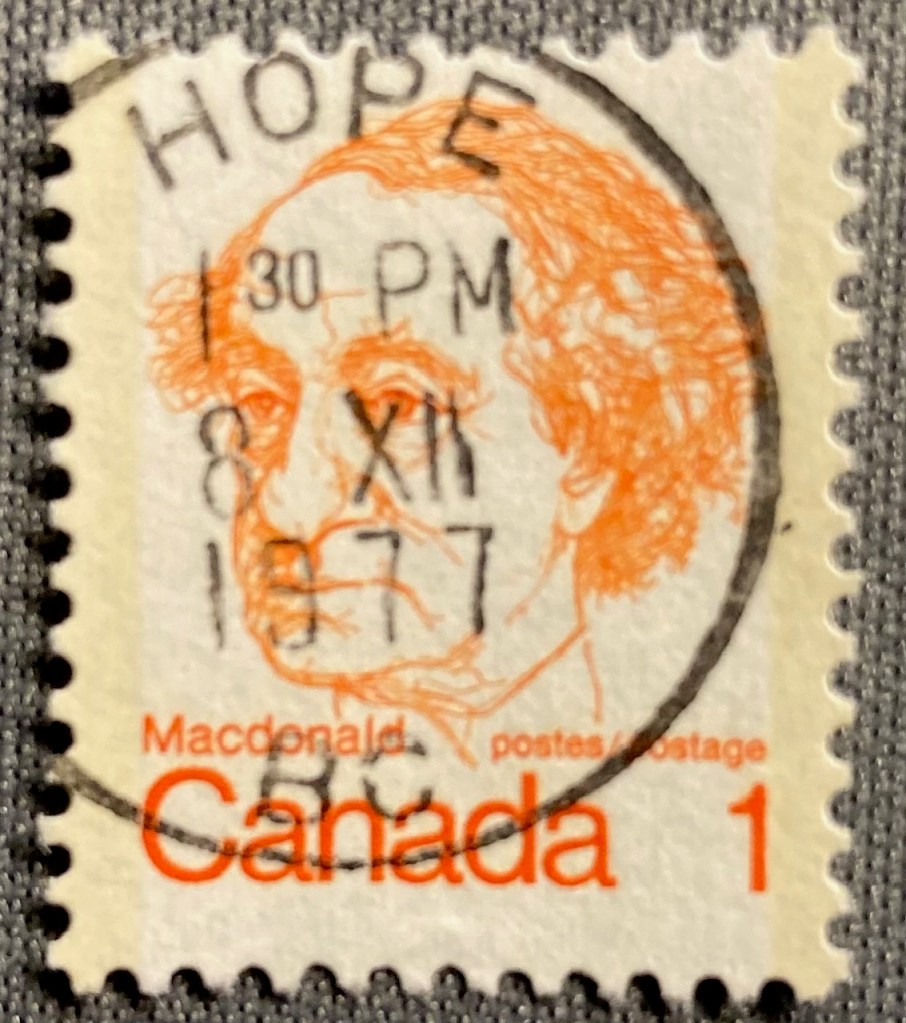
Given the placement of the marks, the date and place often don’t appear on these US and Canadian stamps; you would need a piece of the envelope to see the provenance. But sometimes you get lucky. This low denomination stamp was probably one of two or three stamps on its letter; given it’s position on the envelope the mark landed squarely on the prime minister. Hope is a virtue, and also a place in British Columbia where a letter was mailed on Dec 8, 1977 (December being the 12th month, XII in Roman numerals which Canada used on its postmarks)
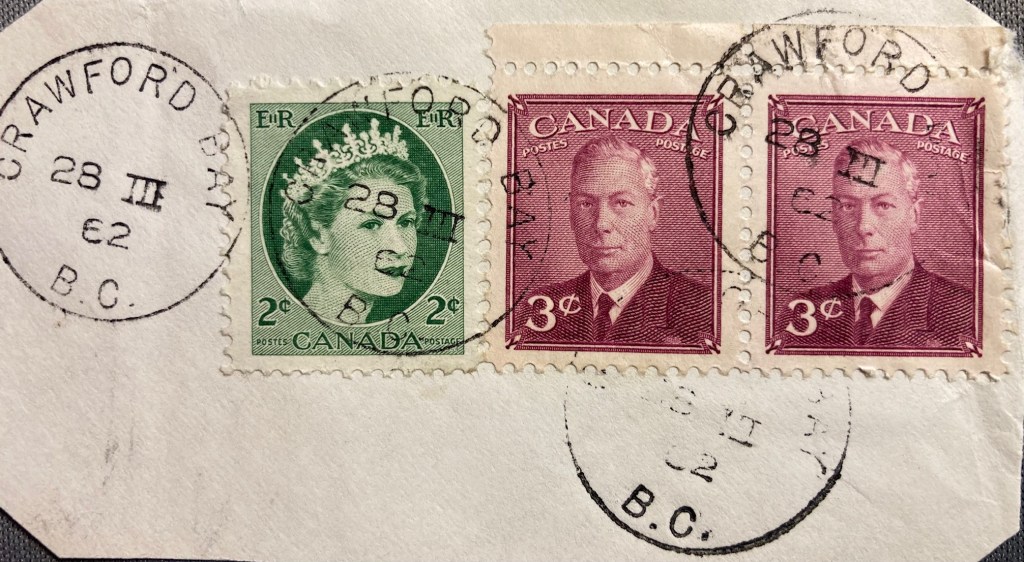
If we go further back in time to periods before mail was processed mechanically, or to places that didn’t have this equipment, we begin to see more stamps that were cancelled by hand, and we’re more likely to see the origin and date marked on the stamp. Queen Elizabeth II appears with her father King George VI on a letter from Crawford Bay, BC on March 28, 1962. QE II is probably the most widely depicted person on postage stamps; this series is known as Canada’s Wildings, their main definitive stamp from the 1950s to early 60s. The photo was taken by Dorothy Wilding, whose photos were also used for the UK’s 1950s definitive stamps of the queen (which are known by collectors as The Wildings). I should add, “definitives” are the small, basic, and most widely printed stamps that countries issue. Think of stamps of the flag in the US, or the queen (or now, the king) in the UK and Canada (Canadians also employ their flag and the maple leaf quite a bit).
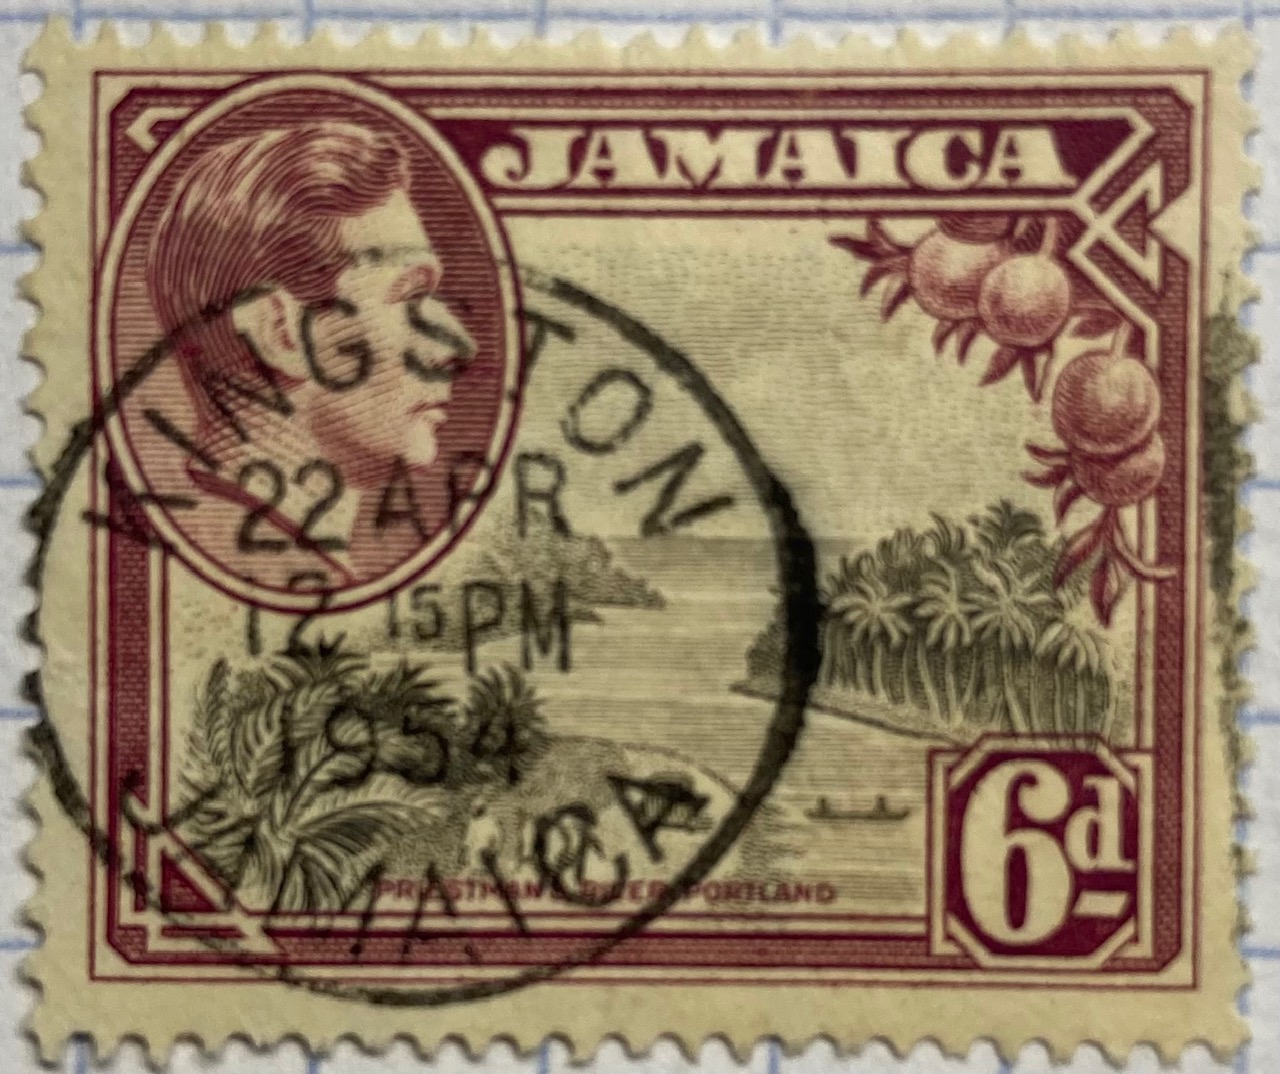
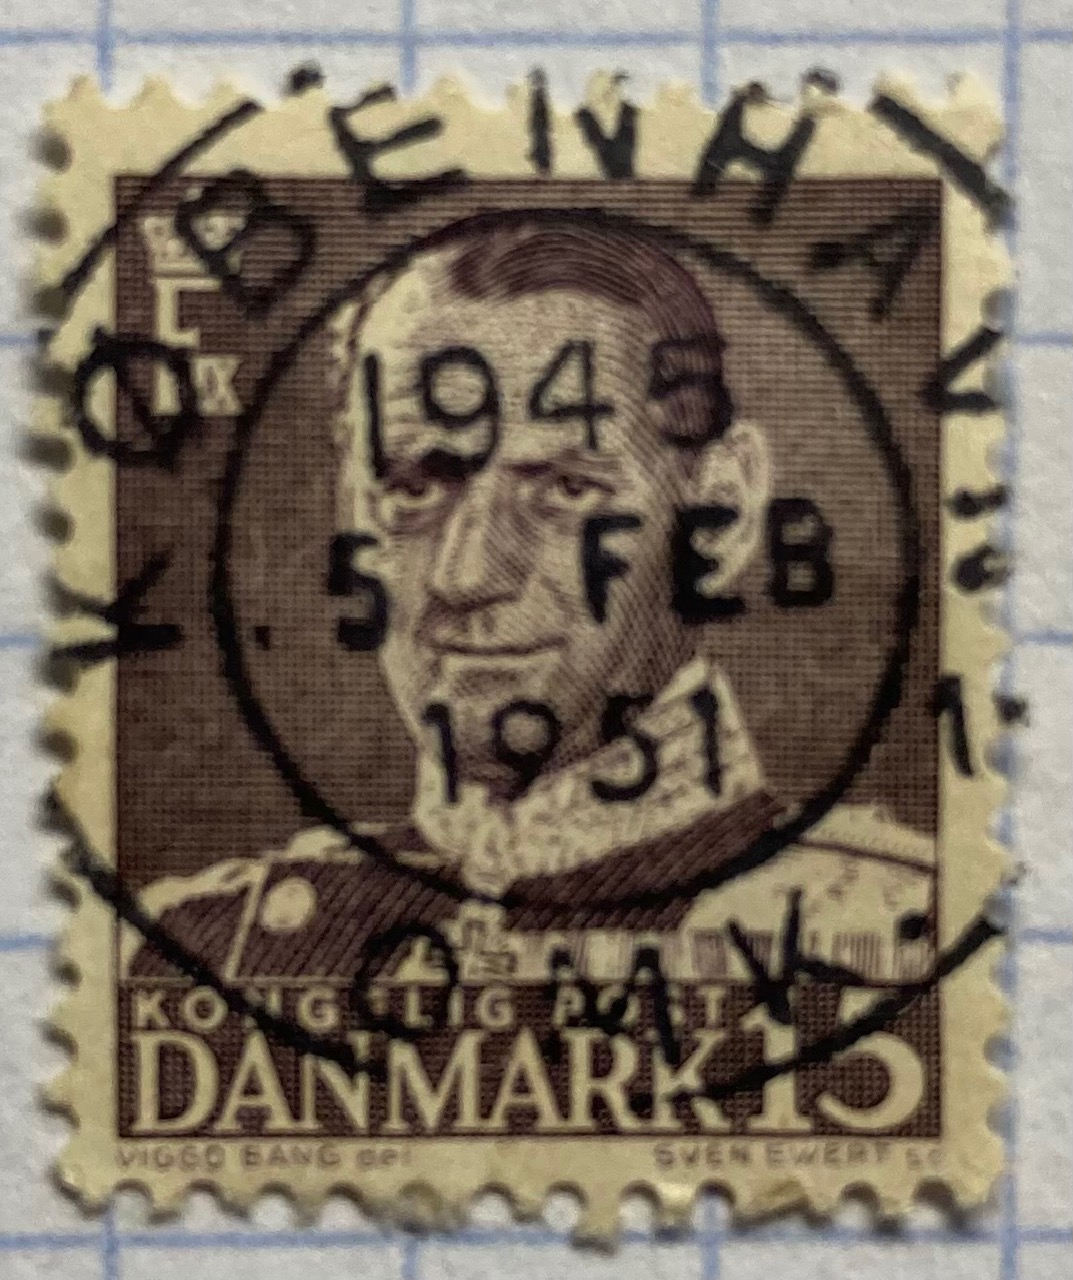
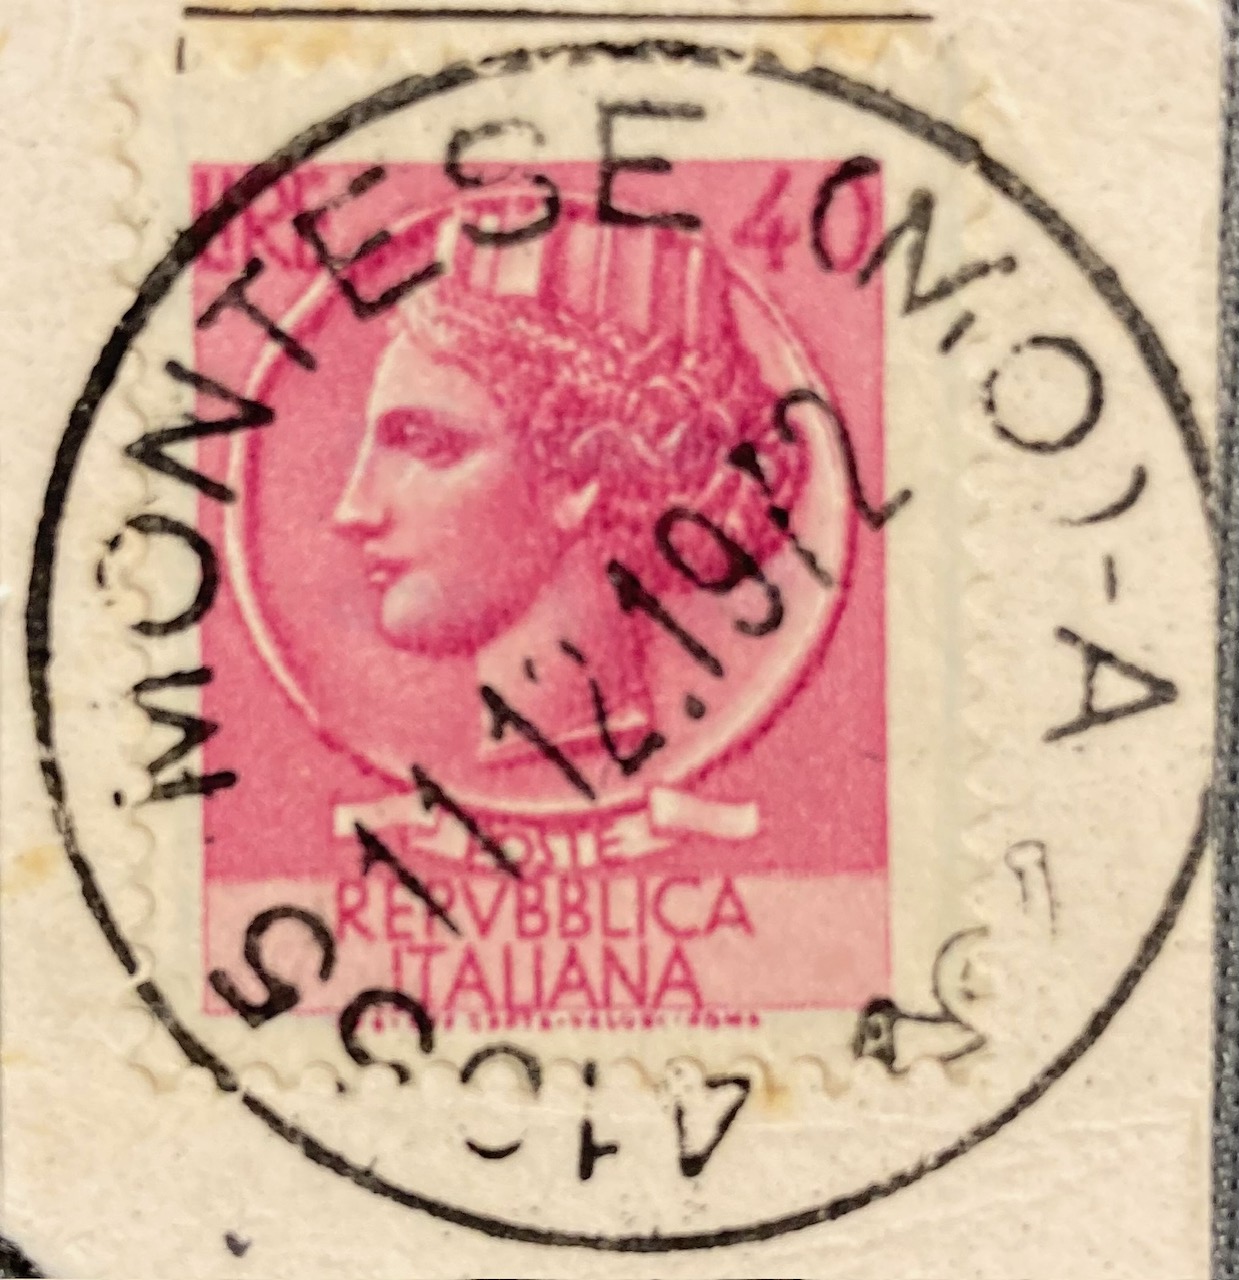
Postmarks vary over time and place with many countries having distinct cancellation styles, and where the markings may appear on the stamp itself. The examples below depict marks that “hit the spot”, on afternoons in 1954 in Kingston, Jamaica and 1982 in Pinetown, South Africa (ten miles from Durban). The marks on the Danish and Italian stamps are a bit larger than the stamps themselves, but we can still make out Kobenhavn (Copenhagen) in Denmark. The year is 1951; the 1945 at top is actually 19:45 hours as they use the 24-hour clock (7:45pm). Since the Coin of Syracuse (the definitive Italian stamp from the 1950s through the 70s – this one cancelled in 1972) is still on the envelope, we can see it originated in Montese, a town in the Emilia-Romagna region of northern Italy.
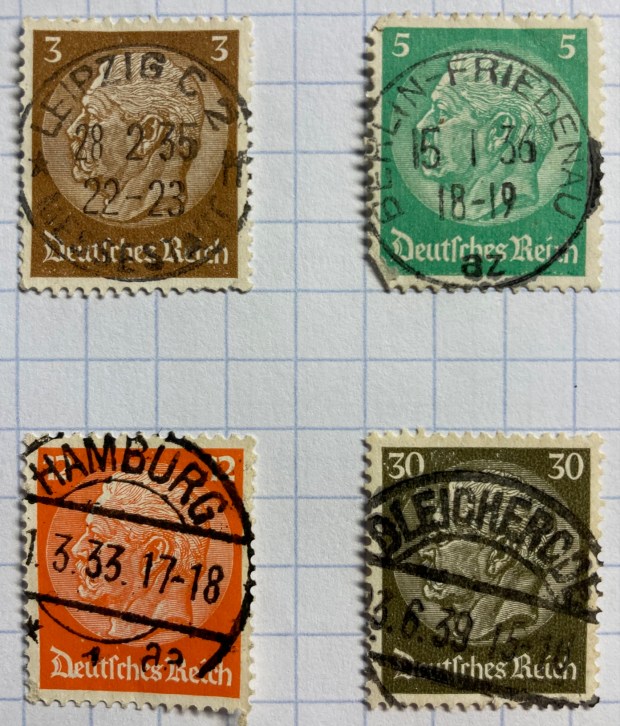
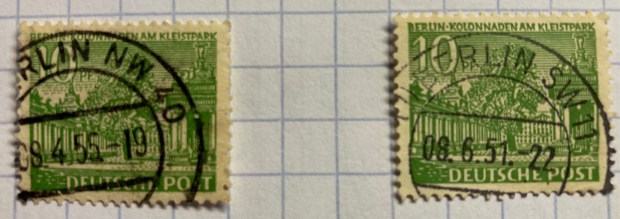
German stamps had a couple of distinctive marks in the mid 20th century, which often landed directly on the stamp. If you acquire enough of these you can assemble a collection that represents cities across the country. The 1930s examples below depict Paul Von Hindenburg, a WWI general and later president of the Weimar Republic. After WWII, Germany and the city of Berlin were divided into occupation zones; we can see examples from the Northwest and Southwest Berlin zones canceled in the 1950s.
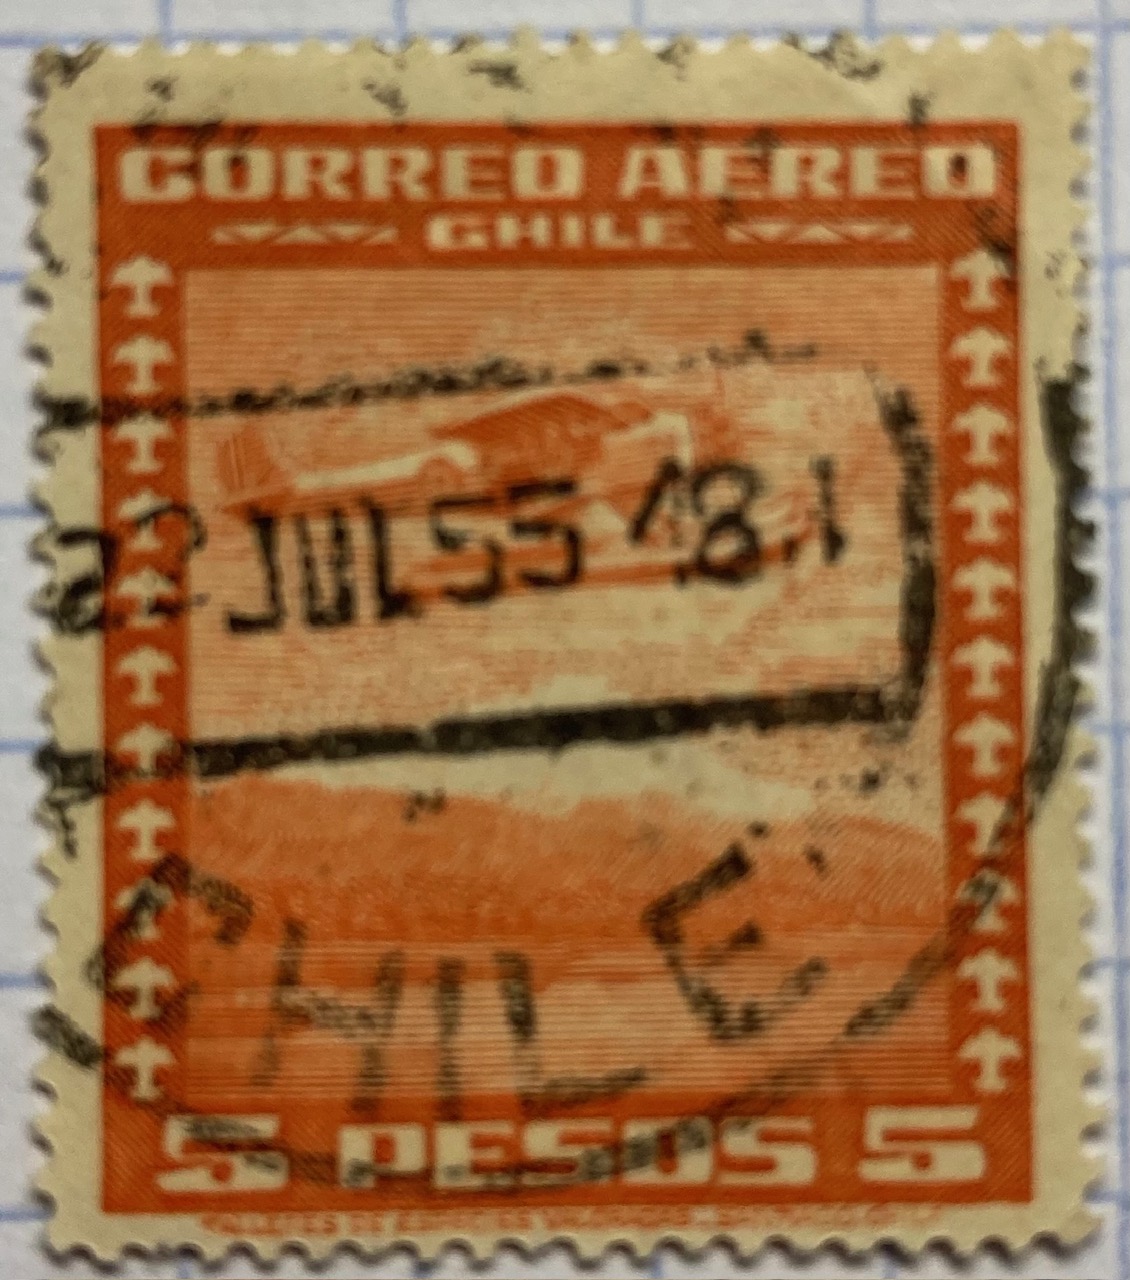
The postmarks in these Latin American stamps incorporate their country of origin.
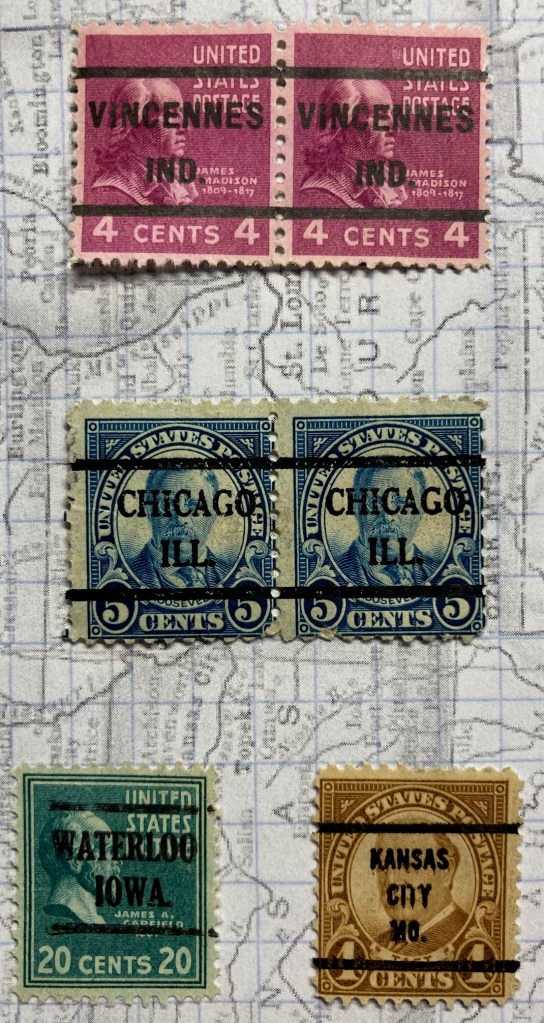
Back in North America, in the first half of the 20th century post offices issued pre-cancelled stamps that bore the mark of the city where they were distributed. Pre-cancelling was an early solution for saving time and money in processing large volumes of mail. In the US, you’ll see these on definitive stamps from the 1920s to the 1970s, particularly on the 4th Bureau Issues (1922-1930) (example of 4c Taft and 5c Teddy Roosevelt on the left), and the Presidential Series of 1938, known as the ‘Prexies”. This series was proposed by Franklin Roosevelt, who was an avid stamp collector, and it depicted every president from Washington to Coolidge. Given the wide range of stamps and denominations, they remained in circulation into the 1950s.
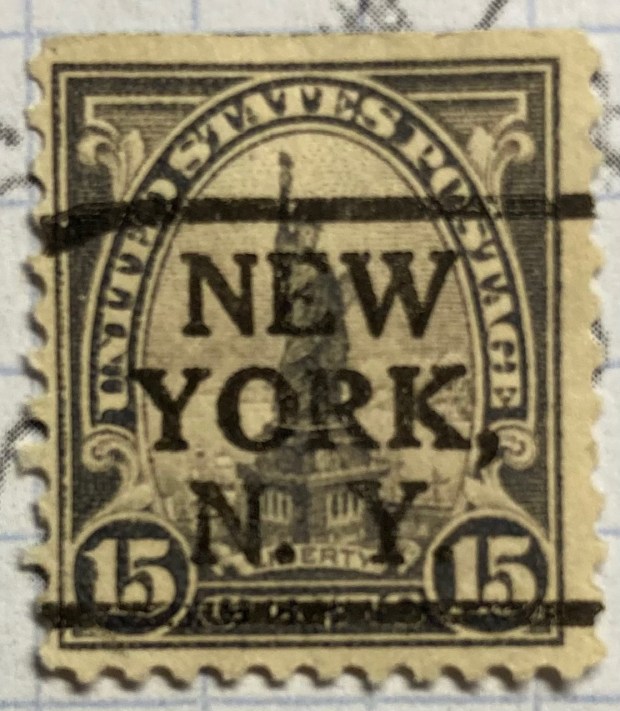
If you’re lucky, you can discover some interesting connections between the postmark and the subject depicted on the stamp, like this 4th Bureau, 1920s stamp of the Statue of Liberty, prominently pre-cancelled in New York.
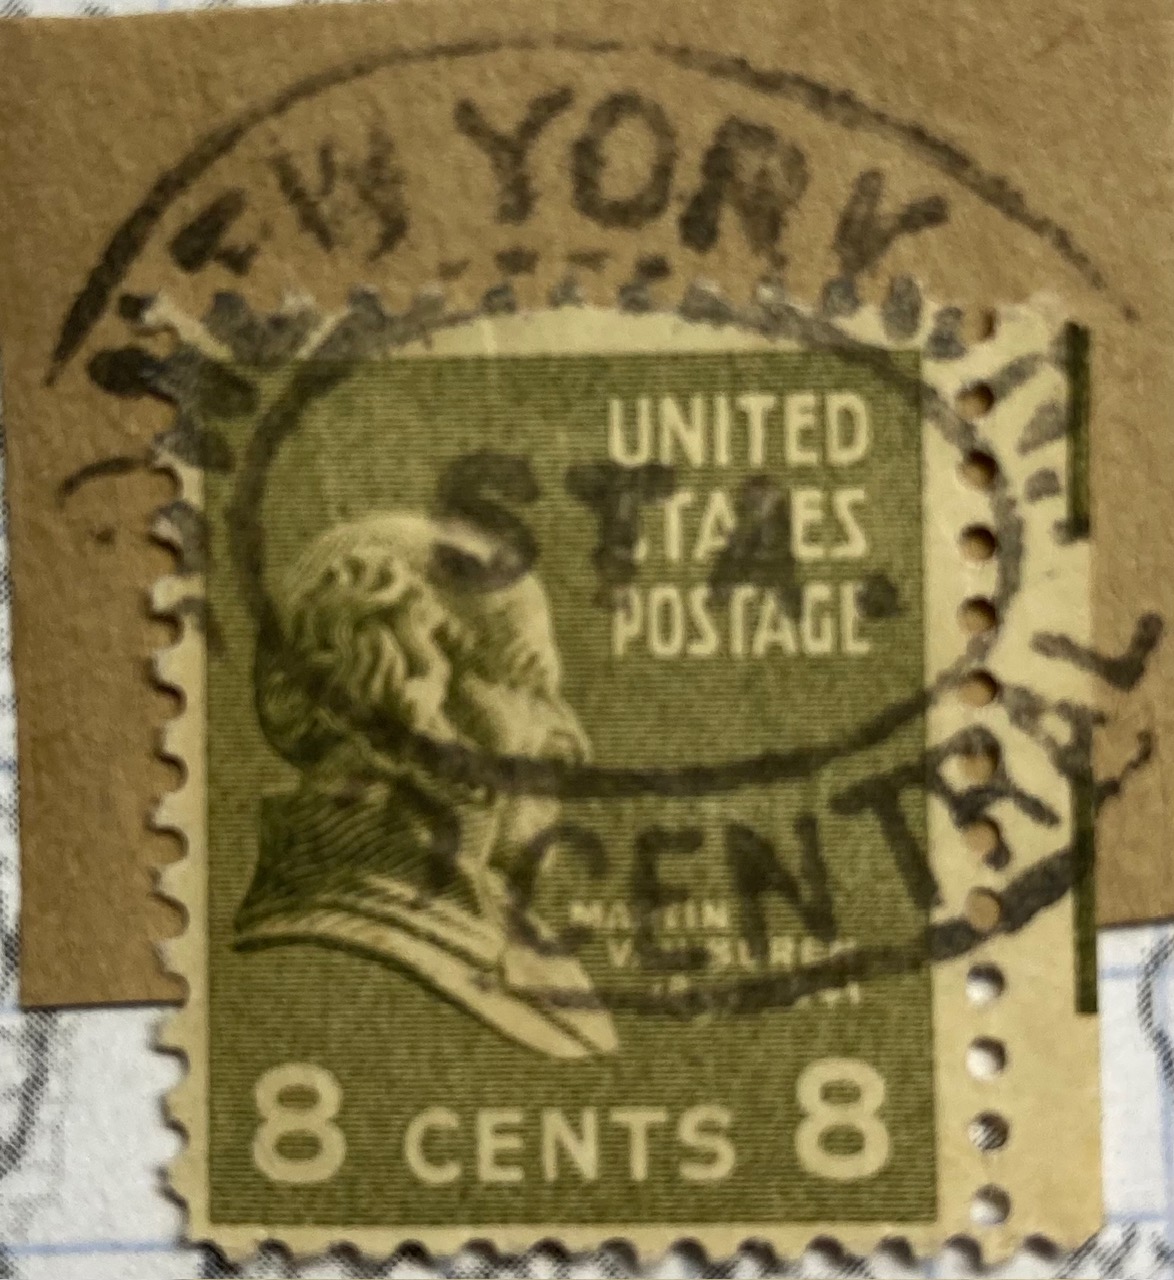
Mail was often transported by train, and train stations were key points where passengers would mail letters before and after traveling, and in some cases even on the train if there was a postal car. “Gare” is the French term for “station”, and we see examples from 1910 Belgium and 1985 France below. An example from Germany is marked Bahnpost (“station” or “train” mail) on board a Zug (“train”) that left Chemnitz early in the 20th century. Since I still had a portion of the envelope, we know the Prexie stamp of Martin Van Buren traveled through Grand Central Station in NYC, at some point in the mid 20th century.
Parts of the Address
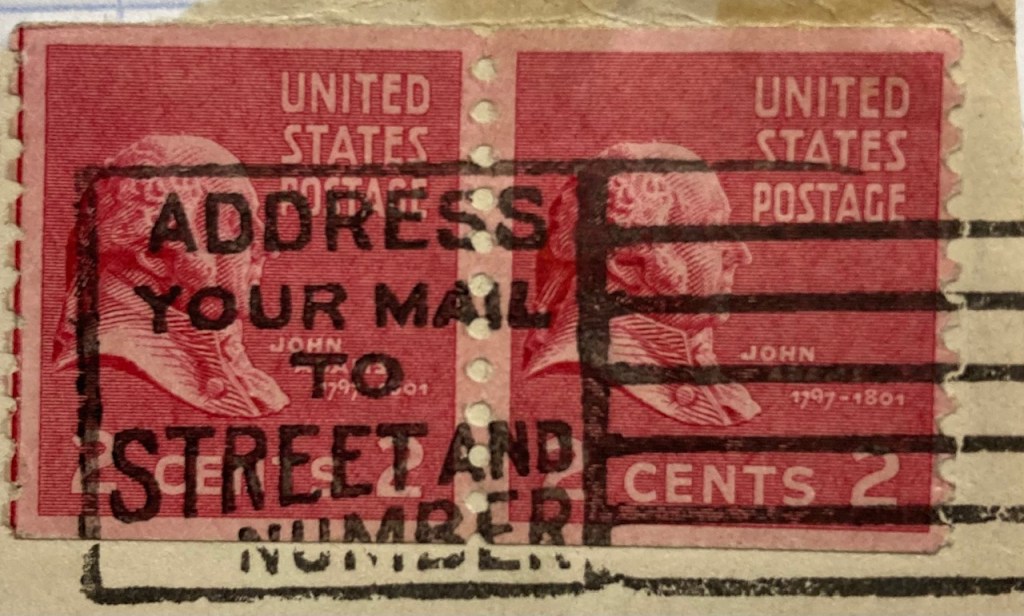
Beyond the cancellation mark that provides time and origin of place, geography also appears in postmarks as exhortations from post offices to encourage letter writers to address mail correctly, so that it ends up at the right destination. The development of addressing systems was, in part, prompted by the need to get mail to locations quickly and accurately. This mid-20th century mark on a pair of John Adams Prexies reminds folks to include both the street and house number in the address.
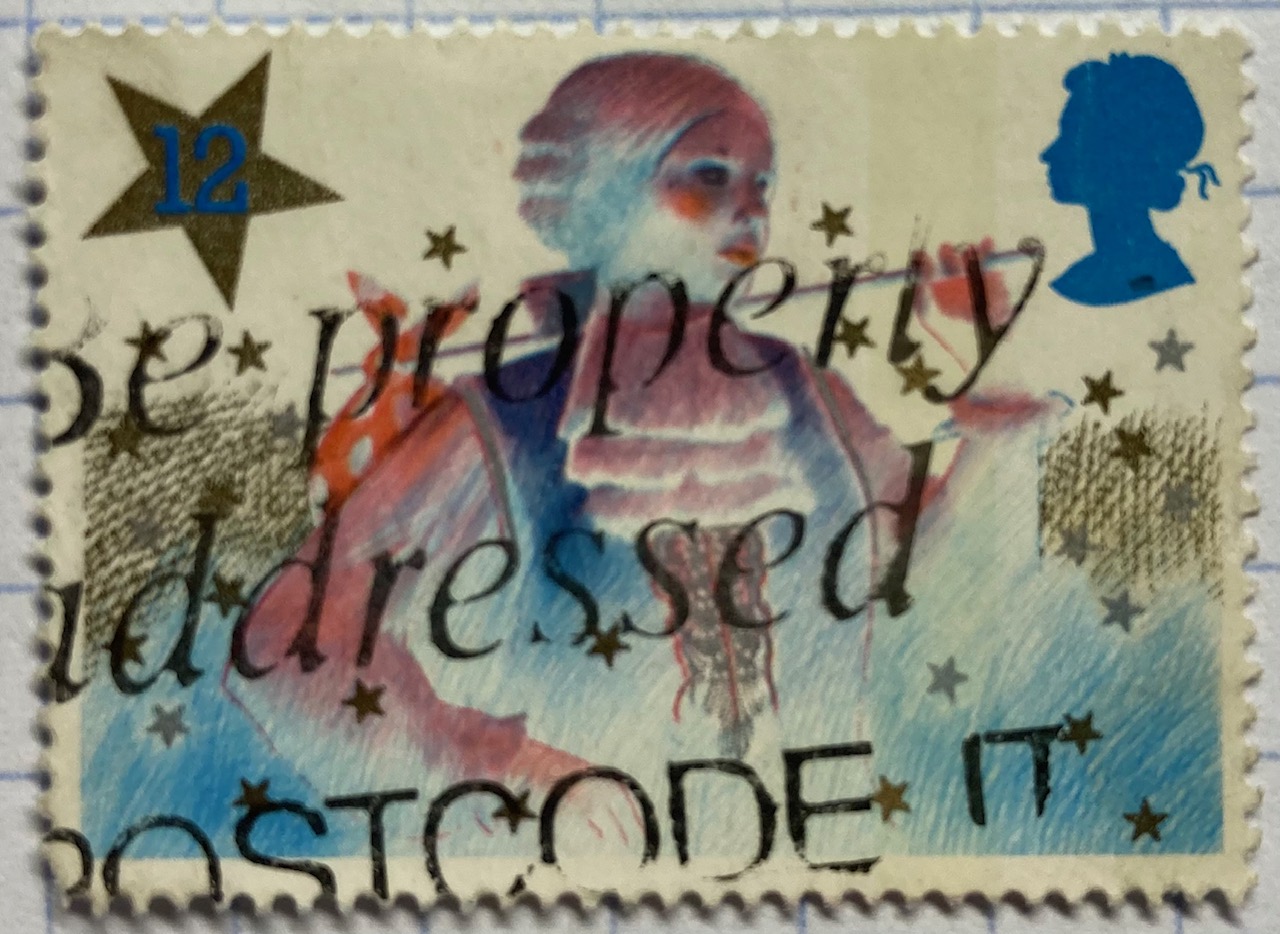
Postal codes were developed in the mid 20th century as unique identifiers to improve sorting and delivery, as the volume of mail kept increasing. The 1980s stamps below include an example from the US, where the ZIP Code or “Zone Improvement Plan” is the name of US postal code system (introduced in 1963). The USPS always wants you to use it. The other stamp comes from the UK, where the Royal Mail encourages you to “Be Properly Addressed” by adding your post code.
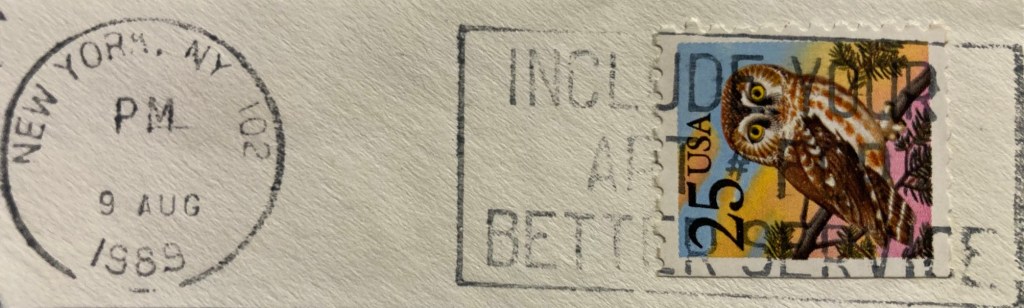
If you’ve ever lived in an apartment building, you’ve probably experienced the annoyance of not receiving letters and packages because the sender (or some computer system) failed to include the apartment number. This is particularly problematic in big cities like New York, so the post office regularly reminded folks with this special mark.
Celebrating Places in Postmarks
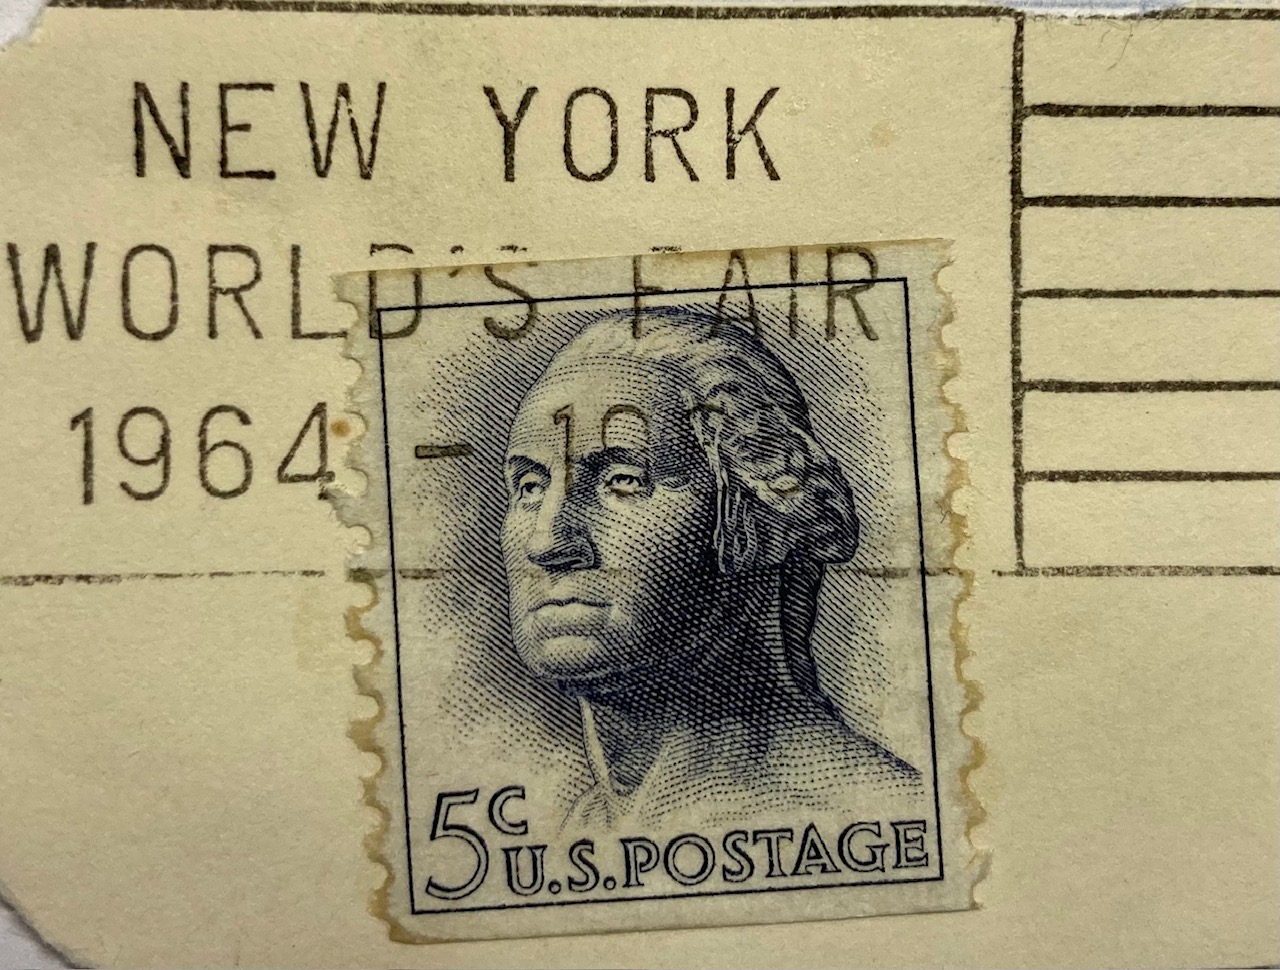
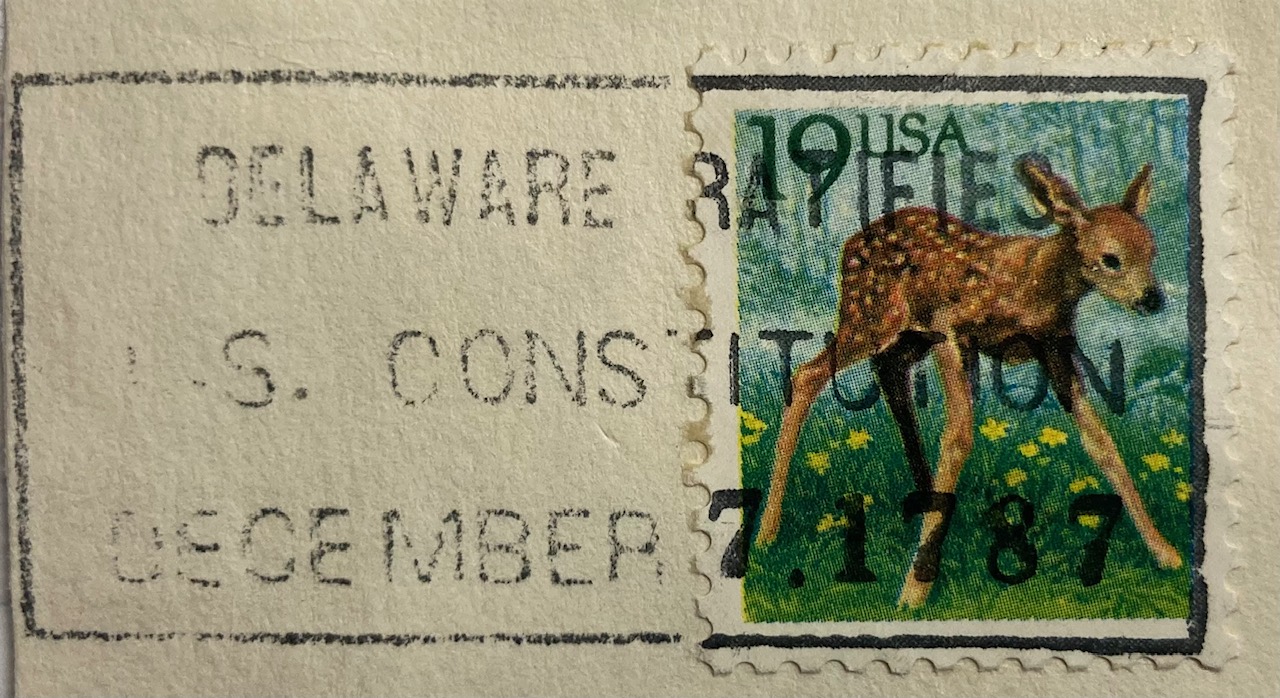
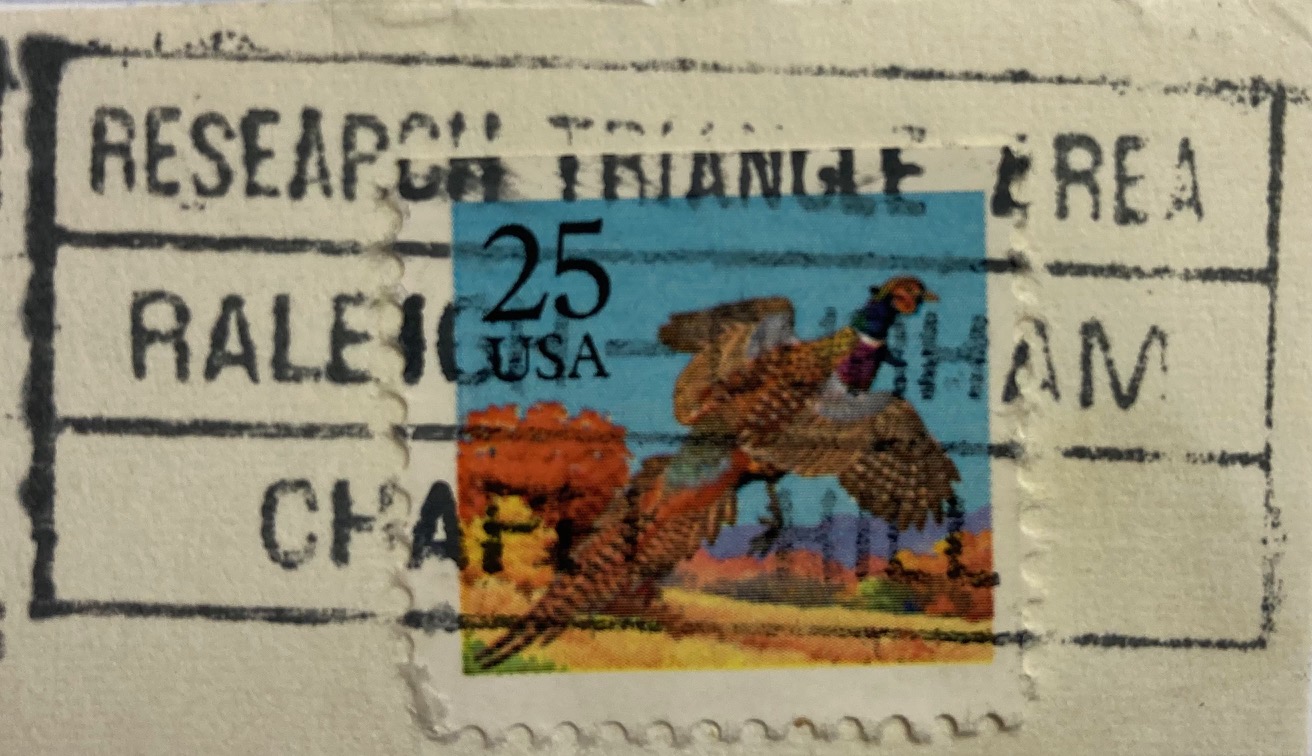
The most interesting examples of geography in postmarks are special, commemorative markings celebrating specific places and events tied to particular locales. Some of the marks have utilitarian designs like the ones below, commemorating the World’s Fair in New York in 1964 – 65, celebrating Delaware’s 200th anniversary of being the first state to ratify the Constitution, and promoting the burgeoning Research Triangle in North Carolina in the 1980s.
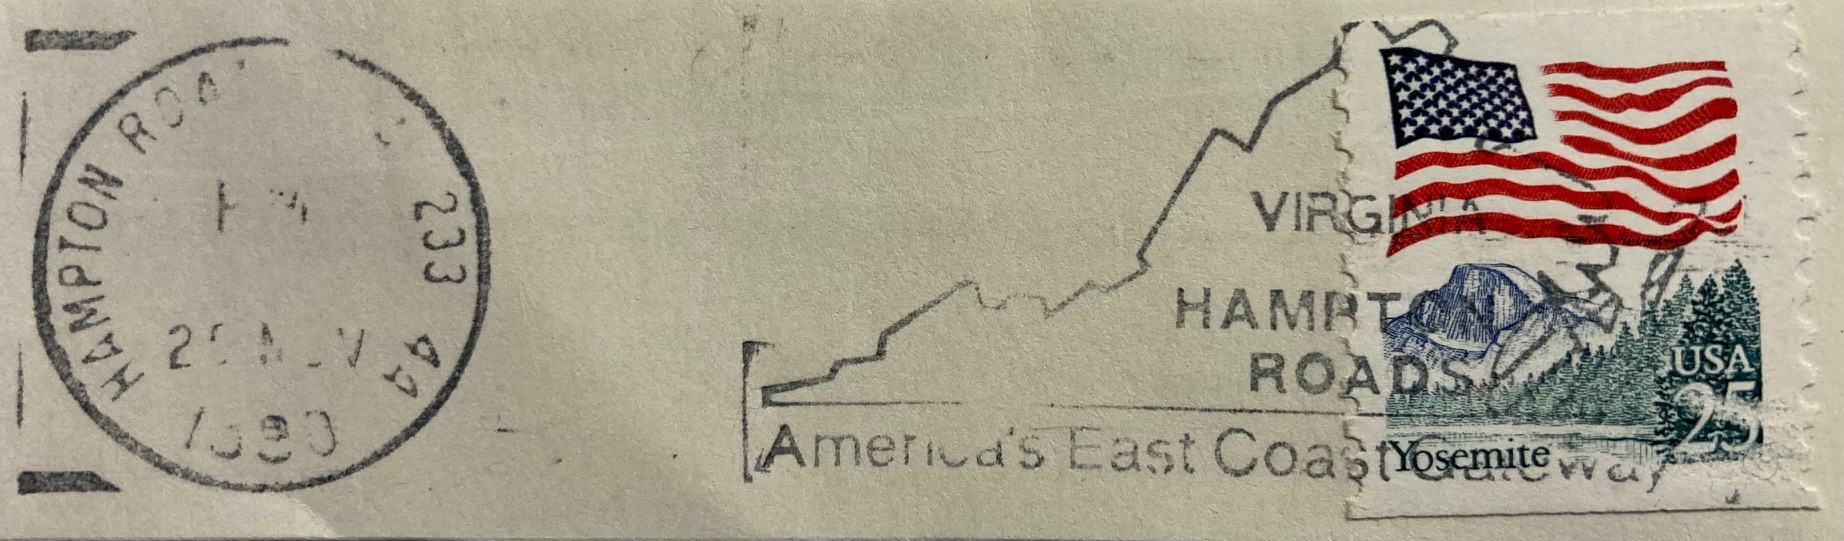
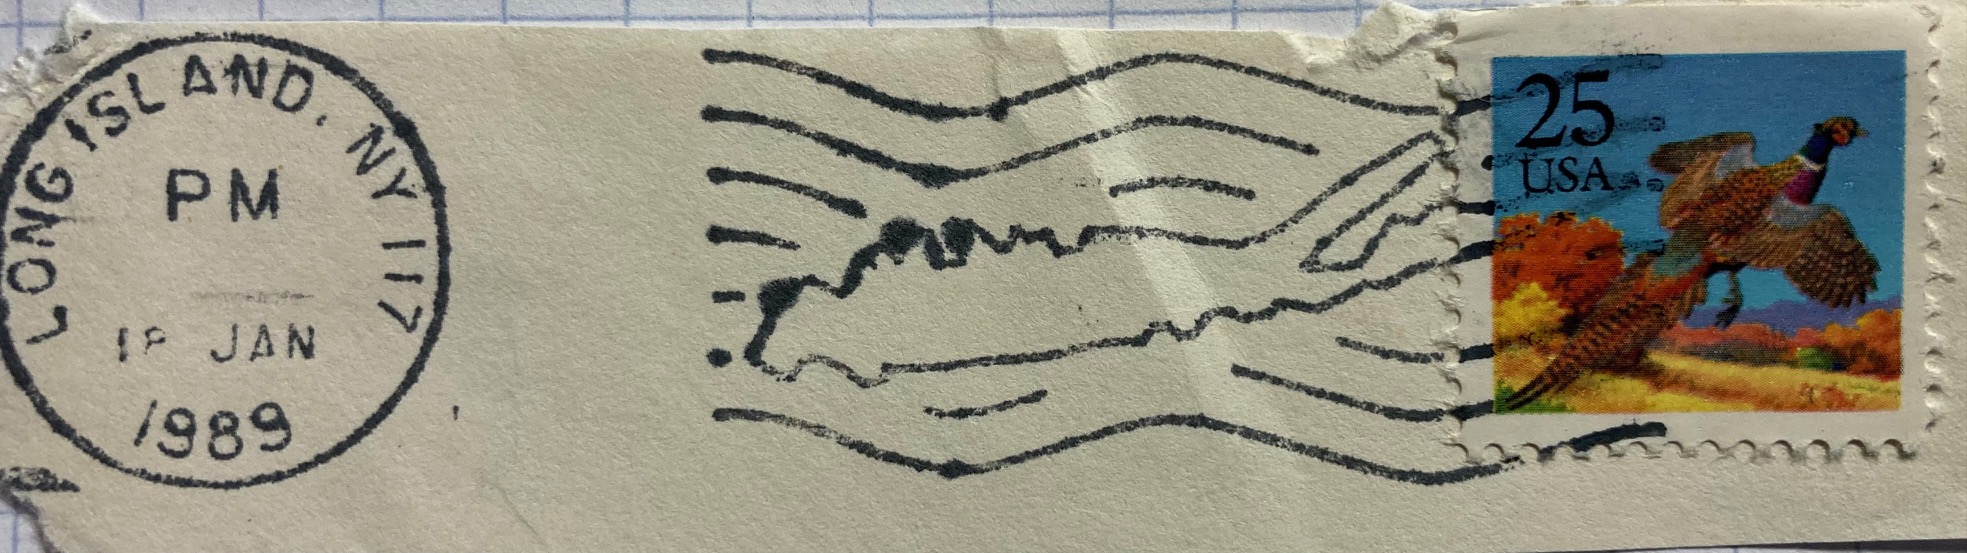
Others marks are fancier, depicting maps or places in the markings themselves. The examples below include a promotion for Hampton Roads in Virginia, and a stylized version of Long Island embedded in wavy cancellation lines. Most of the items I have are from the US, but you’ll find examples from around the world. The postal service in France has long created special markings to celebrate local and regional culture and history. This mark from the early 1960s celebrates an exhibition or trade fair in Neufchateau in northeastern France. For special markings like these, collectors will often save the entire envelope (in my case it was damaged, so I opted to clip out the marking and stamp). The stamp features Marianne, a legendary personification of the French republic who has appeared on definitive stamps there since the 1940s.
If you’ve acquired a bag of stamps you’ll get a mix that are on paper (clipped or torn from the envelope), or off paper (removed from the envelope by soaking in warm water, before the days of self adhesives). You often lose the message and provenance in these mixed bags, but are left with tantalizing clues, and funny quirks. The message on this 1970s Spanish stamp featuring long-time leader (aka dictator) Francisco Franco is unclear. He is shouting something about “districts” and “letters” in reference to the cities of Barcelona and Bilbao.
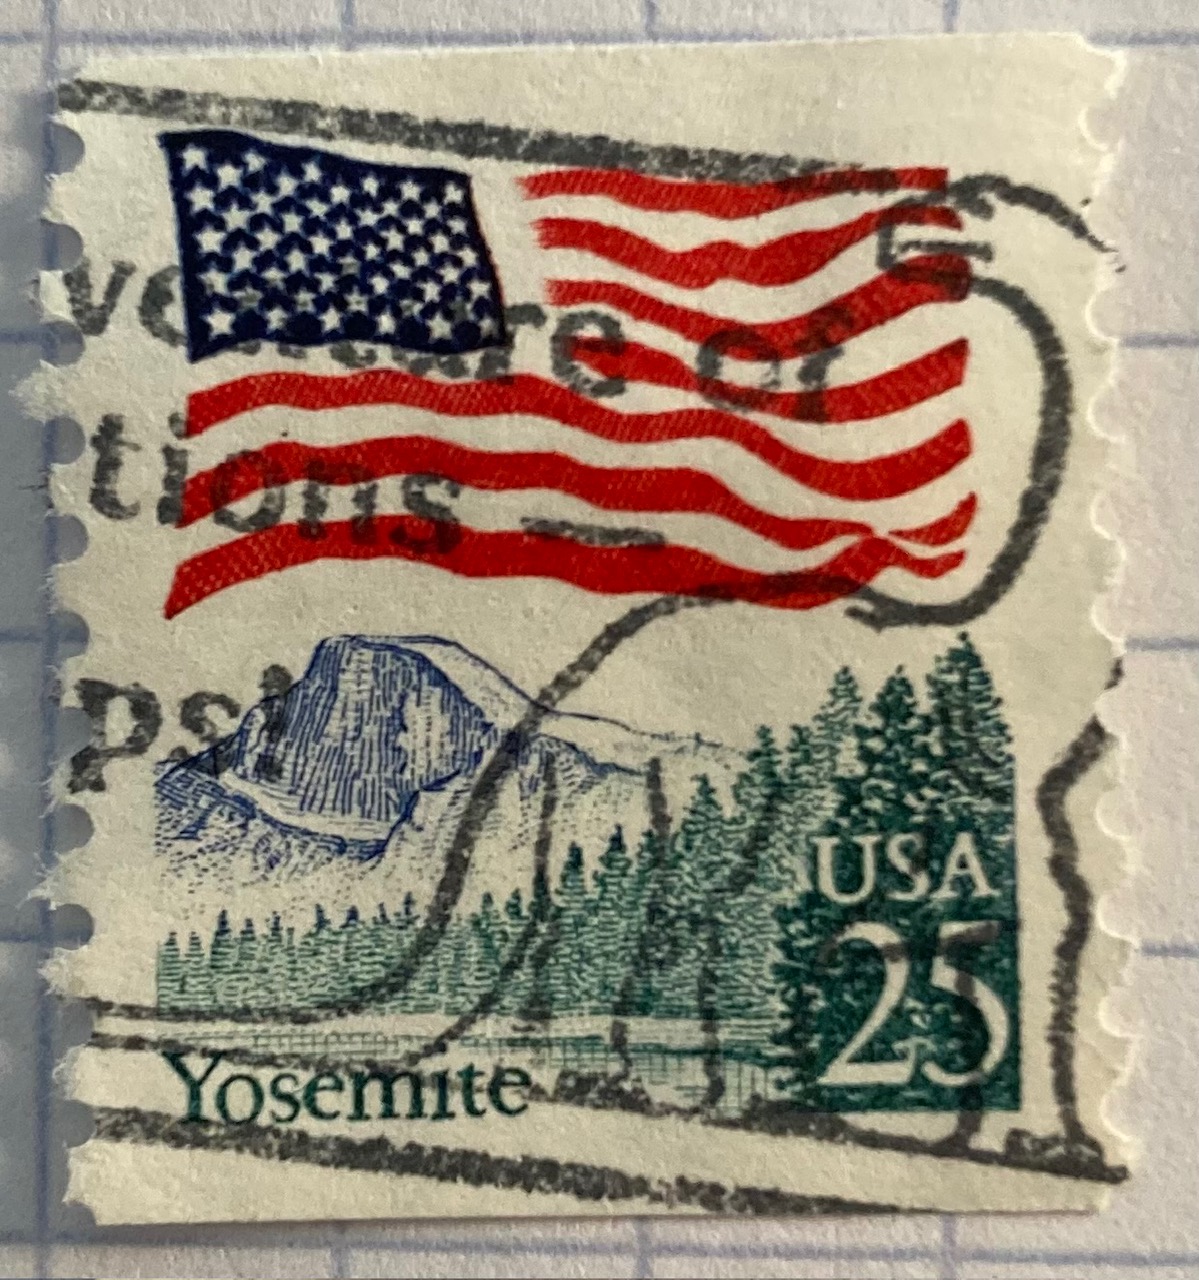
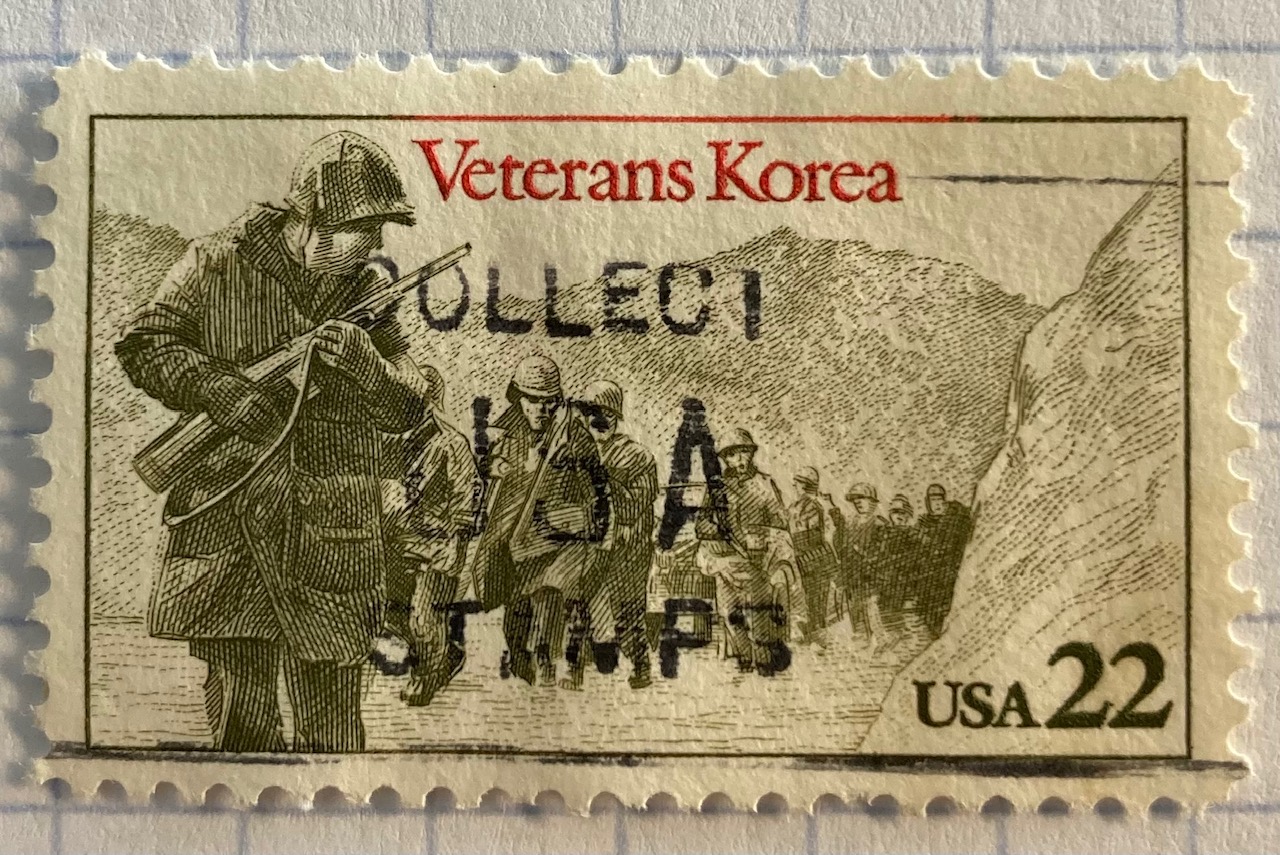
Did you know there were dinosaurs in Yosemite National Park? This brontosaurus was part of a larger marking that advertised the adventures of stamp collecting, which these US Korean War soldiers encourage you to do.
In Conclusion
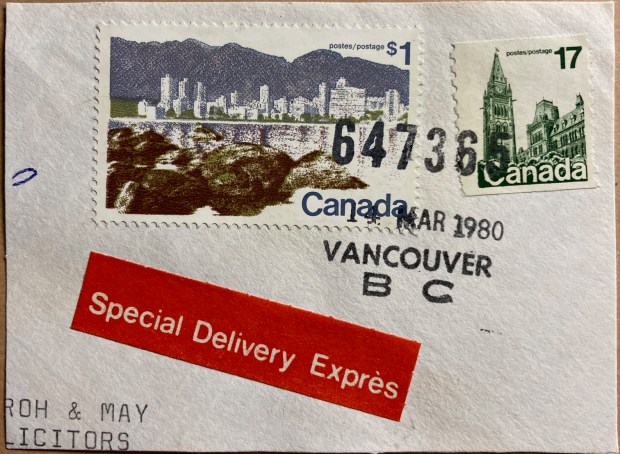
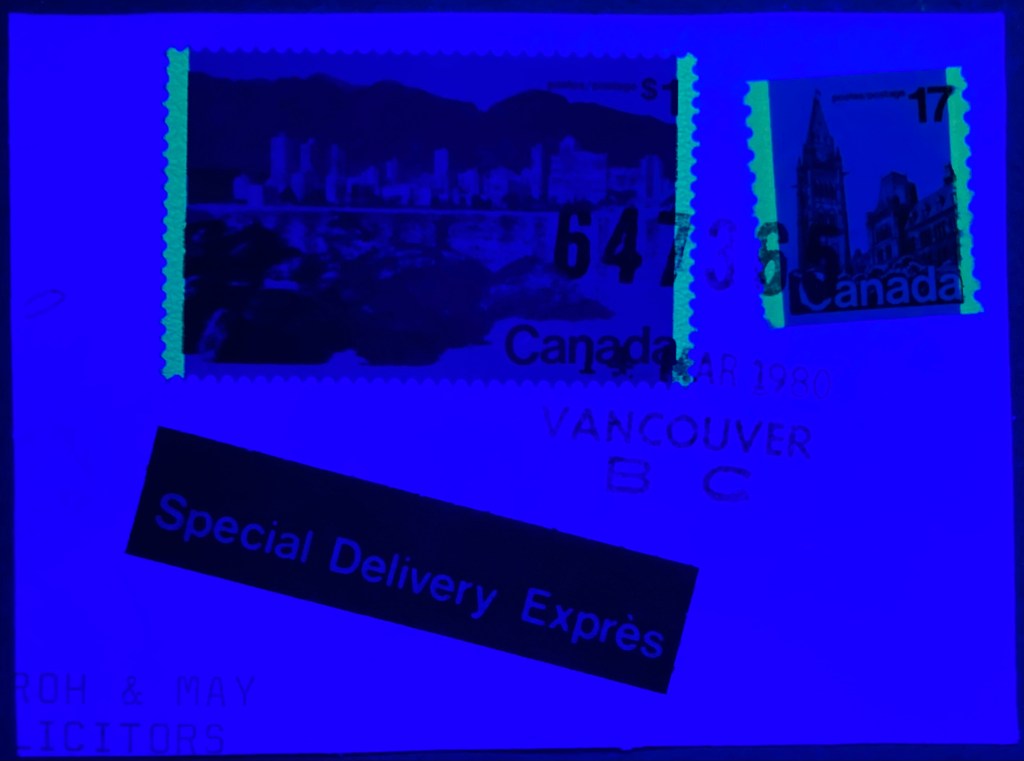
I hope you enjoyed this nerdy journey through the world of postmarks on stamps and their relation to geography. I’ll leave you with one final, strange fact that you may be unaware of. The lead image at the top of this post depicts a stamp of Vancouver’s skyline, that happened to be postmarked in Vancouver, Canada in March 1980. It’s always neat when you find these examples where the postmark and the stamp are linked. But did you know Vancouver glows in the dark? Countries began tagging stamps with fluorescence or phosphorescence in the mid 20th century, so machines could optically process mail. You can see them glow using special UV lamps – just be sure to wear protective eye wear (the bright yellow lines along the edges of the stamp are the tags).
There’s been a lot of turmoil emanating from Washington DC lately. One development that’s been more under the radar than others has been the modification or removal of US federal government datasets from the internet (for some news, see these articles in the New Yorker, Salon, Forbes, and CEN). In some cases, this is the intentional scrubbing or deletion of datasets that focus on topics the current administration doesn’t particularly like, such as climate and public health. In other cases, the dismemberment of agencies and bureaus makes data unavailable, as there’s no one left to maintain or administer it. While most government data is still available via functioning portals, most of the faculty and researchers I work with can identify at least a few series they rely on that have disappeared.
Librarians, archivists, researchers, professors, and non-profits across the country (and even in other parts of the world), have established rescue projects, where they are actively downloading and saving data in repositories. I’ve been participating in these efforts since January, and will outline some of the initiatives in this post.
The Internet Archive
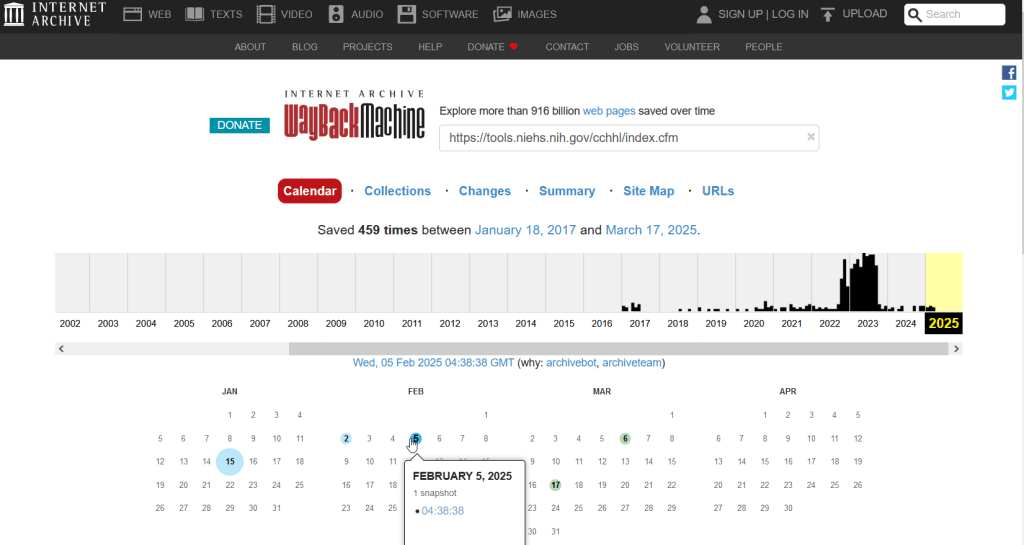
The place of last resort for finding deleted web content is the Internet Archive. This large, non-profit project has been around as long as the web has existed, with the goal of creating a historic archive of the internet. It uses web crawlers or spiders to creep across the web and make copies of websites. With the Wayback Machine, you can enter a URL and find previous copies of web pages, including sites that no longer exist. You’re presented with a calendar page where you can scroll by year and month to select a date when a page was captured, which opens up a copy.
This allows you to see the content, navigate through the old website, and in many cases download files that were stored on those pages. It’s a great resource, but it can’t capture everything; given the variety and complexity of web pages and evolving web technologies, some websites can’t be saved in working order (either partially or entirely). Content that was generated and presented dynamically with JavaScript, or was pulled and presented from a database, is often not preserved, as are restricted pages that required log-ins.
An archived copy of the NIEHS page (the actual website was deleted in mid February 2025)
The Internet Archive also hosts a number of special collections where folks have saved documents, images, sound and video, and software. For example, you can find many research articles that are available in PubMed from the PubMed Central collection, a ton of documents from the USDA’s National Agricultural Library, and about 100 GB of data someone captured from the CDC in January 2025. A large project called the End of Term Archive was launched in 2008 to capture what federal government websites looked like at the end of each presidential term. The pages are saved in a special collection in the IA.
Data Rescue Project
Dozens of new data archiving projects were launched at the end of 2024 and beginning of 2025 with the intention of saving federal datasets. The Data Rescue Project is one of the larger efforts, which has been driven by data librarians and archivists with non-profit partners. Professional groups including IASSIST, ICPSR, RDAP, the Data Curation Network, and the Safeguarding Research & Culture project have been active organizers and participators. While this will be an oversimplification, I’ll summarize the project as having two goals
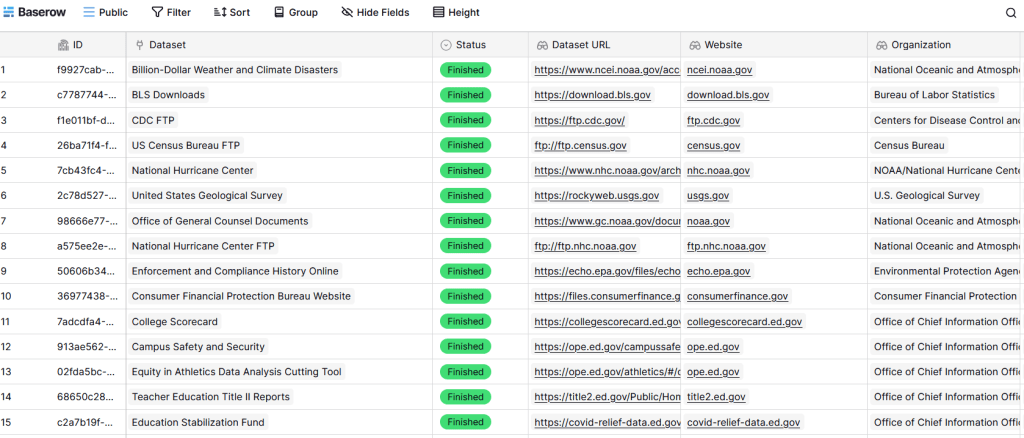
The first goal is to keep track of what the other archiving projects are, and what they have saved. To this end, they created the Data Rescue Tracker, which has two modules. The Downloads List is an archive of datasets that have been saved, with details about where the data came from and locations of archived copies. The Maintainers List is a catalog of all the different preservation projects, with links to their home pages. There is also a narrative page with a comprehensive list of links to the various rescue efforts, data repositories, alternate sources for government data, and tools and resources you can use to save and archive data.
The Data Rescue Tracker Downloads List
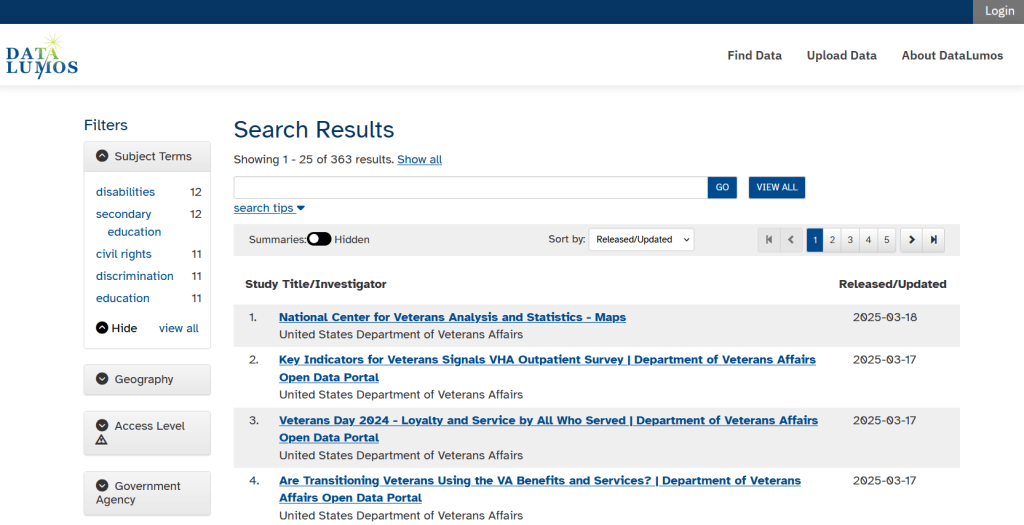
The second goal is to contribute to the effort of saving and archiving data. The team maintains an online spreadsheet with tabs for agencies that contain lists of datasets and URLs that are currently prioritized for saving. Volunteers sign up for a dataset, and then go out and get it. Some folks are manually downloading and saving files (pointing and clicking), while others write short screen scraping scripts to automate the process. The Data Rescue Project has partnered with ICPSR, a preeminent social science research center and repository in the US, at the University of Michigan. They created a repository called DataLumos, which was launched specifically for hosting extracts of US federal government data. Once data is captured, volunteers organize it and generate metadata records prior to submitting it to DataLumos (provided that the datasets are not too big).
DataLumos archive for federal government datasets, maintained by ICPSR
Most of the datasets that DRP is focused on are related to the social sciences and public policy. The Data Rescue Project coordinates with the Environmental and Government Data Initiative and the Public Environmental Data Partners (which I believe are driven by non-profit and academic partners), who are saving data related to the environment and health. They have their own workflows and internal tracking spreadsheets, and are archiving datasets in various places depending on how large they are. Data may be submitted to the Internet Archive, the Harvard Dataverse, GitHub, SciOp, and Zenodo (you can find out where in the Data Rescue Tracker Download’s List).
Mega Projects
There are different approaches for tackling these data preservation efforts. For the Data Rescue Project and related efforts, it’s like attacking the problem with millions of ants. Individual people are coordinating with one another in thousands of manual and semi-automated download efforts. A different approach would be to attack the problem with a small herd of elephants, who can employ larger resources and an automated approach.
For example, the Harvard Law School Library Innovation Lab launched the Archive of data.gov, a large project to crawl and download everything that’s in data.gov, the US federal government’s centralized data repository. It mirrors all the data files stored there and is updated regularly. The benefit of this approach is that it captures a comprehensive amount of data in one go, and can be readily updated. The primary limitation is that there are many cases where a dataset is not actually stored in data.gov, but is referenced in a catalog record with a link that goes out to a specific agency’s website. These datasets are not captured with this approach.
If trying to find back-ups is a bit bewildering, there’s a tool that can help. Boston University’s School of Public Health and Center for Health Data Science have created a find lost* data search engine, which crawls across the Harvard Project, DataLumos, the Data Rescue Project, and others.
Beyond the immediate data preservation projects that have sprung up recently, there are a number of large, on-going projects that serve as repositories for current and historical datasets. Some, like IPUMS at the University of Minnesota and the Election Lab at MIT focus on specific datasets (census data for the former, election results data for the latter). There are also more heterogeneous repositories like ICPSR (including OpenICPSR which doesn’t require a subscription), and university-based repositories like the Harvard Dataverse (which includes some special collections of federal data extracts, like CAFE). There are also private-sector partners that have an equal stake in preserving and providing access to government data, including PolicyMap and the Social Explorer.
Wrap-up
I’ve been practicing my Python screen scraping skills these past few months, and will share some tips in a subsequent post. I’ve been busy contributing data to these projects and coordinating a response on my campus. We’ve created a short list of data archives and alternative sources, which captures many of the sources I’ve mentioned here plus a few others. My library colleagues in the health and medical sciences have created a list of alternatives to government medical databases including PubMed and ClinicalTrials.gov
Having access to a public and robust federal statistical system is a non-partisan issue that we should all be concerned about. Our Constitution justifies (in several sections) that we should have such a system, and we have a large body of federal laws that require it. Like many other public goods, the federal statistical system contributes to providing a solid foundation on which our society and economy rest, and helps drive innovation in business, policy, science, and medicine. It’s up to us to protect and preserve it.
I’m often asked about what the best approaches are for comparing US census data over time, to account for changes in census geography and to limit the amount of data processing you have to do in stitching data from different census years together. Census geography changes significantly each decade, and by and large the Census Bureau does not compile and publish historical comparison tables.
My primary suggestion is to use the National Historical Geographic Information System or NHGIS (I’ll mention some additional suggestions at the end of this post). Maintained by IPUMS at the University of Minnesota, NHGIS is the repository for all historic US census summary data from 1790 to present. While most of the data in the archive is published nominally (the format and structure in which the data was originally published), they do publish a set of Time Series Tables that compile multiple years of census data in one table. These tables come in two formats:
Nominal tables: the data is published “as is”, based on the boundaries that existed at each point in time. If a geography was added or dropped over the course of the years, it falls in or out of the table in the given year that the change occurred. With a few exceptions, the earliest nominal tables begin with the 1970 census and are published for eight geographies: nation, regions, divisions, states, counties, census tracts, county subdivisions, and places.
Standardized tables: the data has been normalized, where a geography for a single time period serves as the basis for all data in the table. The NHGIS is currently using 2010 as the basis, so that data prior and subsequent to 2010 has been modified to fit within the 2010 boundaries. This is achieved by aggregating block or block group data from each period to fit within the 2010 boundaries, and apportioning the data in cases where a block or group is split by a boundary. The earliest standardized tables begin with the 1990 census, and cover the basic 100% count data. Data is published for ten geographies: states, counties, census tracts, block groups, county subdivisions, places, congressional districts (as defined for the 110th-112th Congresses, 2007-2013), core based statistical areas (using 2009 metro area definitions), urban areas, and ZIP Code Tabulation Areas (ZCTAs).
Included in the documentation is a full list of time series tables, and whether they are available in nominal or standardized format. The availability of specific time periods and geographies varies. As of late 2024, the availability of standardized tables that include the 2020 census is currently limited to what was published in the early Public Redistricting Files. This will likely change in the near future to include additional 2020 data, and it’s possible that the standardized geography will eventually switch from 2010 to 2020 geography.
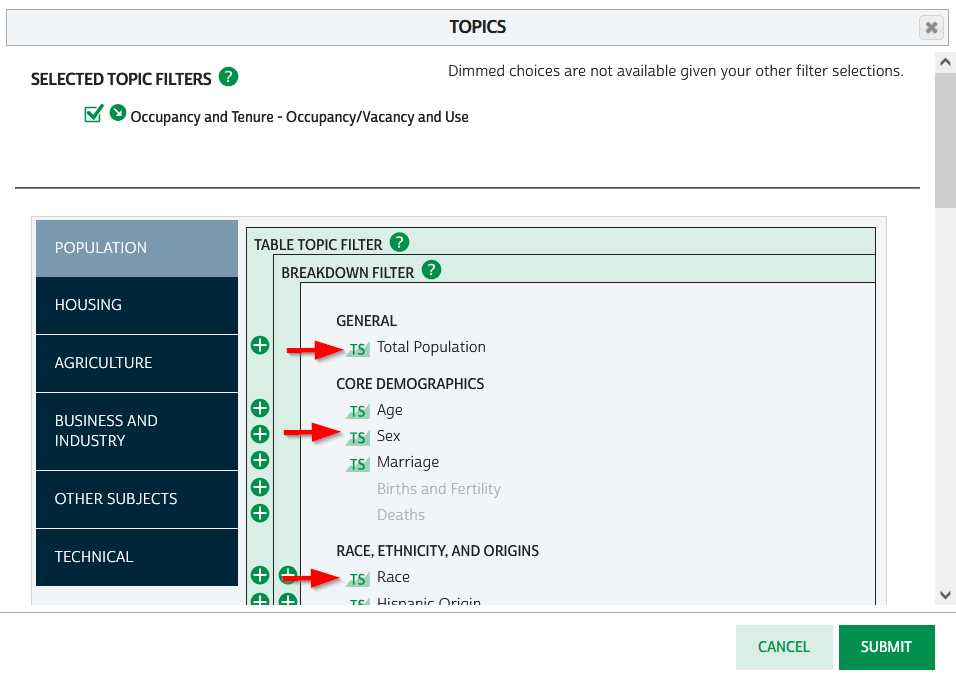
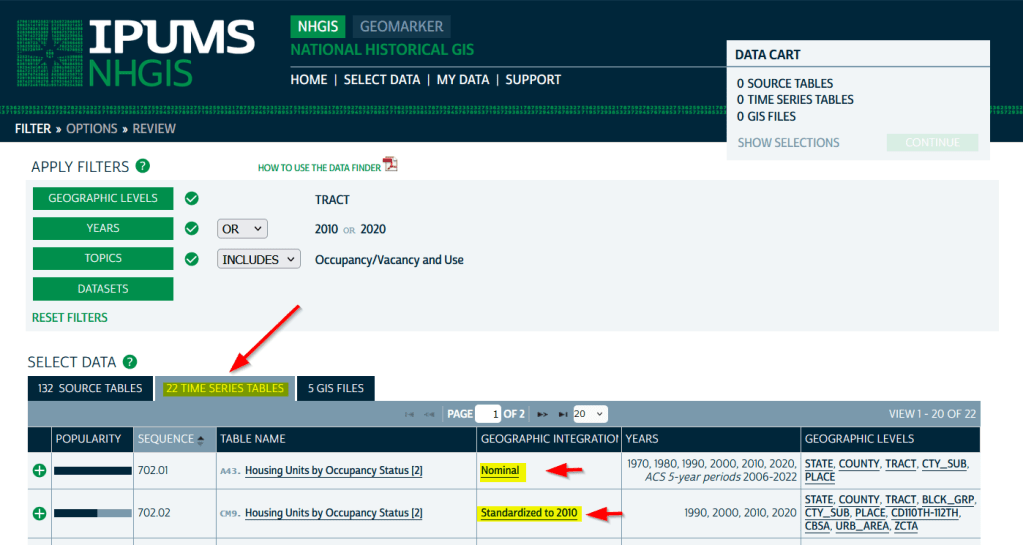
To access the Time Series Tables, you can browse the NHGIS without an account but you’ll need to create one in order to download anything. Once you launch NHGIS click on the Topics filter. In the list of topics, any topic under the Population or Housing category that has a “TS” flag next to it has at least one time series table. In the example below, I’ve used the filters to select census tracts for Geographic Level, 2010 and 2020 for Years, and Housing – Occupancy and Vacancy status as my Topic.
In the results at the bottom, the original Source Tables from each census are shown in the first tab. The Time Series Tables can be viewed by selecting the adjacent tab. The first two tables in this example are Housing Units by Occupancy Status. Clicking on the name of the tables reveals the variables that are included, and the source for the statistics. The first table is a nominal one that stretches from 1970 to the most recent ACS. The second table is a standardized one that covers 1990 to 2020. I’ve checked both boxes to add these to my cart.
The third tab in the results are GIS Files. If we want to map standardized data, we would choose just the boundaries for the standardized year, as all of the data in the table has been modified to fit these boundaries. If we were mapping nominal data, we would need to download boundary files for each time period and map them separately (unless they were stable geographies like states that haven’t changed since 1970).
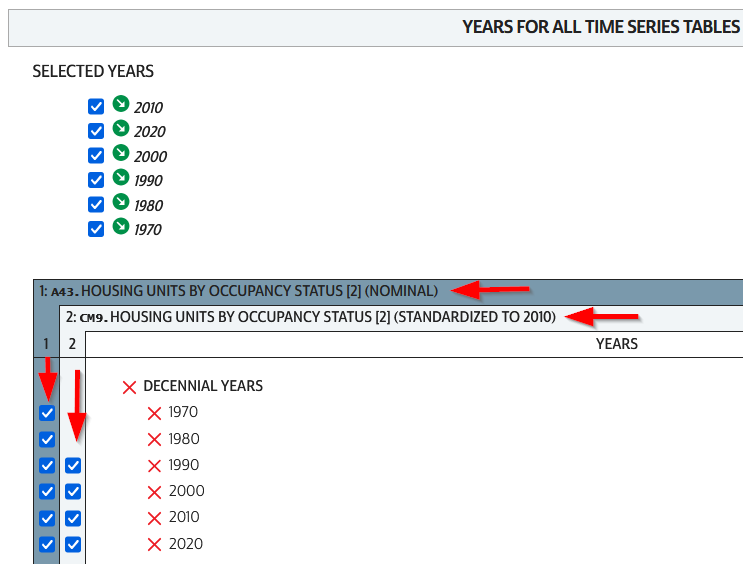
We hit the Continue button in the Cart panel when we’re ready to download. By default the extract will only include years and geographies we have filtered for. To add additional years or geos we can add them on this next screen. I’ve modified my list to get all available decennial years for each table. Note that if you’re going to select 5-year ACS data for nominal tables, choose only a few non-overlapping periods. In most cases you can’t filter geographies (i.e. select tracts within a state), you have to take them all. On the final screen you choose your structure; CSV is usually best, as is Time varies by column. Once you submit your request you’ll be prompted to log in if you haven’t already done so. Wait a bit for the extract to compile, then you can download the table and codebook.
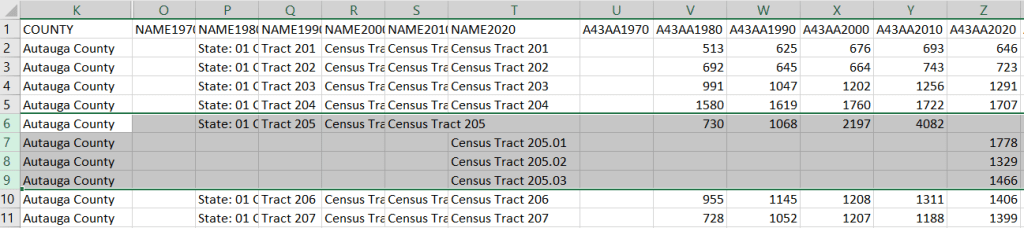
A portion of the nominal table is depicted below. This table includes identifiers and labels for each of the census years. The variables follow, ordered by variable and then by year. In this example, occupied housing units from 1970 to 2020 appear in the first block, and vacant units in the second. All the 1970 census tract values for Autauga County, Alabama are blank (as many rural counties in 1970 were un-tracted). We can see that values for census tract 205 run only from 1980 to 2010, with no value for 2020. The tract was split into three parts in 2020, and we see values for tracts 205.01, .02, and .03 appear in 2020. So in the nominal tables, geographies appear and disappear as they are created or destroyed. However, if geographic boundaries change but the name and designation for the geography do not, that geography persists throughout the time series in spite of the change.
A portion of the standardized table is below. This table only includes identifiers and labels for the 2010 census, as all data was modified to fit the tract geography of that year. The values for each census year except 2010 are published in triplicate: an estimate, and a lower and upper bound for the estimate. If the values in these three columns differ, it indicates that a block (or block group) was split and reapportioned to fit within the tract boundary for 2010 (you may also see decimals, indicating a split occurred). You’d use the estimate in your work, while the bounds provide some indication of the estimate’s accuracy. Note in this table, tract 205 in Autauga County persists from 1990 to 2020, as it existed in 2010. Data from the three 2020 tracts was aggregated to fit the 2010 boundary.
The crosswalk tables that IPUMS used to create the standardized data are available, if you wanted or needed to generate your own normalized data. The best approach is to proceed from the bottom up, aggregating blocks to reformulate the data to the geography you wish to use. Some decennial census data, and all data from the ACS, is not available at the block level, which necessitates using block groups instead.
There are some alternatives for obtaining or creating time series census data, which could fit the bill depending on your use case (esp if you are looking at larger geographies). There’s also reference material that can help you make sense of changes.
The Longitudinal Tract Database at Brown University provides tract-level crosswalks from 1970 to 2020. They also provide some pre-compiled data tables generated from the crosswalk.
Use an interactive mapping tool like the Social Explorer to make side by side comparison maps from two time periods. They also incorporate some of the NHGIS standardized data into their database. (SE is a subscription-based product; if you’re at a university see if your library subscribes).
In this post I’ll demonstrate how to create least cost paths using QGIS and GRASS GIS, and in doing so will describe how a cost surface is constructed. In a surface analysis, you model movement across a grid whose values represent friction encountered in moving across it. In computing a least cost path, you’re seeking an optimal route from an origin to the closest destination, where ‘close’ incorporates distance and ease of movement across that surface. These kinds of analyses are often conducted in the environmental sciences, in modeling the movement of water across terrain, and in zoology in predicting migration paths for land-based animals.
In this example the idea was to chart the origin of settlements and possible trade routes in ancient history. In applications where we’re studying human activity, network analysis is typically used instead. Networks use geometry, where a node is a place or person, and connections between nodes are indicated with lines. Lines typically have a value associated with them that identify either the strength of a connection, or conversely friction associated with moving between nodes. The idea for this project was to identify how networks formed, so the surface analysis served as a proto-network analysis. While there were roads and maritime routes in pre-modern times, these networks were weaker and less dense. Charting movement over a surface representing terrain could provide a decent approximation of routes (but if you’re interested in ancient Roman network routing, check out the ORBIS project at Stanford).
This example stems from a project I was helping a PhD student with; I don’t want to replicate his specific study, so I’ve modified the data sources and area of focus to model movement between large settlements and stone quarries in the ancient Roman world. My goal is to demonstrate the methods with a plausible example; if we were doing this as part of an actual study, we would need to be more discriminating in selecting and processing our data.
Preliminary Work
The Pleiades project will serve as our source for destinations; it’s an academic gazetteer that includes locations and place names for the ancient and early medieval world, stretching from Europe and North Africa through the Middle East to India. It’s published in many forms, and I’ve downloaded the Pleiades Data for GIS in a CSV format. Using QGIS, I used the Add Delimited Text tool to plot the places.csv to get all of the locations, and joined that file to the places_place_type.csv file which contains different categories of places. I used Select by Attributes to get locations classified as quarries, and exported the selection out to a geopackage.
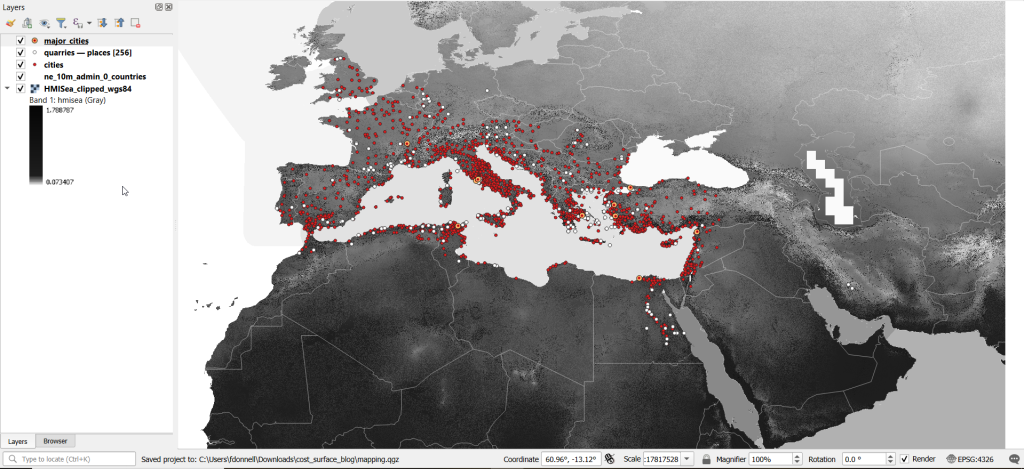
The Pleiades data includes a category for settlements, but there are about ten thousand of these and there isn’t an easy way to create a subset of the largest places. So I opted to use Hanson’s dataset of the largest settlements in the ancient Roman world to serve as our source for origins (about 1,400 places). This data was packaged in an Excel file; I plotted the coordinates using the Create Points Layer from Table tool in QGIS and converted the result to a geopackage. For testing purposes, I selected a subset of ten major cities and saved them in a separate layer: Athenae, Alexandria (Aegyptus), Antiochia (Syria), Byzantium, Carthago, Ephesus, Lugdunum, Ostia, Pergamum, Roma.
For the friction grid, I downloaded a geoTIFF of the Human Mobility Index by Ozak. The description from the project:
“The Human Mobility Index (HMI) estimates the potential minimum travel time across the globe (measured in hours) accounting for human biological constraints, as well as geographical and technological factors that determined travel time before the widespread use of steam power.”
There are three separate grids that vary in extent based on the availability of seafaring technology. I chose the grid that incorporates seafaring prior to the advent of ocean-going ships, which is appropriate for the Mediterranean world during the classical era. The HMI is a global grid at 925 meter resolution. To minimize processing time, I clipped it to a bounding box that encompasses the area of study. The grid is in the World Cylindrical Equal Area system; I reprojected it to WGS 84 to match the rest of the layers. As long as we’re not measuring actual distances, we don’t need to worry about the system we’re using (but if we were, we’d use an equidistant system). Since the range of values is small and it’s hard to see differences in cell values, I symbolized the grid as single-band psuedo color and used a quantiles classification scheme with 12 categories.
Lastly, I grabbed some modern country boundaries from Natural Earth to serve as a general frame of reference. A screenshot of the workspace is below:
Least Cost Path in QGIS
QGIS has a third-party plug-in for doing a least cost path analysis, which works fine as long as you don’t have too many origin points. Go to Plugins > Manage and Install Plugins > Least Cost Path to turn it on. Then open the Processing toolbox and it will be listed at the bottom. See the screenshot below for the tool’s menu. The Cost raster layer is the friction surface, so the human mobility index in this example. The start points are the ten major cities and the end points are the quarries. The start-point layer dialog only accepts a single point; if you have multiple points, hit the green circular arrow button to iterate across all of them. There’s a checkbox for connecting the start point to just the nearest end point (as opposed to all of them). Save the output to a geopackage.
It took about five minutes to run the analysis and iterate across all ten points. Each path is saved in a separate file, but since they have an identical structure I subsequently used Vector > Data Management Tools > Merge Vector Layers to combine them into one file. The attribute table records the end point ID (for the quarry) and the accumulated cost, but does not include the origin ID; this ID is the number 1 repeated each time, as the tool was iterating over the origin points. We can see the result below; for Athens and Ephesus in the south, land routes were shortest, whereas for Pergamum and Byzantium in the north it was easier (distance and friction-wise) to move across the sea.
While this worked fine for ten cities, it would take a considerable amount of time to compute paths for all 1,400. The problem here is that the plugin was designed for one point at a time. Let’s outline the process so we can understand how alternatives would work.
Cost Surface Analysis
To calculate a least cost path, the first step is to create a cost surface, where we take our friction grid and the destinations and calculate the total cost of movement across all cells to the nearest destination. First, the destinations are placed on the grid, and they become the grid sources. Then, the accumulated cost of moving from each source to its adjacent cells is calculated. For horizontal and vertical movement, it’s the sum of the friction values divided by two, and for diagonal movement it’s the sum of the friction values divided by two then multiplied by 1.4142. Once those calculations are performed, those adjacent cells are assigned to each source. Next, the lowest accumulated cost cell in the grid is identified, the cost for moving to its unassigned neighbors is calculated, and these cells are assigned to the same source. This process is repeated by cycling through the lowest accumulated value until all calculations for the grid are finished. Illustrated in the example below, which I derived from Lloyd’s Spatial Data Analysis (2010) pp. 165-168.
For each cell, three items are recorded, and are saved either as separate bands in one raster, or in three separate raster files:
Accumulated cost of moving to that cell from the nearest source
Assignment or allocation of the cell to its source (the nearest one to which it “belongs”)
A vector that indicates direction from that source
With these cost surfaces, we can take the second step of calculating the least cost path. We place a number of starting points onto this surface, and each point is assigned to the closest destination based on where its grid cell was allocated. The direction to that destination is traced backward using the direction grid, and the total cost of movement is taken from the accumulated cost surface.
Knowing how this process works, there are two practical conclusions we can draw. First, when computing the cost surface, you use your destinations (not the origins) as the source for the cost surface. You use the origins as the start points for the least cost path. Second, there’s no need to recalculate the cost surface for every origin point; you only need to do this once. That’s why the QGIS plugin took so long; it was recomputing the cost surface each time. Knowing this, we can use GRASS GIS to compute the paths, as it’s designed to compute the surface just once (and it’s data structure will also boost performance a bit).
Cost Surface Analysis in GRASS
GRASS GIS comes bundled with QGIS. While it’s possible to run a number of GRASS tools directly within QGIS, it’s a bit undesirable as you’re not able to access the full range of parameters or options for each GRASS command. I opted to create the GRASS environment in QGIS, and loaded all the necessary data into the GRASS format. Then, I flipped over to the GRASS GUI to do the analysis.
GRASS uses a distinct database structure and file format, and we need to create a GRASS workspace and load our data into that database in order to use the cost surface tools. I followed the steps in the QGIS manual for creating a GRASS environment and loading data into a GRASS database. Once you create the database and mapset, you use the QGIS Browser to browse to the grassdata folder and designate your new mapset as your working mapset (mapsets have the little green grass icon beside them). With the GRASS tools open, I used v.in.ogr.qgis to load my my cities and quarries layers into this mapset, and r.in.gdal.qgis to load the mobility index (if these layers weren’t already in your QGIS project, you’d use the tools that don’t have the qgis suffix, i.e. v.in.ogr).
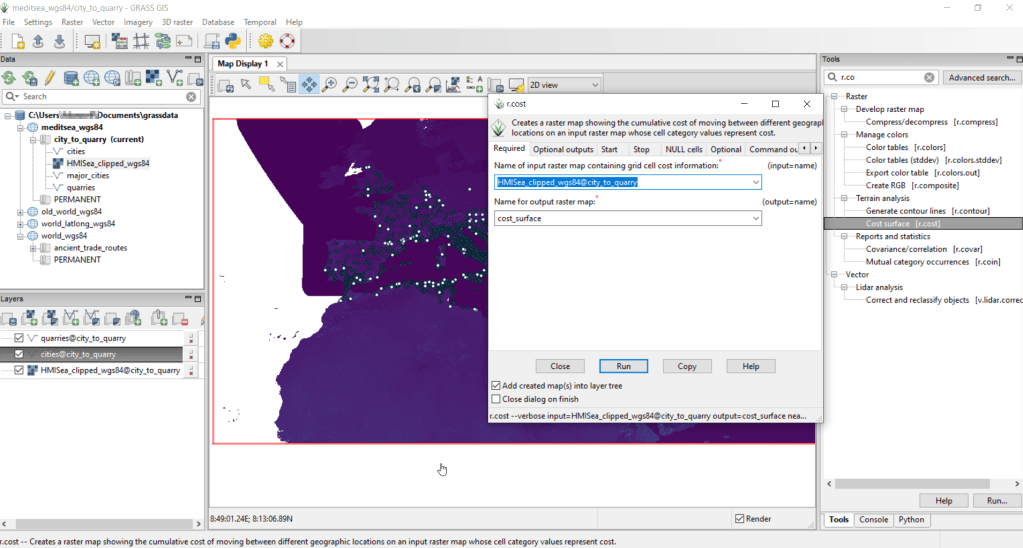
After exiting QGIS and launching GRASS, you select the mapset under the grassdata database at the top, right click and choose Switch mapset, and choose the mapset you want to work with (if you don’t see it, hit the database icon to browse and connect to the grassdata folder). You can display the layers in the GRASS window to visualize them, but it’s not necessary for running the tools. In the tool menu on the right, search for the Cost surface tool, r.cost, and choose the following options:
Required: input raster map with grid cell cost is the human mobility index, and output raster is cost_surface
Optional outputs: output raster with nearest start point as allocation_surface, output raster with movement as direction_surface
Start: vector starting points for the cost surface are the destinations, the quarries
Optional: check verbose output (to get more details on errors)
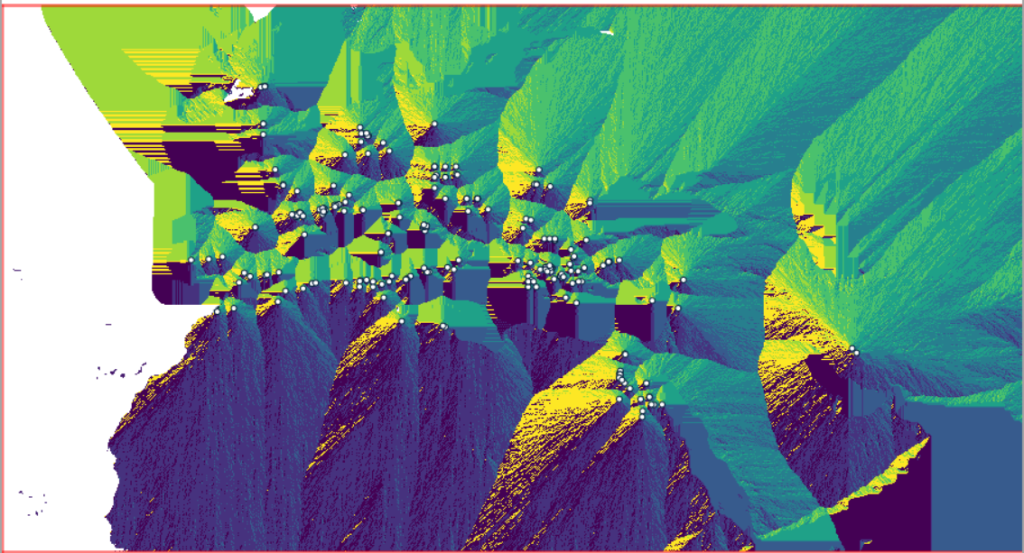
Running this operation on all 1,400 cities took a matter of seconds, and all three rasters described in the previous section were generated: cost, allocation, direction (shown below).
Using these outputs, we can run the Least cost route or flow tool, which is called r.drain (as it’s often used in earth sciences to chart the path that water will drain based on elevation).
Required: Name of input elevation or cost surface raster is cost_surface, Name of output raster path: is path_raster
Cost surface: check the Input raster map is a cost surface box, Name of input movement direction raster is direction_surface
Start: Name of starting points vector map: are the origins (cities)
Path settings: choose ONE option that you’d like to record (or none)
Optional: check Verbose mode, Name for output drain vector is path_vector
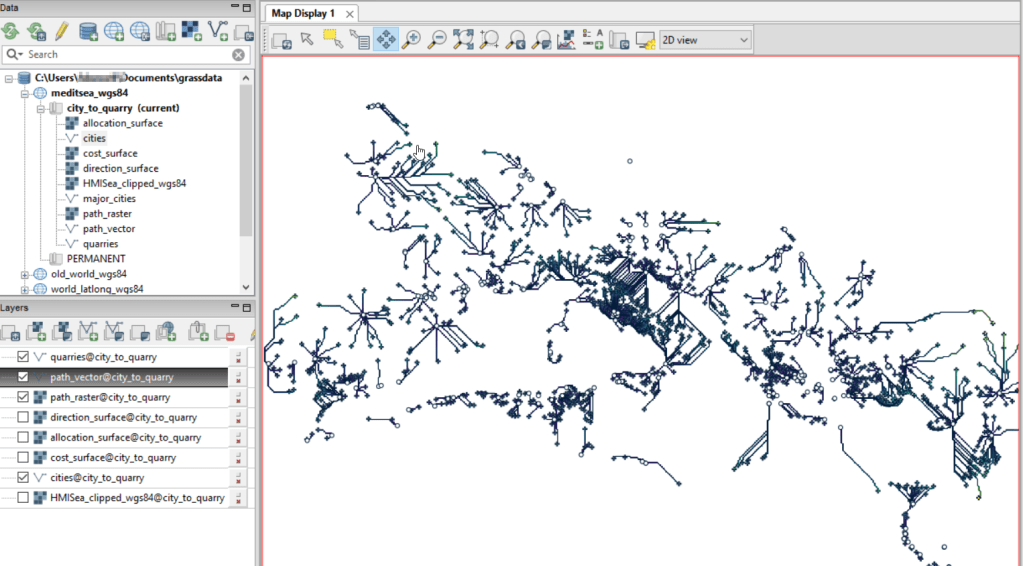
This also took mere seconds to complete (!) and generated the paths from each origin (city) to the closet destination (quarry) over the surface as both raster cells and vector lines. The output in GRASS is shown below.
At this stage, we can hop back into QGIS, and load these output paths into our original project to symbolize and study what’s going on. Notice the settlements in northeastern Italy and along the Dalmatian coast; for many of them the least cost path is to a quarry across the sea rather than through rugged mountainous terrain. Even though some quarries in the mountains may be closer in actual distance, it’s a tougher path to travel.
Conclusion
The benefit of using GRASS is that we can run these processes fairly quickly for large datasets. The GRASS commands can also be compiled into a batch script, so you can create a documented and automated process instead of having to drill through multiple menus.
A big downside of the GRASS tools for this analysis is that the resulting vector paths contain no information about the origin or destination points, and only the raster path output carries along values. You might be able to generate this information through some extra steps; using the QGIS field calculator, you can get the coordinates for the start point and end point of each path and add them explicitly to the attribute table. Then take those coordinates, and for the start point of the line select the closest city and get its attributes, and for the end point select the closet quarry and get its attributes. I say “closest” because the vector paths don’t snap perfectly to the start and end points. Modifying the resolution of the human mobility index to make it coarser (fewer cells) might help to resolve this, or converting the origin and destination points to a raster of the same resolution as the index. Alternatively, if you incorporate the GRASS commands into a Python script, you could iterate over the origins in the least cost path analysis and record the origin IDs as you step through.
I haven’t worked all the pieces, but hopefully this will be useful for those of you who are interested in conducting a basic cost surface analysis in open source. The student I was helping was interested in measuring the density of the paths across a grid, so this process worked for him as he didn’t need to associate the paths with origins and destinations. Beyond FOSS GIS, ArcGIS Pro has a full suite of tools for cost surface analysis, and the underlying methods and logic are the same.
I carted several boxes of old stuff from my mom’s basement to mine about a year ago, since I finally had a basement of my own for storing boxes of old stuff. This stuff included a bin with my old stamp collection, one of many childhood hobbies. Leafing through it for the first time in decades, my interest was rekindled and I thought this would make for a relaxing, non-screen-based hobby that I could work on for an hour or so in the evenings. I’ve been transferring and re-organizing this collection over the past year.
Similar to other leisurely pursuits that I’ve written about (usually around this time each year), such as video games and hunting for USGS survey markers while hiking, this hobby has a strong connection to geography. Stamps express the geography, culture, and history of the world’s countries in miniature, and collecting them familiarizes you with different places, languages, and currencies. Postage stamps were introduced in the mid 19th century, so any collection will recount modern history, documenting the: aggregation of states into nations and empires, collapse of empires and states into smaller countries, emergence of colonies as independent states, shifting boundaries as countries fought and occupied one another, and coalescence of nations into larger alliances and supra-national bodies.
This natural connection between stamps and geography becomes even more literal when countries depict themselves on stamps through maps, landscapes, and places. In this post I’ll share examples from my collection that illustrate these themes. I recently finished teaching and consulting for S4’s two week GIS Institute; my favorite lecture is the one I give on cartography, a topic that I generally don’t get to cover in classes where I guest lecture. For that talk, I use a gallery of maps to illustrate different aspects of cartographic design, good and bad. I’ll take a similar approach here. While I’ve endeavored to select stamps from a cross-section of the world’s nations, my selection is a bit skewed by luck of the draw, in terms of stamps I happen to have that fit the theme, and as my collection is largely frozen in time. I stopped around 1992, right when the world’s map changed quite a bit at the abrupt end of the cold war.
Maps on Stamps
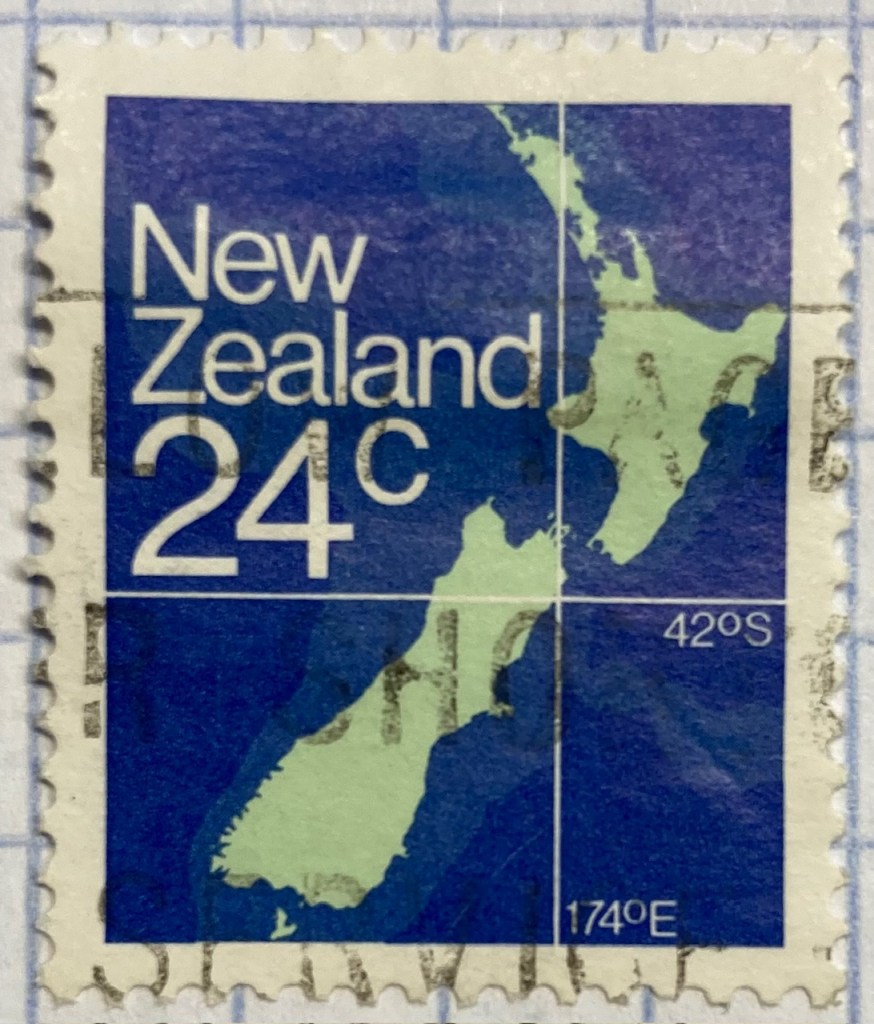
Reference maps are the most basic of maps, designed to show you where places are located. Many countries have issued stamps depicting their location, such as this 1980s stamp from New Zealand. In this case, latitude and longitude coordinates are used to help you identify precisely where the Kiwis are; a southerly spot at 42 degrees south latitude and 174 degrees east longitude.
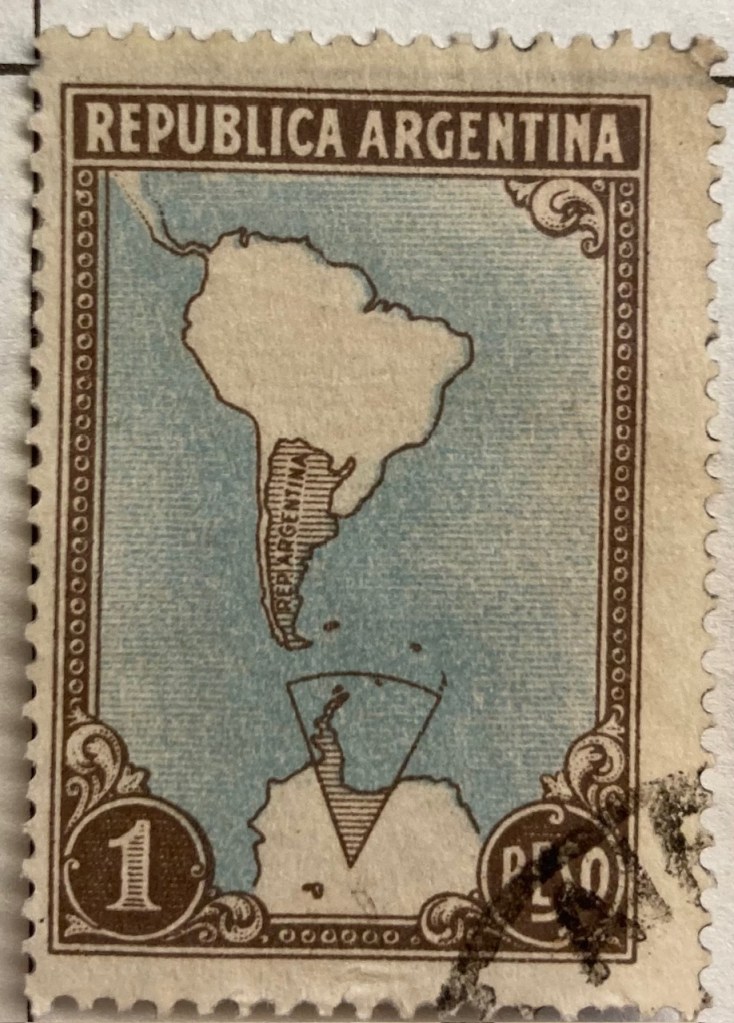
A broader frame of reference can be used for putting a place in context, in order to locate it. This 1930s stamp of Argentina depicts its location in the southern cone of South America, with the Atlantic and Pacific Ocean labeled. We can clearly see that Argentina is the focus of the map based on the shading and title, and figure ground relationship (the distinction between a foreground and background on a flat surface) is established between the country, continent, and ocean so that Argentina is in the foreground (although the bold frame gives us the impression of looking at a painting). There is something else going on though…
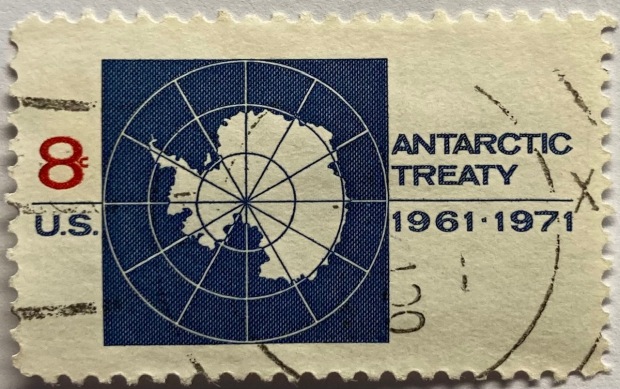
Which is more apparent in this subsequent map from the 1950s. The Falklands Islands (a territory of the UK) are claimed by Argentina and shaded as part of the country in both maps, and in this later stamp so is a big chunk of Antarctica. Nations use maps, and stamps, to assert their authority and control over space, in a message that is affixed to envelopes and sent around the world. A counterpoint to this example is the stamp displayed in the header of this post, a 1971 US stamp commemorating the Antarctic Treaty (which essentially states that no nation can claim or own Antarctica).
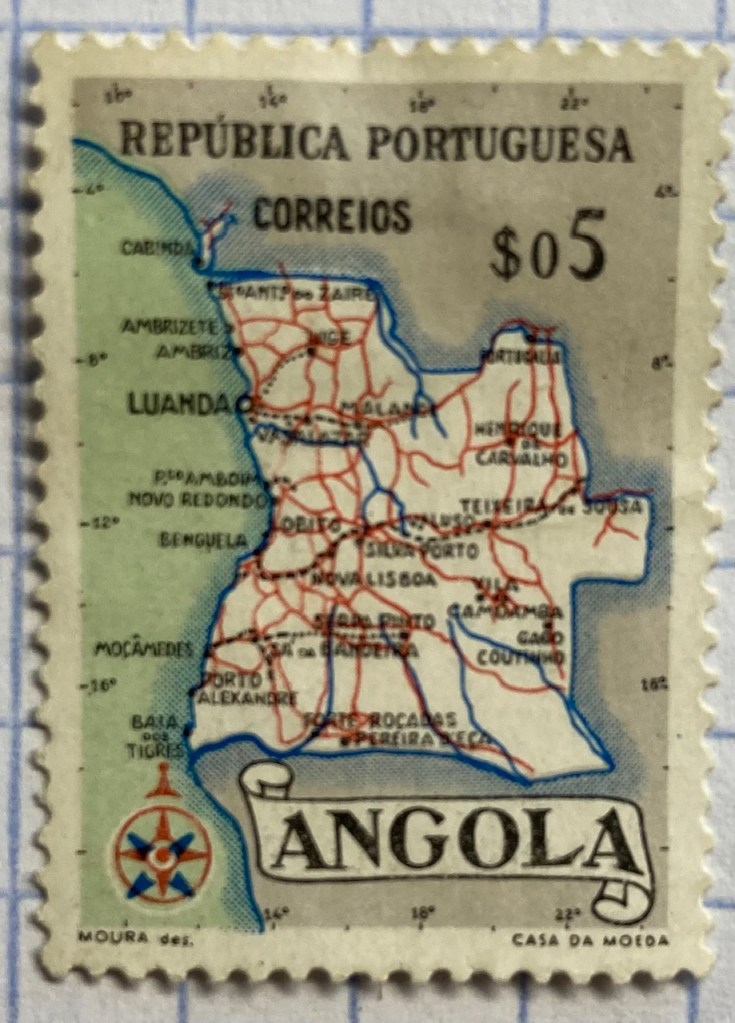
This detailed reference map of Angola was issued as part of a series of stamps in the 1950s, when Angola was a Portuguese colony. The issuance of stamps and depiction of territories was one method for empires to assert authority over their colonies. Visually this is a busy map, as they squeezed in as many cities, roads, railroads, and rivers as they could (emphasizing the development of the colony). The white on grey contrast with a blue halo brings the country to the foreground, and if you look closely you’ll see latitude and longitude coordinates around the edges. Ultimately, too much material squeezed into this little map makes it hard to read.
As colonies gained independence throughout the post World War II period, the depiction of nations switched from being one of colonial authority and control to independence and national pride. It was common for many western states at this time to issue series of stamps that depicted a head of state, using the same design but with bold primary colors for different denominations. India put a unique spin on this practice by depicting their country instead, on a large series issued in the late 1950s (Gandhi had received a multicolored depiction in 1948, one year after independence). The map shows the physical geography of India, framed with a motif that evokes Indian design and culture.
Rwanda also celebrated their independence in a series of multicolored stamps in different denominations. Beyond national pride, these stamps also assert the authority of the new government in the new state (the new president stands in the foreground). Rwanda’s location in Africa is clearly illuminated, emphasized by a halo of white around a dark fill. The geometric frame evokes a distinct African aesthetic.
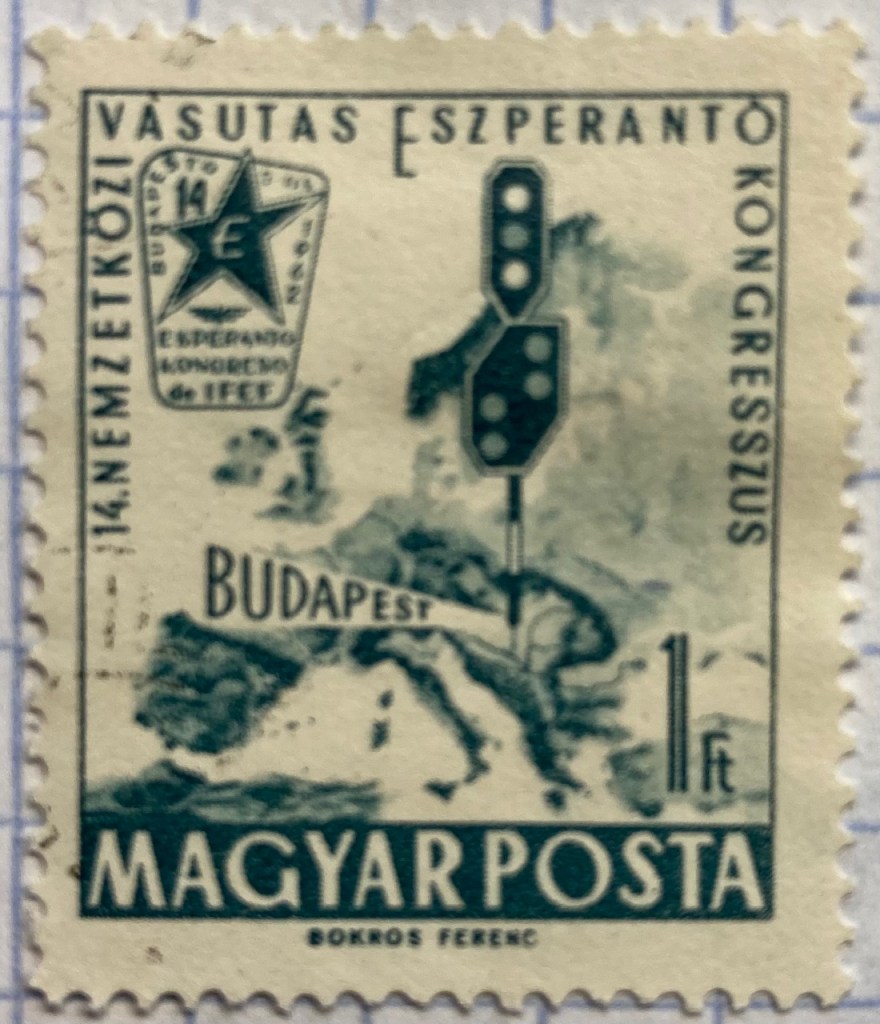
You can emphasize specific locations by modifying the extent and scale of a map. This 1960s stamp from Hungary emphasizes the location of its capital city Budapest as being in the center of Europe. The railroad traffic light and prominent label draw your eye right to the location, while simultaneously blotting out surrounding areas (of lesser importance). Clearly there is no better place for hosting the… Esperanto Congress.
This 1960s Chilean stamp celebrates the Alliance for Progress, a ten year plan launched by US President Kennedy to strengthen economic ties between the US and Latin America and to promote democracy (which meant, stop communism). The choice of a globe rather than a flat map better emphasizes the scope and reach of an initiative than spans vast distances and ties nations together. Not very well as it turned out – the initiative was considered a big failure.
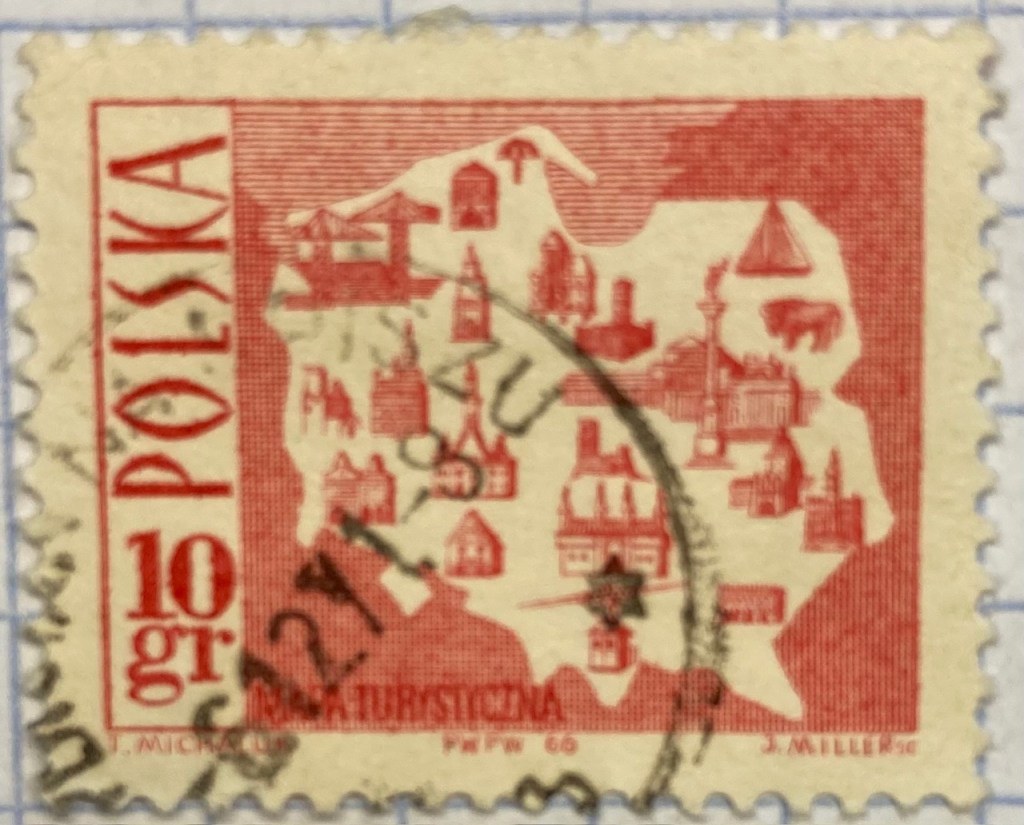
Reference maps show us where things are, while thematic maps show us what’s going on there. As the name suggests, they illustrate a specific theme. This fun 1960s stamp from Poland illustrates the mix of architecture, settlements, and industry across the nation, for tourists (Mapa Turystyczna). Figure ground relationship is clearly established with a white foreground for the state and a red background (solid on land and hashed on water).
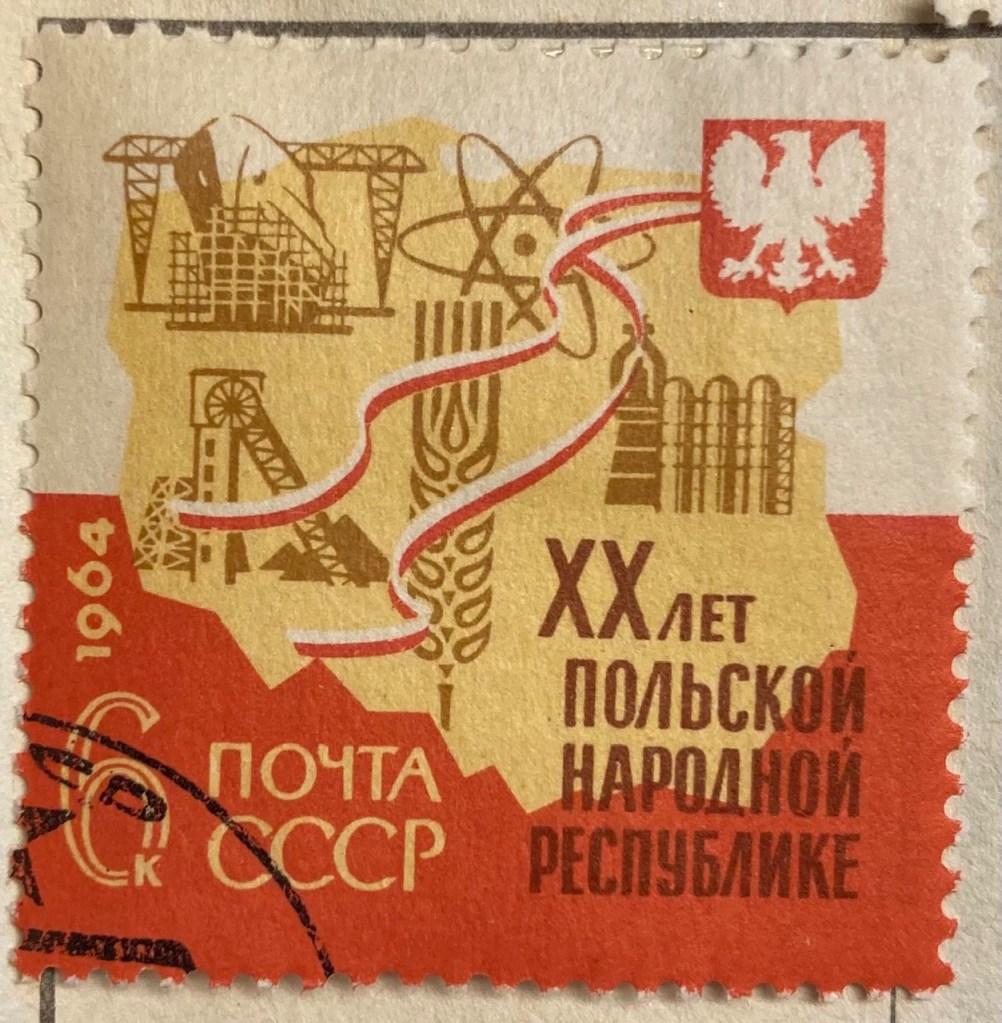
It’s one thing to make map stamps of your own country, but the implications are quite different when your neighbor is making map stamps of you. This map of Poland was part of a series of stamps the USSR issued of its Warsaw Pact neighbors, featuring their friendly and productive comrades, and all the wonderful resources their nations have to share… Also a way of broadcasting to the rest of the world the alliances between nations.
Maps are a visual means of communicating messages about places, sometimes through data, sometimes with symbols or images. These messages can be pretty overt, as in this 1980s stamp from Iran that expresses solidarity with the Afghan resistance to Soviet occupation. Angry, red clenched fists and bayonets – no friendly comrades here. The bayonets come from the direction in which the invaders came, and their downward thrust draws your eyes to the raised fists.
Messages can be more subtle, as in this East German stamp that proclaims the Baltic as the “Friendly Sea” (a better translation is the “Sea of Peace”). The muted blues evoke a nautical theme, and are also subdued and non-threatening, while the halo effect along the coast and variation in tone distinguishes land from water. The DDR began constructing the Berlin Wall one year before this stamp was issued, and it was not a Friendly Wall.
Maps for navigation are a distinct type of reference map, designed to help us get from point A to point B. This 1970s East German stamp was part of a series that depicted lighthouses over nautical charts, which display varying levels of ocean depth (by using shading and labeling depths at spot locations) and a selection of prominent features on land that can be spotted from ships. Useful for navigating the Friendly Sea no doubt.
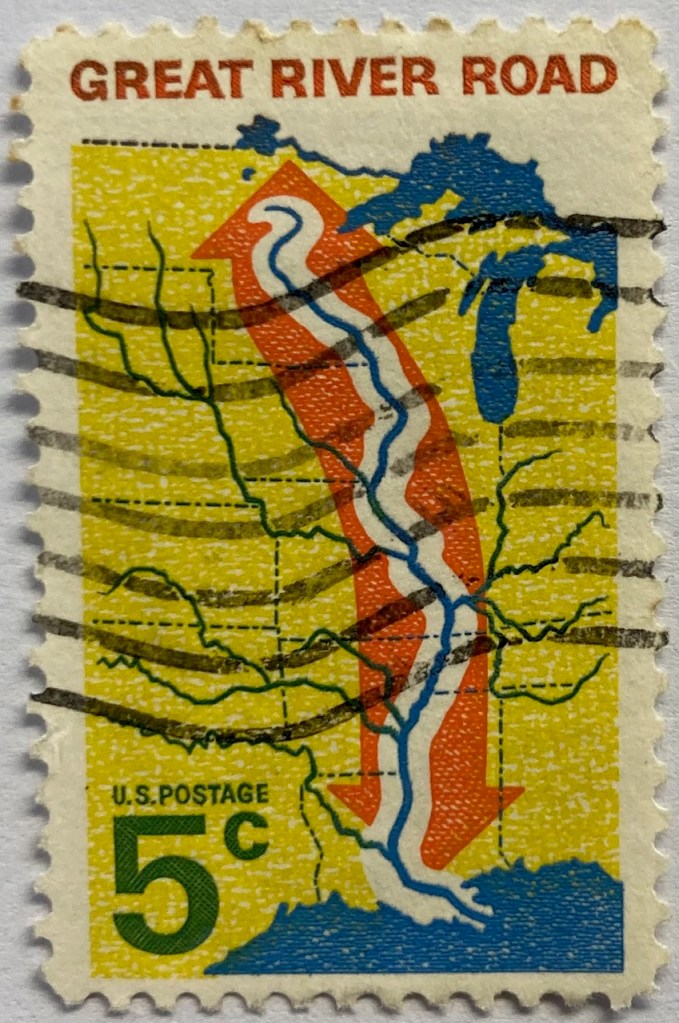
This 1960s map from the US depicts the Mississippi River as the “River Road”. The broad white buffer around the river plants it within the foreground, while the orange arrow imparts a dynamic sense of north / south movement. The tributaries feed into this central trunk, giving us a sense of the breadth of the network. The extent of the map omits the east and west coasts, so we don’t see the overall context for where the river is situated. But it’s a good trade-off, as it focuses our attention squarely on the river system, leaving out the empty spaces that the network doesn’t reach. Still, it would have made sense to indicate that this is the Mississippi River somewhere on the stamp.
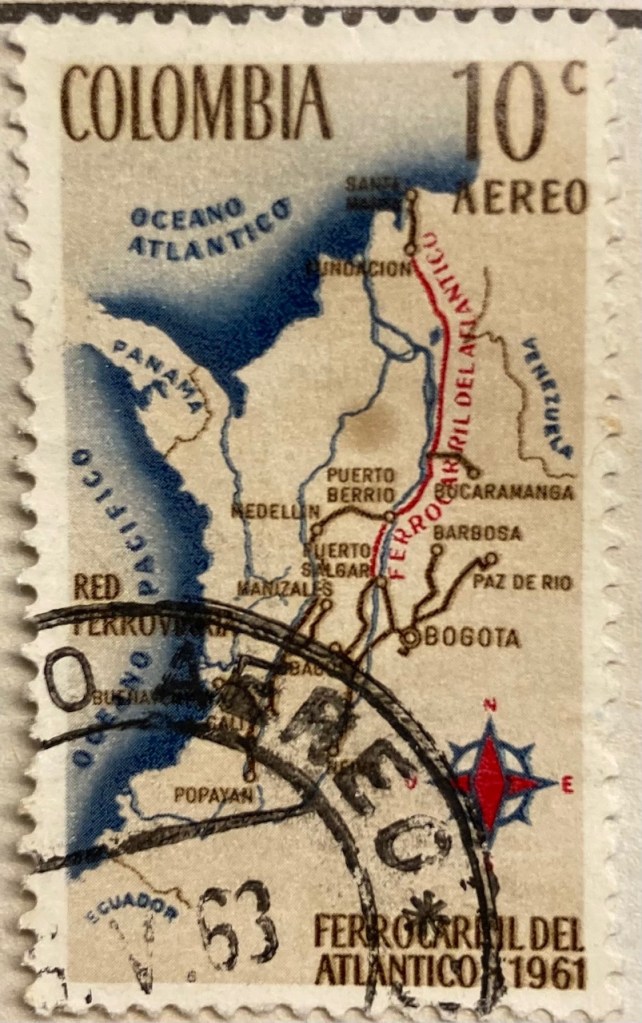
This map of Columbia depicts the Ferrocarril del Atlántico, a railroad line that connects the Atlantic coast to the capital of Bogota and whose construction was quite an achievement. The line is in red, and presumably the brown lines are connecting railroads. The overlapping labels (there are too many of them) make it difficult to read, and the thickness of the lines for railroads, rivers, and country boundaries are the same, making them hard to distinguish. There is no visual hierarchy for the labels to distinguish importance, as the font sizes are all the same, and the labels for the oceans and neighboring countries use the same color, a cartographic no-no. But there is a nice compass rose.
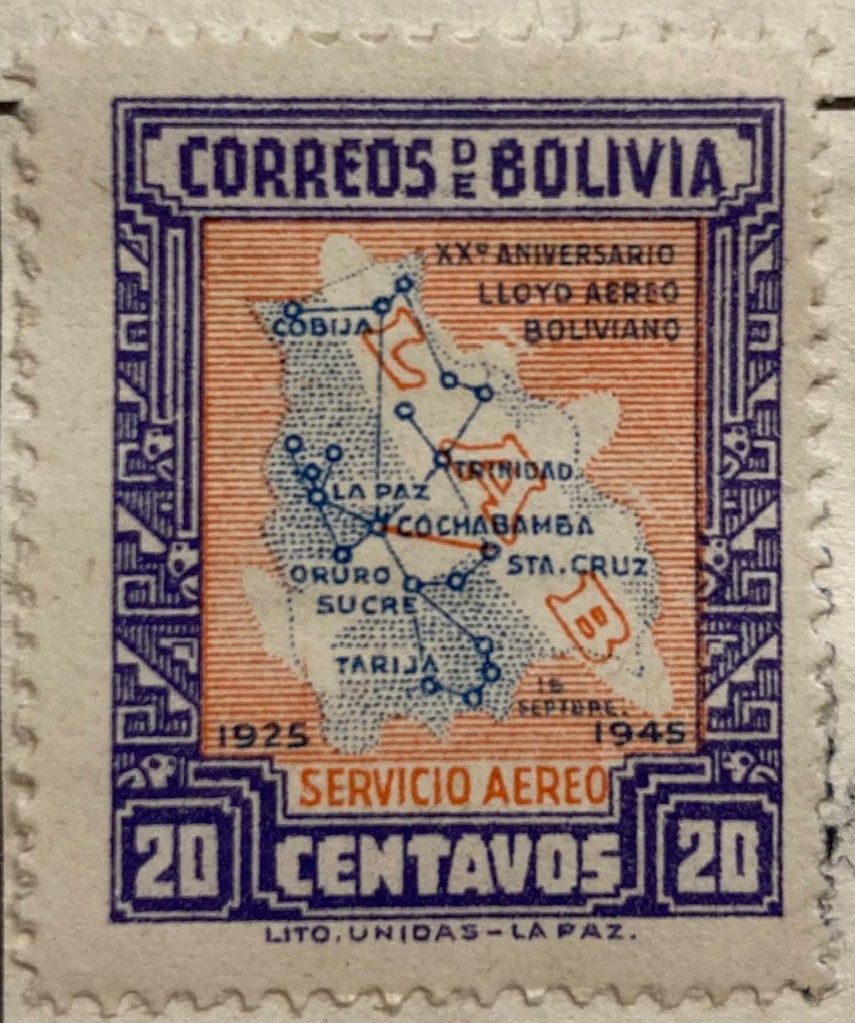
Air travel was often celebrated on mid 20th century stamps, sometimes in relation to air mail services. This compact map of Bolivia from 1945 depicts the seemingly comprehensive system of the national airline within the country, with a vector graph of points and lines, and with labels for the major nodes. The labels and LAB logo fill in and hide areas that don’t have much service, particularly the eastern part of the country. The traditional Mesoamerican motif in the frame is an interesting contrast to the modern subject matter of the map.
Landscapes and Places
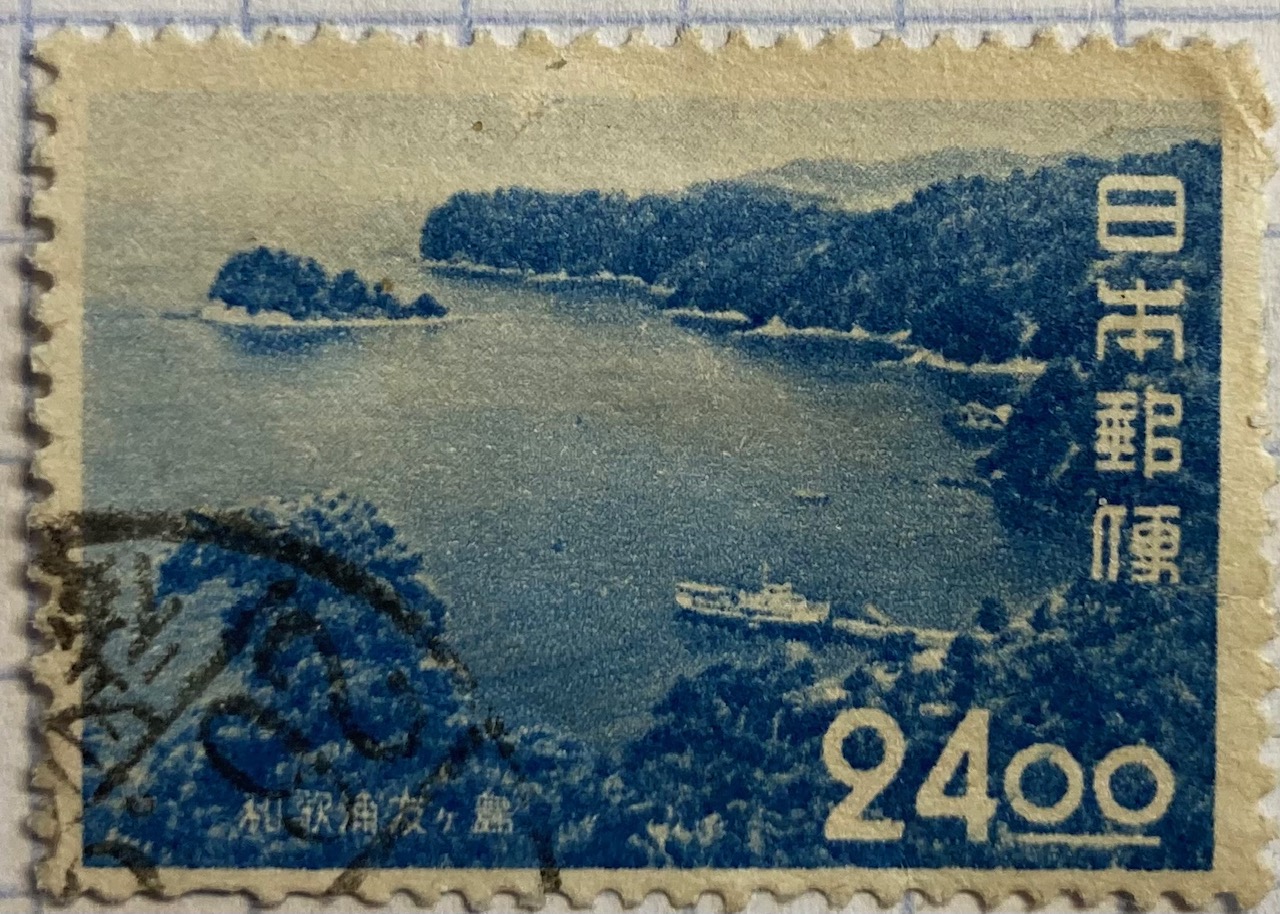
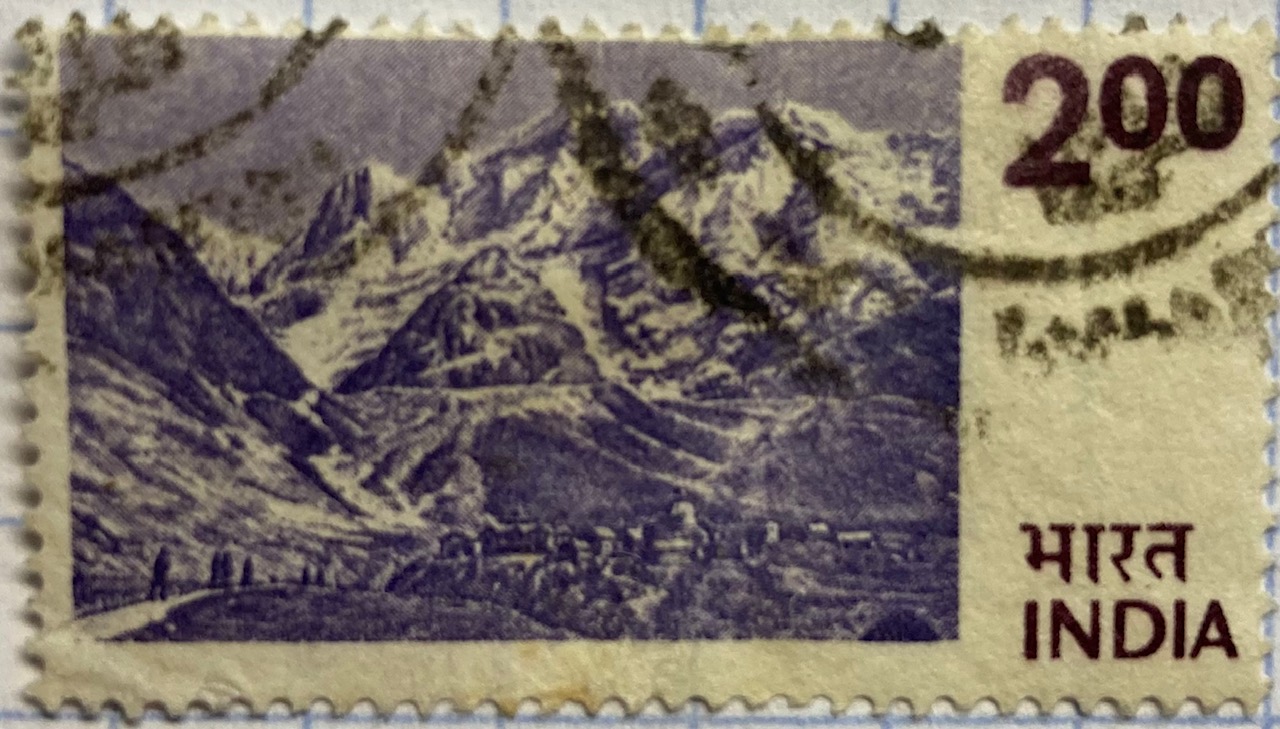
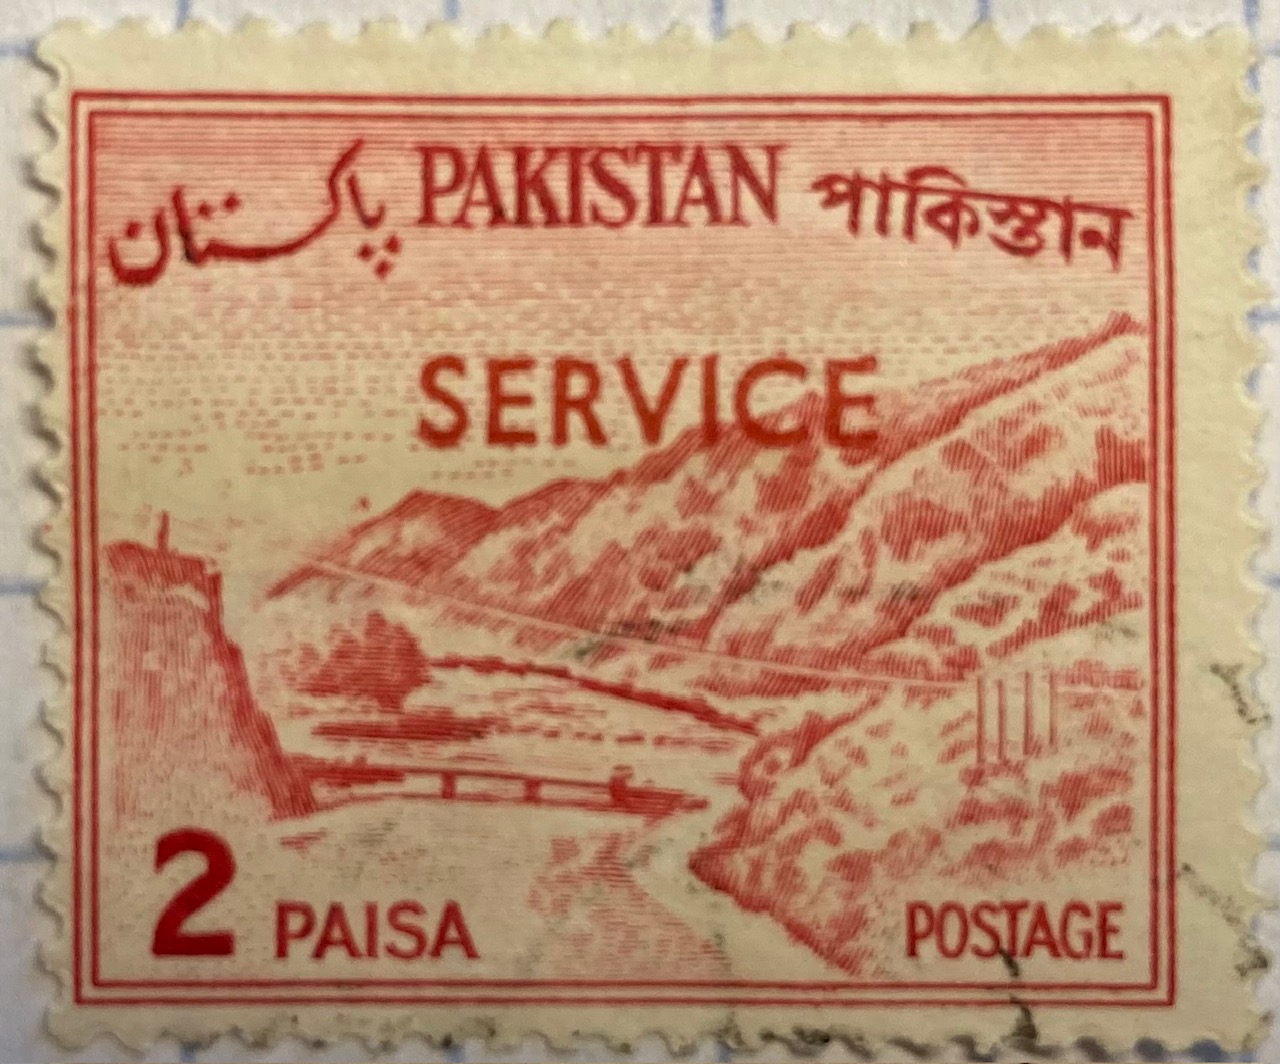
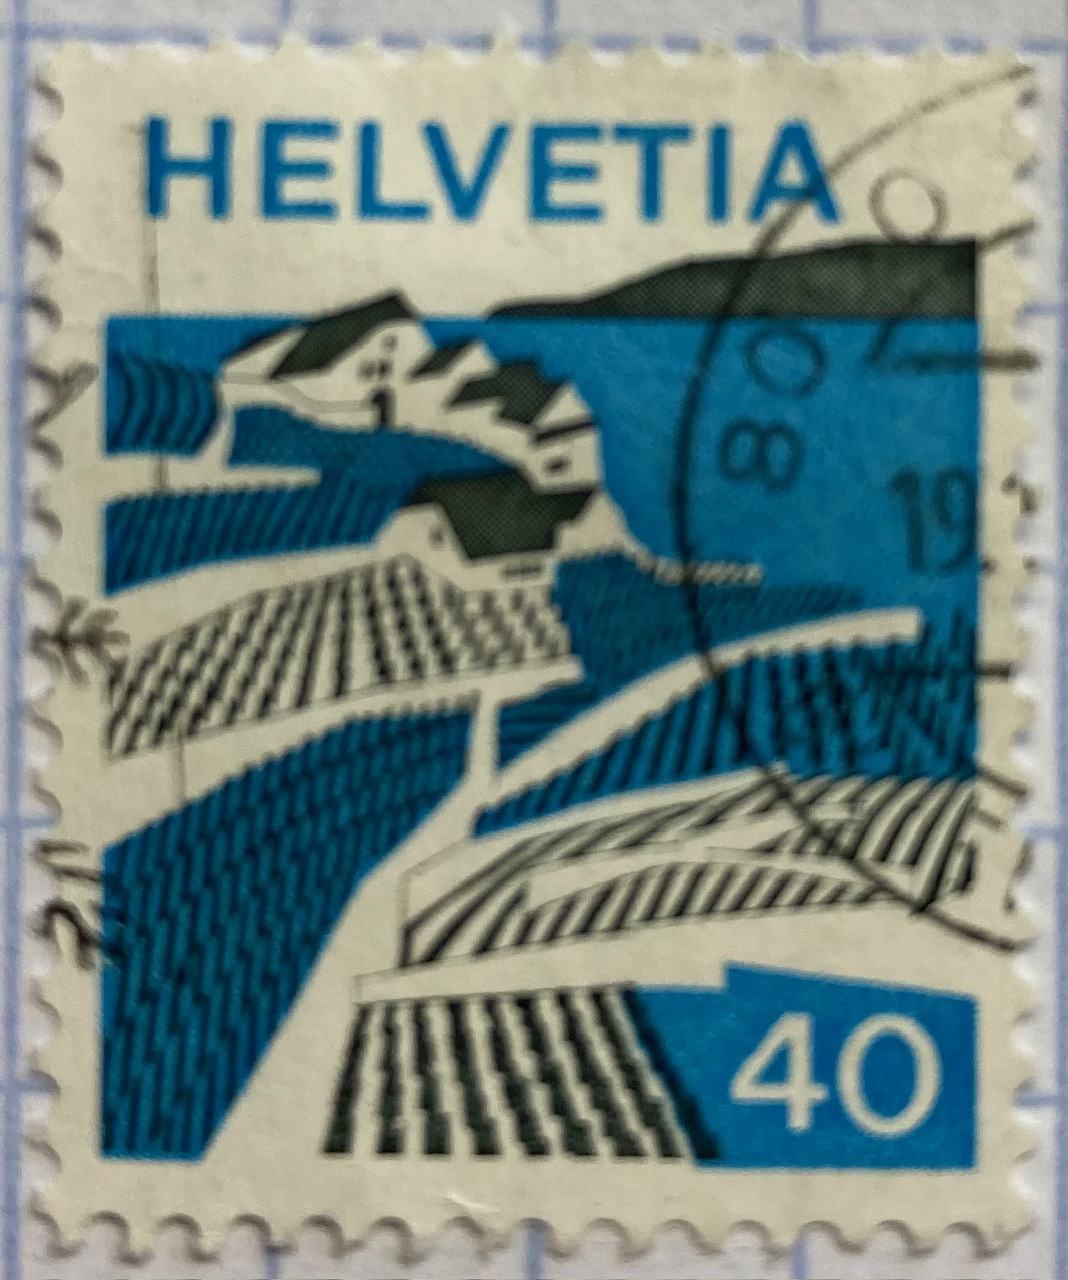
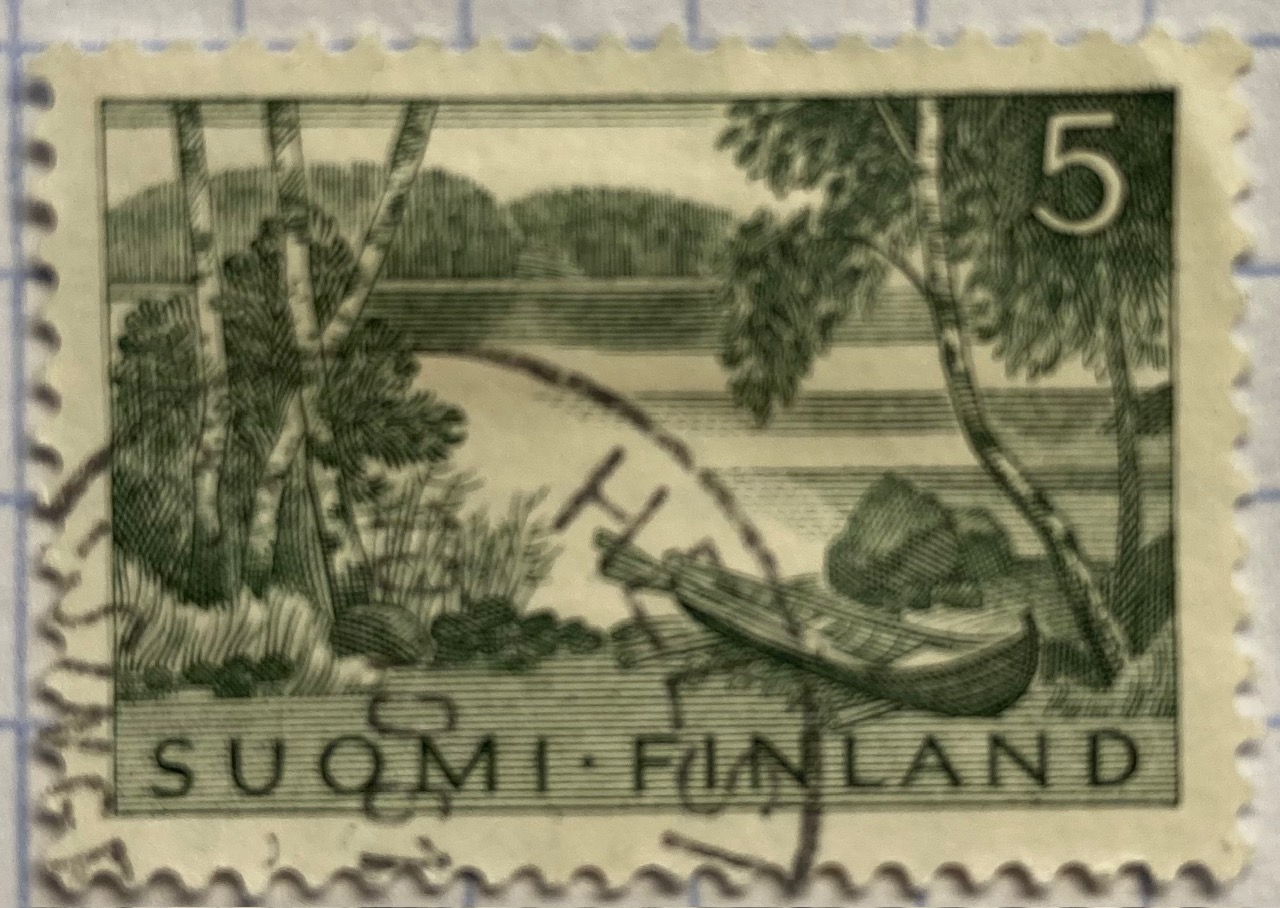
Beyond maps, geography is also communicated on stamps through the depiction of landscapes. The gallery below includes a sample of stamps that illustrate both natural and built environments. The depictions of landscape can be literal, such as the photograph of Wakanoura Bay on the Japanese stamp, or artistic representations like the painting of Rural America and drawing of a Pakistani river valley, or more abstract views such as the stylized image of Swiss (Helvetia) farmland. Stamps can depict specific places, such as the Himalayas in India or the skyline of Singapore, or can be general representations of a landscape, such as an idyllic lakeside in Finland.
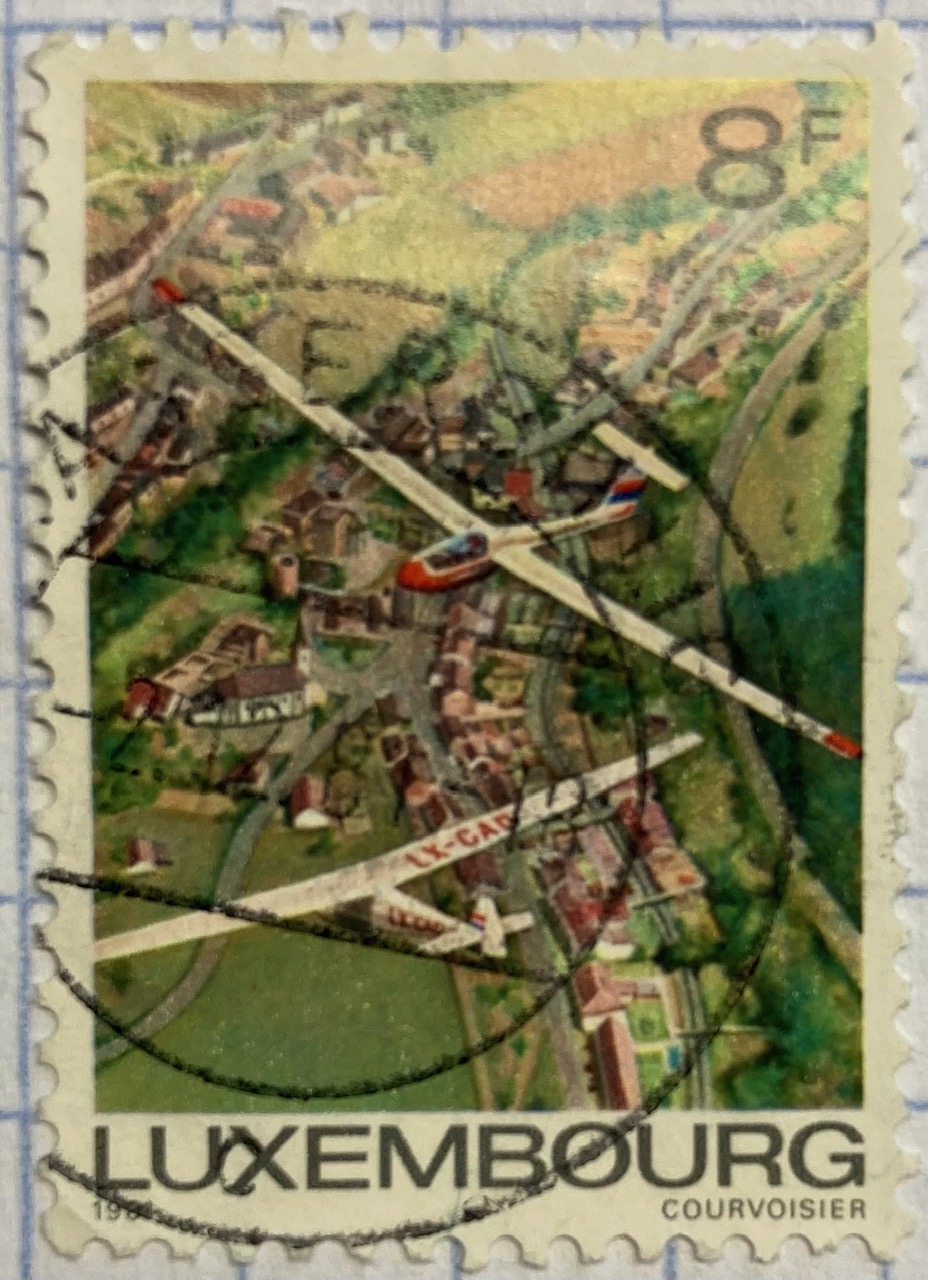
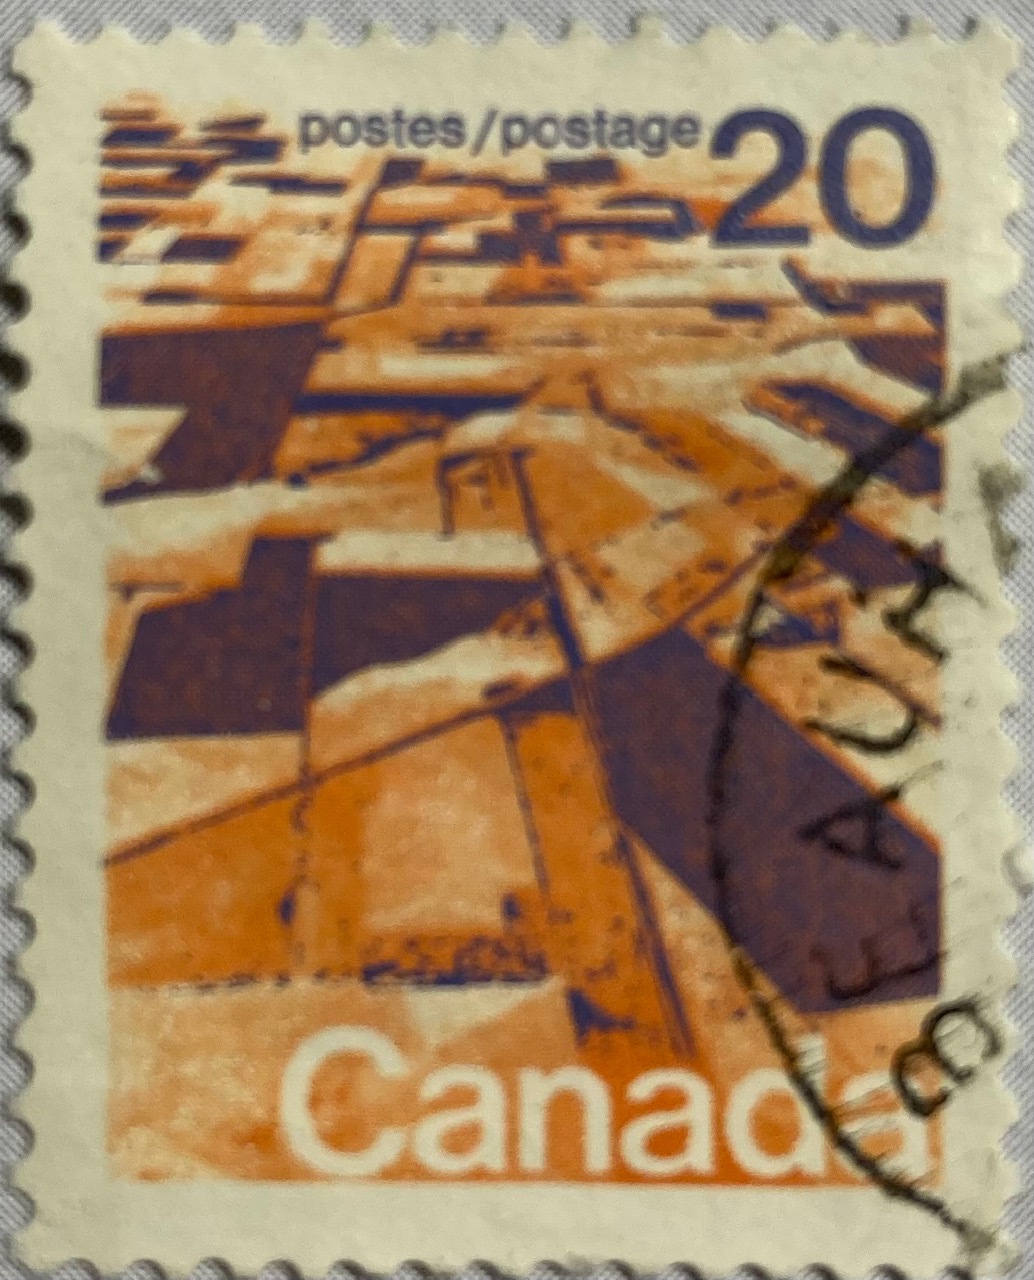
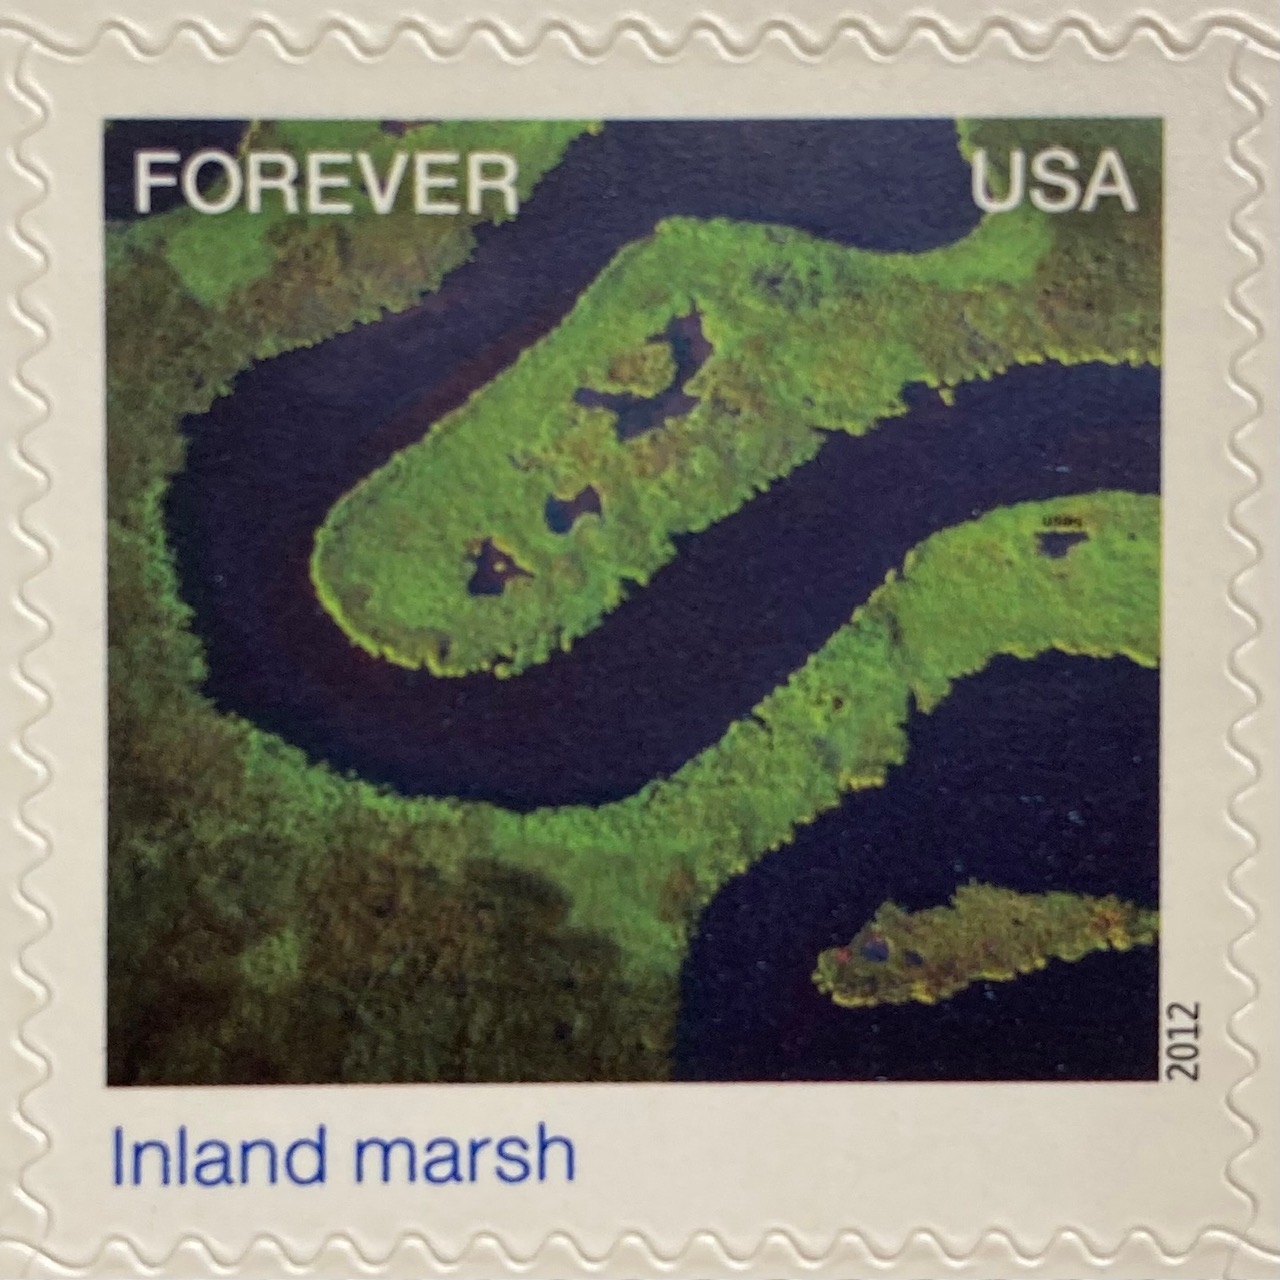
A birds-eye view offers a different perspective. The gliders are the focus of the Luxembourg stamp below, but we get to share the pilot’s view of the villages and countryside. Canada issued a series of stamps in the 1970s that depicted its diverse terrain, including this oblique aerial photo of farmland on the Canadian prairie. The US issued a series entitled Earthscapes in 2012, that celebrated both its landscapes and the technology used for capturing them as orthophotos and satellite images.
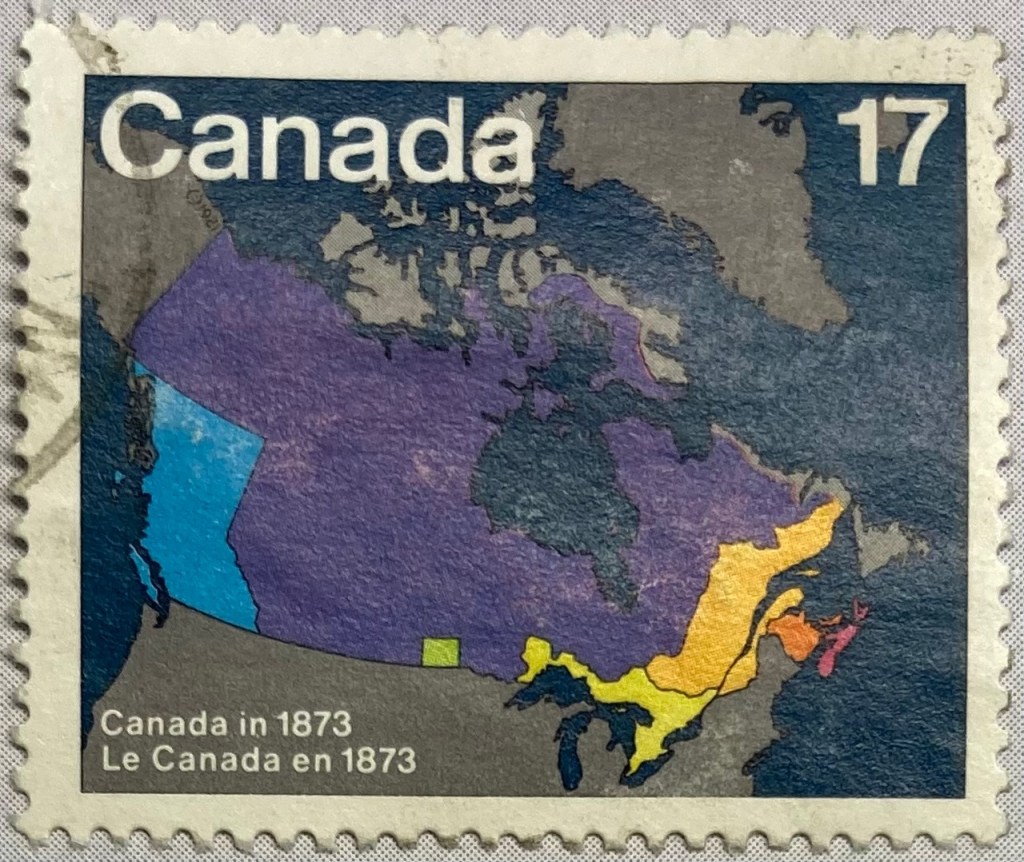
The depiction of places and administrative subdivisions on stamps is a common theme, particularly in nations that are federated states. Canada issued a series of stamps in 1981 that illustrate the evolution of the nation from individual settlements and colonies into provinces and territories that formed the Canadian Confederation. Each stamp represents a specific point in time.
The constituent states and territories of the United States are popular subjects on American stamps. These can be singular, commemorative stamps that celebrate the founding or statehood of a particular state, such as this 1991 stamp marking Vermont’s 200th anniversary of statehood. Or, they can be large series issued as sets that include one stamp for each state. State maps, landscapes, flags, and even official state birds and flowers have served as subjects over the years.
The French postal service published a large series that showcased its historic provinces, releasing stamps individually and in small sets from the 1940s to the 1960s. These stamps depicted the coat of arms for each place, connecting heraldry from the medieval past to the modern French Republic.
Wrap-up
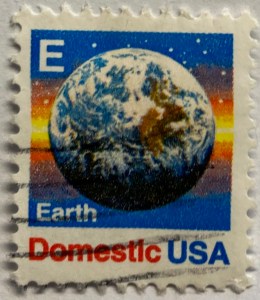
I hope you enjoyed this little, and by no means exhaustive, tour of cartography and geography on postage stamps! There are countless other avenues we could have strolled down in our travels, such as the depiction of explorers and exploration, climate and weather, environmentalism, how map projections are employed, and views from space. My parting example is a reminder that maps are 2D representations of our spherical 3D world. And that “E ” is for “Earth”.
(In the 1980s and 90s the US Postal Service issued non-denominational stamps for domestic 1st class mail during transition periods when postal rates increased. They featured letters instead of currency values, and you could use them before and after a rate changed. A through D featured a stylized eagle from the postal service logo, but by the time they got to E they followed Sesame Street’s lead and depicted objects that began with each letter. The USPS dropped the letter convention in the 2000s, and in 2011 dropped denominations altogether in favor of Forever stamps.)



































You must be logged in to post a comment.